Using the iPad Pro as my development machine
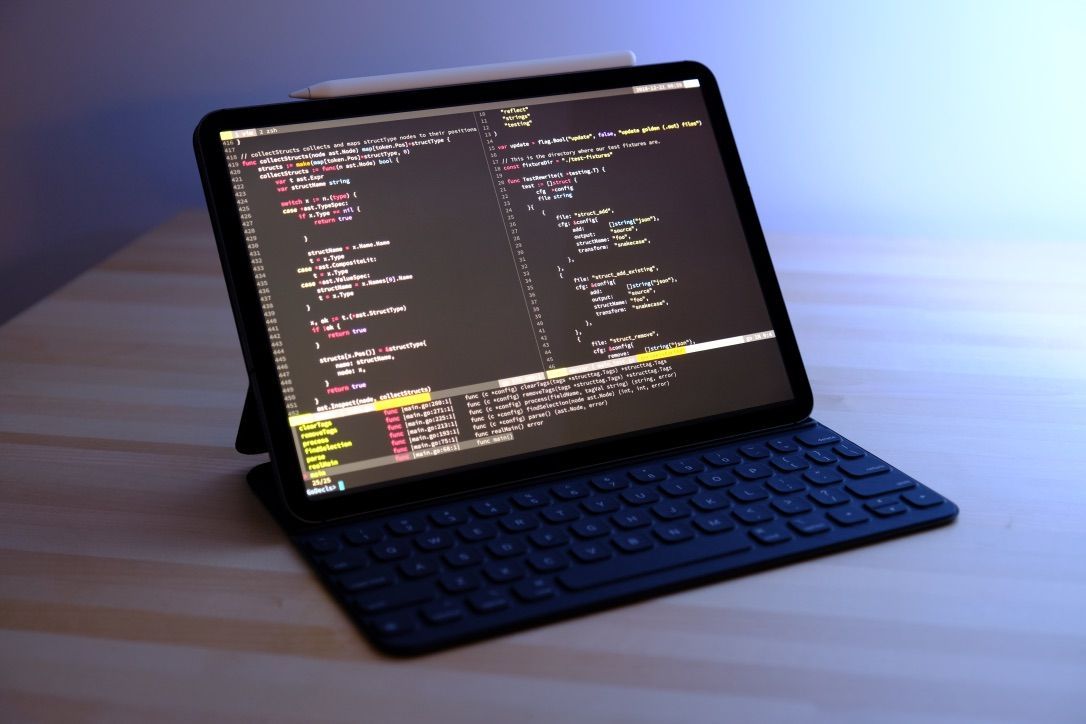
I bought an 11" iPad Pro to use it as my main development machine. Let me say it's an attempt.
I'm a huge fan of Bret Victor and try to immerse myself with his ideas, papers, and videos. One of the things he talks about is how we should look into new mediums to unleash our creativity, to create "things" that were not possible before.
The iPad is a very different device. I know that many people (including me) are using it already for so many years. However, the iPad has improved a lot and has two new ways of interactions that are now a first-class citizen in the iPad ecosystem:
- Apple Pencil
- Apple Smart Keyboard
If you think about a second, with the touchscreen, you have three different ways of creating something new, and what to do is only left to our imagination.
The number one reason I bought the iPad Pro is, not just to have an excellent and powerful mobile device, I also wanted to explore new possibilities with all these new input devices, new ways of creating stuff. I think Apple is onto something here and I want to see if it holds up or not.
This is a very lengthy blog post. First I'll share my experiences using it as a development machine, scripts I'm using and my whole workstation setup. Afterwards I'll share and review the various bits of using an iPad Pro (photo and file management, keyboard, pencil, apps, accessories, etc.)
Grab a coffee ☕️ and let’s deep dive into it!
Development
I had a MacBook Pro 13.3", it belongs now to my wife. This was a perfect excuse for me to try out the new iPad Pro and experiment with it. I wanted to see if I could test, write and deploy my day-to-day projects. Is that possible? Let's see!
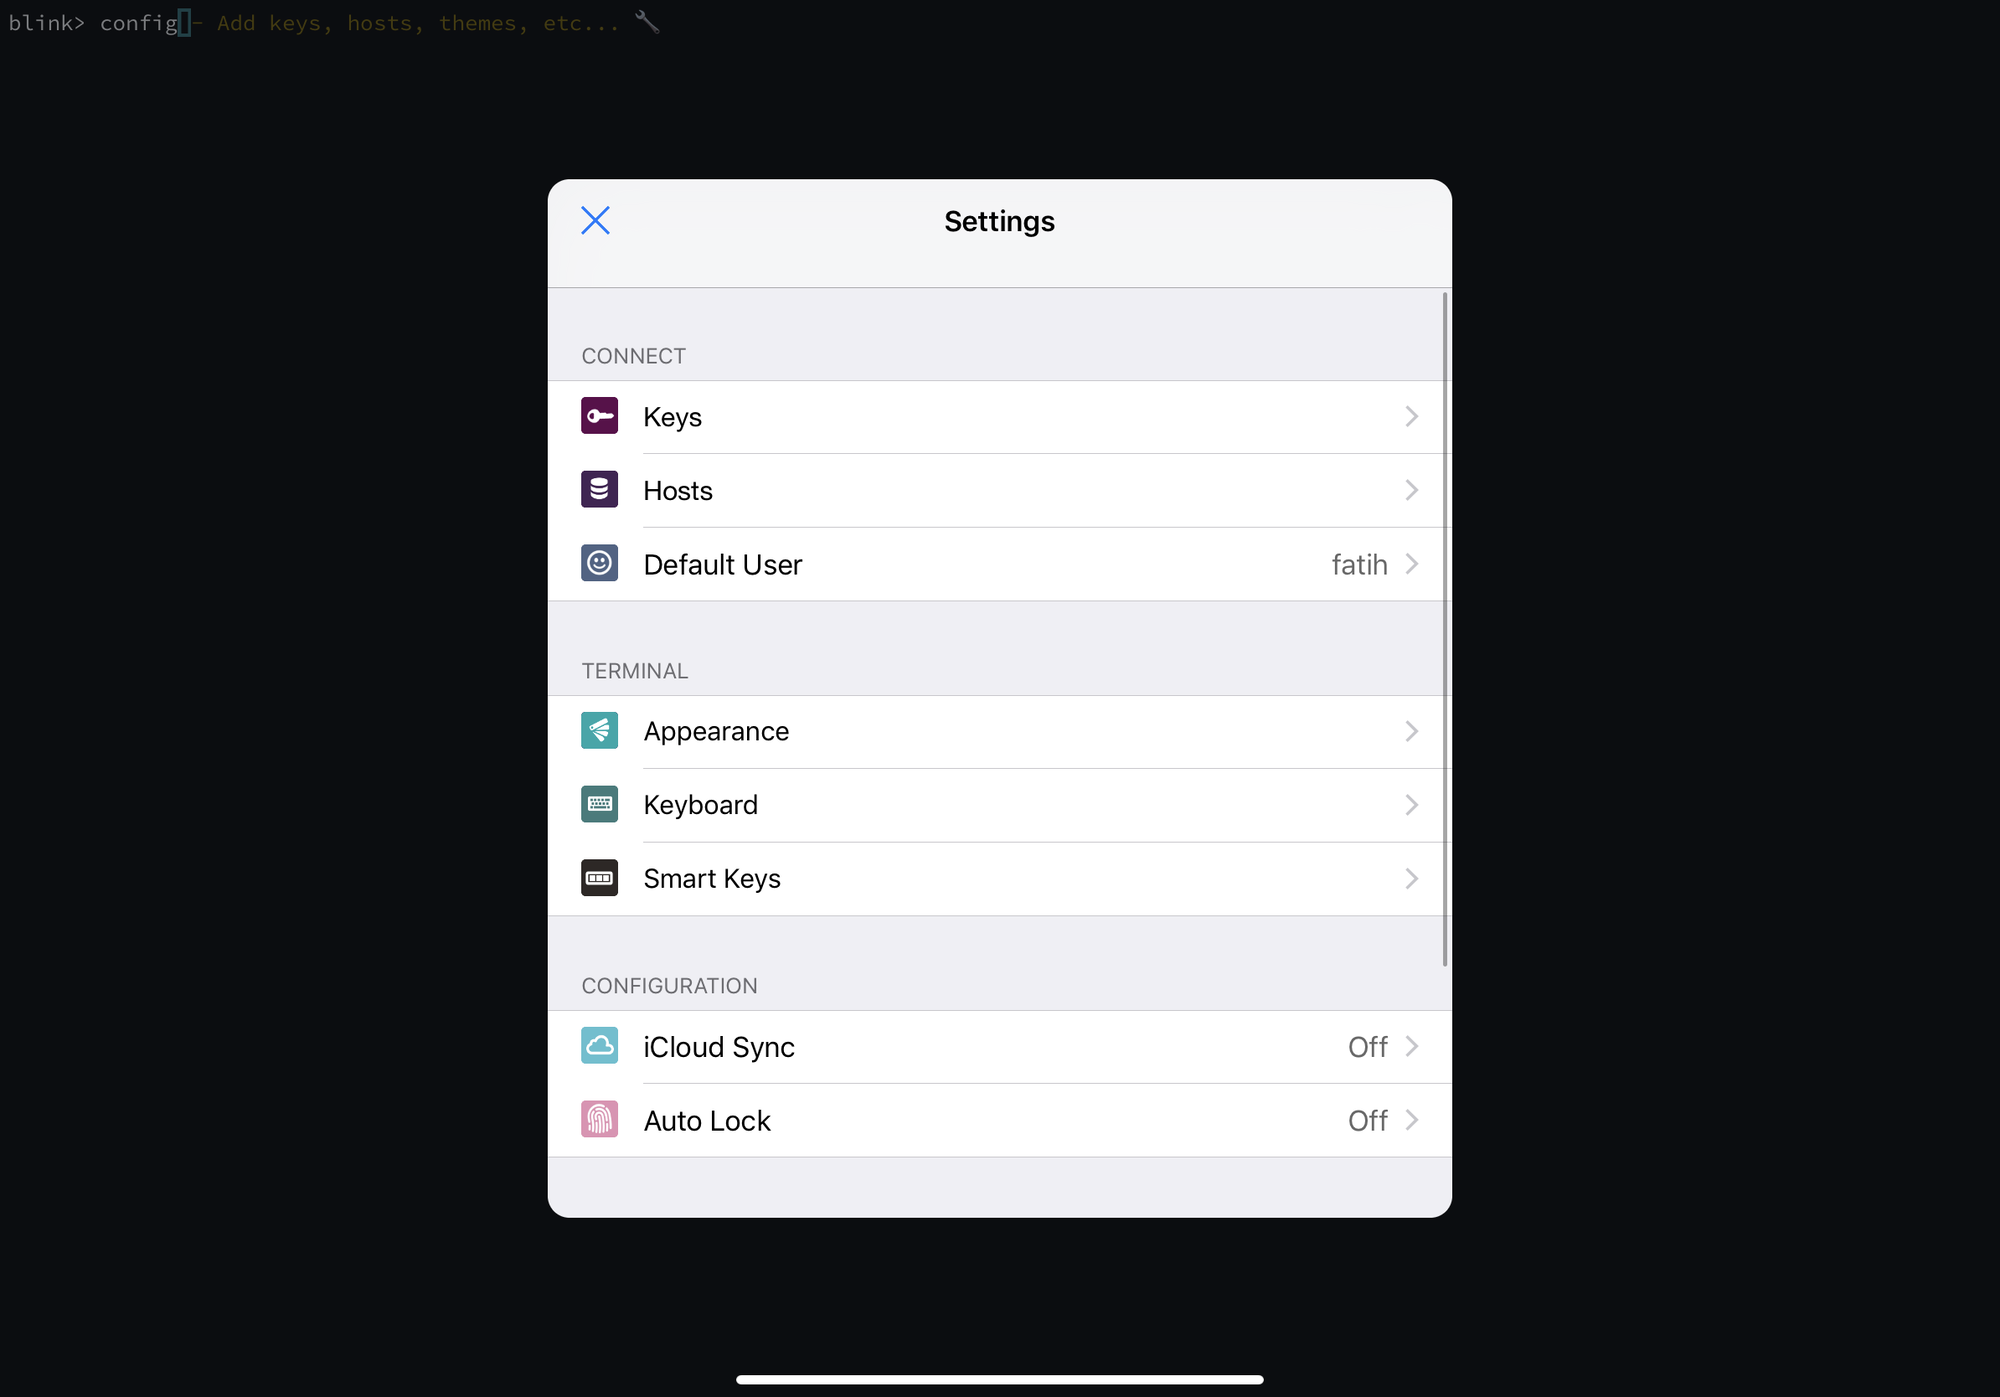
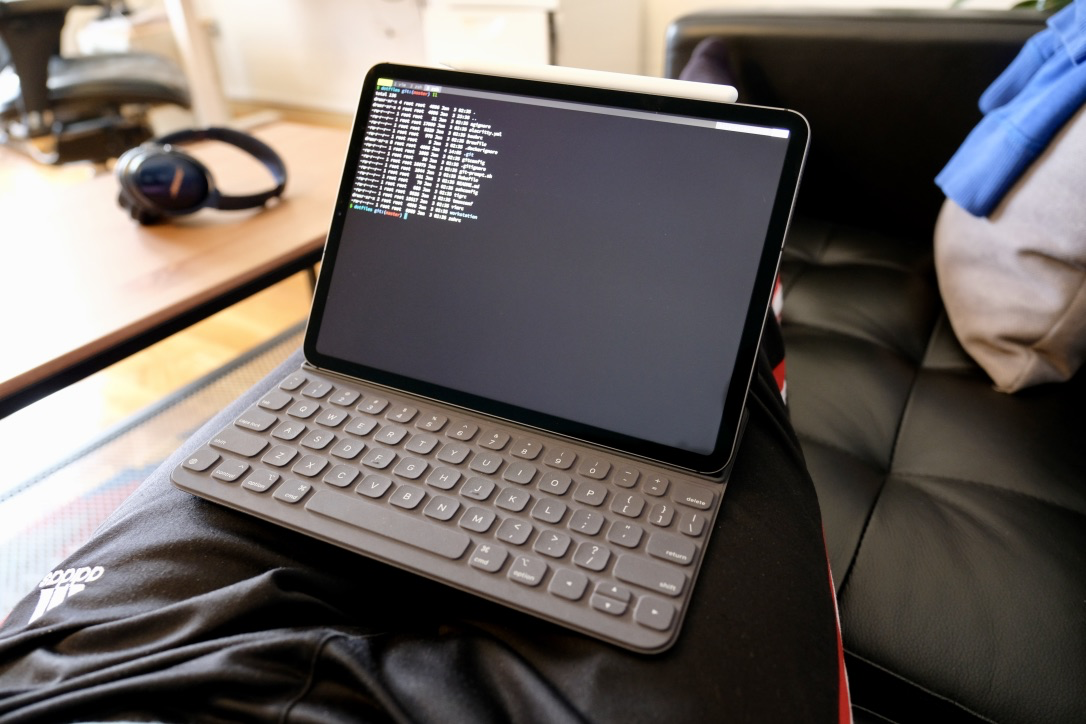
The first thing I started doing was to install Blink.sh and experimenting with it. Blink.sh is a Terminal Emulator and has sandboxed local terminal access, which you can use for basic stuff. It includes the following commands:

As you see there is tons of stuff you can start using, but it's not a full featured OS, which means you're very limited to what you can use. However, there are a couple of commands that are very useful (i.e: scp) and I'll show later in the blog post how I'm using it in conjunction with other iOS apps.
After firing up Blink, it greets you with a blank terminal and a shell prompt. That's it. There is no documentation, no obvious settings, etc.. Initially, even for me as an experienced terminal user, I didn't know what to do. I started to explore the commands and found a config command, that would open the settings for Blink.sh. From there I started digging into the settings.
Before I go and show some of the important stuff, we need to first create a remote workstation which we can start using as our main development machine. Obviously, there is no way to develop on an iPad Pro. Even with the sandboxed emulator above, it's not useful at all. There are projects like iSH, which is a x86 emulation and provides a full Linux shell (it's doing it by doing syscall translations). However it's still in prototype mode and I haven't started to use it yet, but it's something I want to check in the future again. There are also applications like Coda to let you edit and develop with HTML, CSS, etc... But I'm not a web developer and I need a real terminal with usable tools to get my job done.
Now let's continue creating a workstation.
Workstation setup
There are several options to create your remote workstation. The easiest way is just to create a VM instance (say a droplet on DigitalOcean) and then start using it. Install a couple of packages, your favorite programming languages, tools, etc.. and you're done!
However, the problem with this is, what if you somehow lose your machine or some of the data? Or you have decided to change your cloud provider? Maybe you have decided to start from scratch? Let me start with some history:
I started first creating a provisioning script and used Packer to create an image. This image would be then something I would use to start my instance. The problem with this approach was that the interaction and development cycle of the image was just too long.
Suppose I wanted to add a new package/tool to my final image, I had to change my script, create a new image, wait at least 30 minutes (depending on your network and script) and see the end result. Machine images are useful if you want to reuse them between thousands of instances at the same time, but for our needs, it was overkill.
So I ditched the image idea and started using Terraform by dynamically provisioning my droplet during (or after) the droplet creation. This would mean that I didn't have to maintain and store an image, and it would create my droplet with all the packages I provisioned.
The issue with this approach is, as I figured out using it for a couple of weeks, at some point, I had to install new tools or change some of my configurations. Every time I did it, I had to make sure to also update the provisioning script I was using with Terraform. If not, that would mean if I had to create a new remote workstation from scratch, I had to reinstall all the tools again. So what's the point of using a provisioning script then? I'm a very dedicated and focused person, but even I couldn't keep up with syncing my host machine and my provisioning script (you were right qmx).
Finally, after talking with some of my friends who use remote workstations already for months (thanks Doug and Nan), I came to the conclusion of using a Docker container inside the instance.
Update - July 2019
After using this approach for a long time, I've come to the conclusion that using a Docker container comes with its own quirks and issues. Some of these are:
- There is no init system inside Docker and creating a temporary init system (and create a personal user associated with the system) is not easy.
- Treating a container as a whole VM is not a good idea. Containers are not VM's, but I'm trying to use them such as.
- Updating the Docker image is easy, but once you're inside the container, updating the image and replacing the existing container is another problem. I have to exit the container and re-exec again if I want to run it with a new Docker image. Because the container image is immutable and I'm always adding new stuff, this was becoming too repetitive and a hassle to deal with it.
- There is an additional layer (the Docker container) to access my working environment. Because of
this, I have to make sure to update the Docker daemon and runtime with the latest
security fixes to prevent unwanted access and stay up-to-date. Some other problems of having this abstraction are running the
container in--net=hostand exposing all the networks via the host or
opening an additional port3222in the firewall rules for the docker
container.
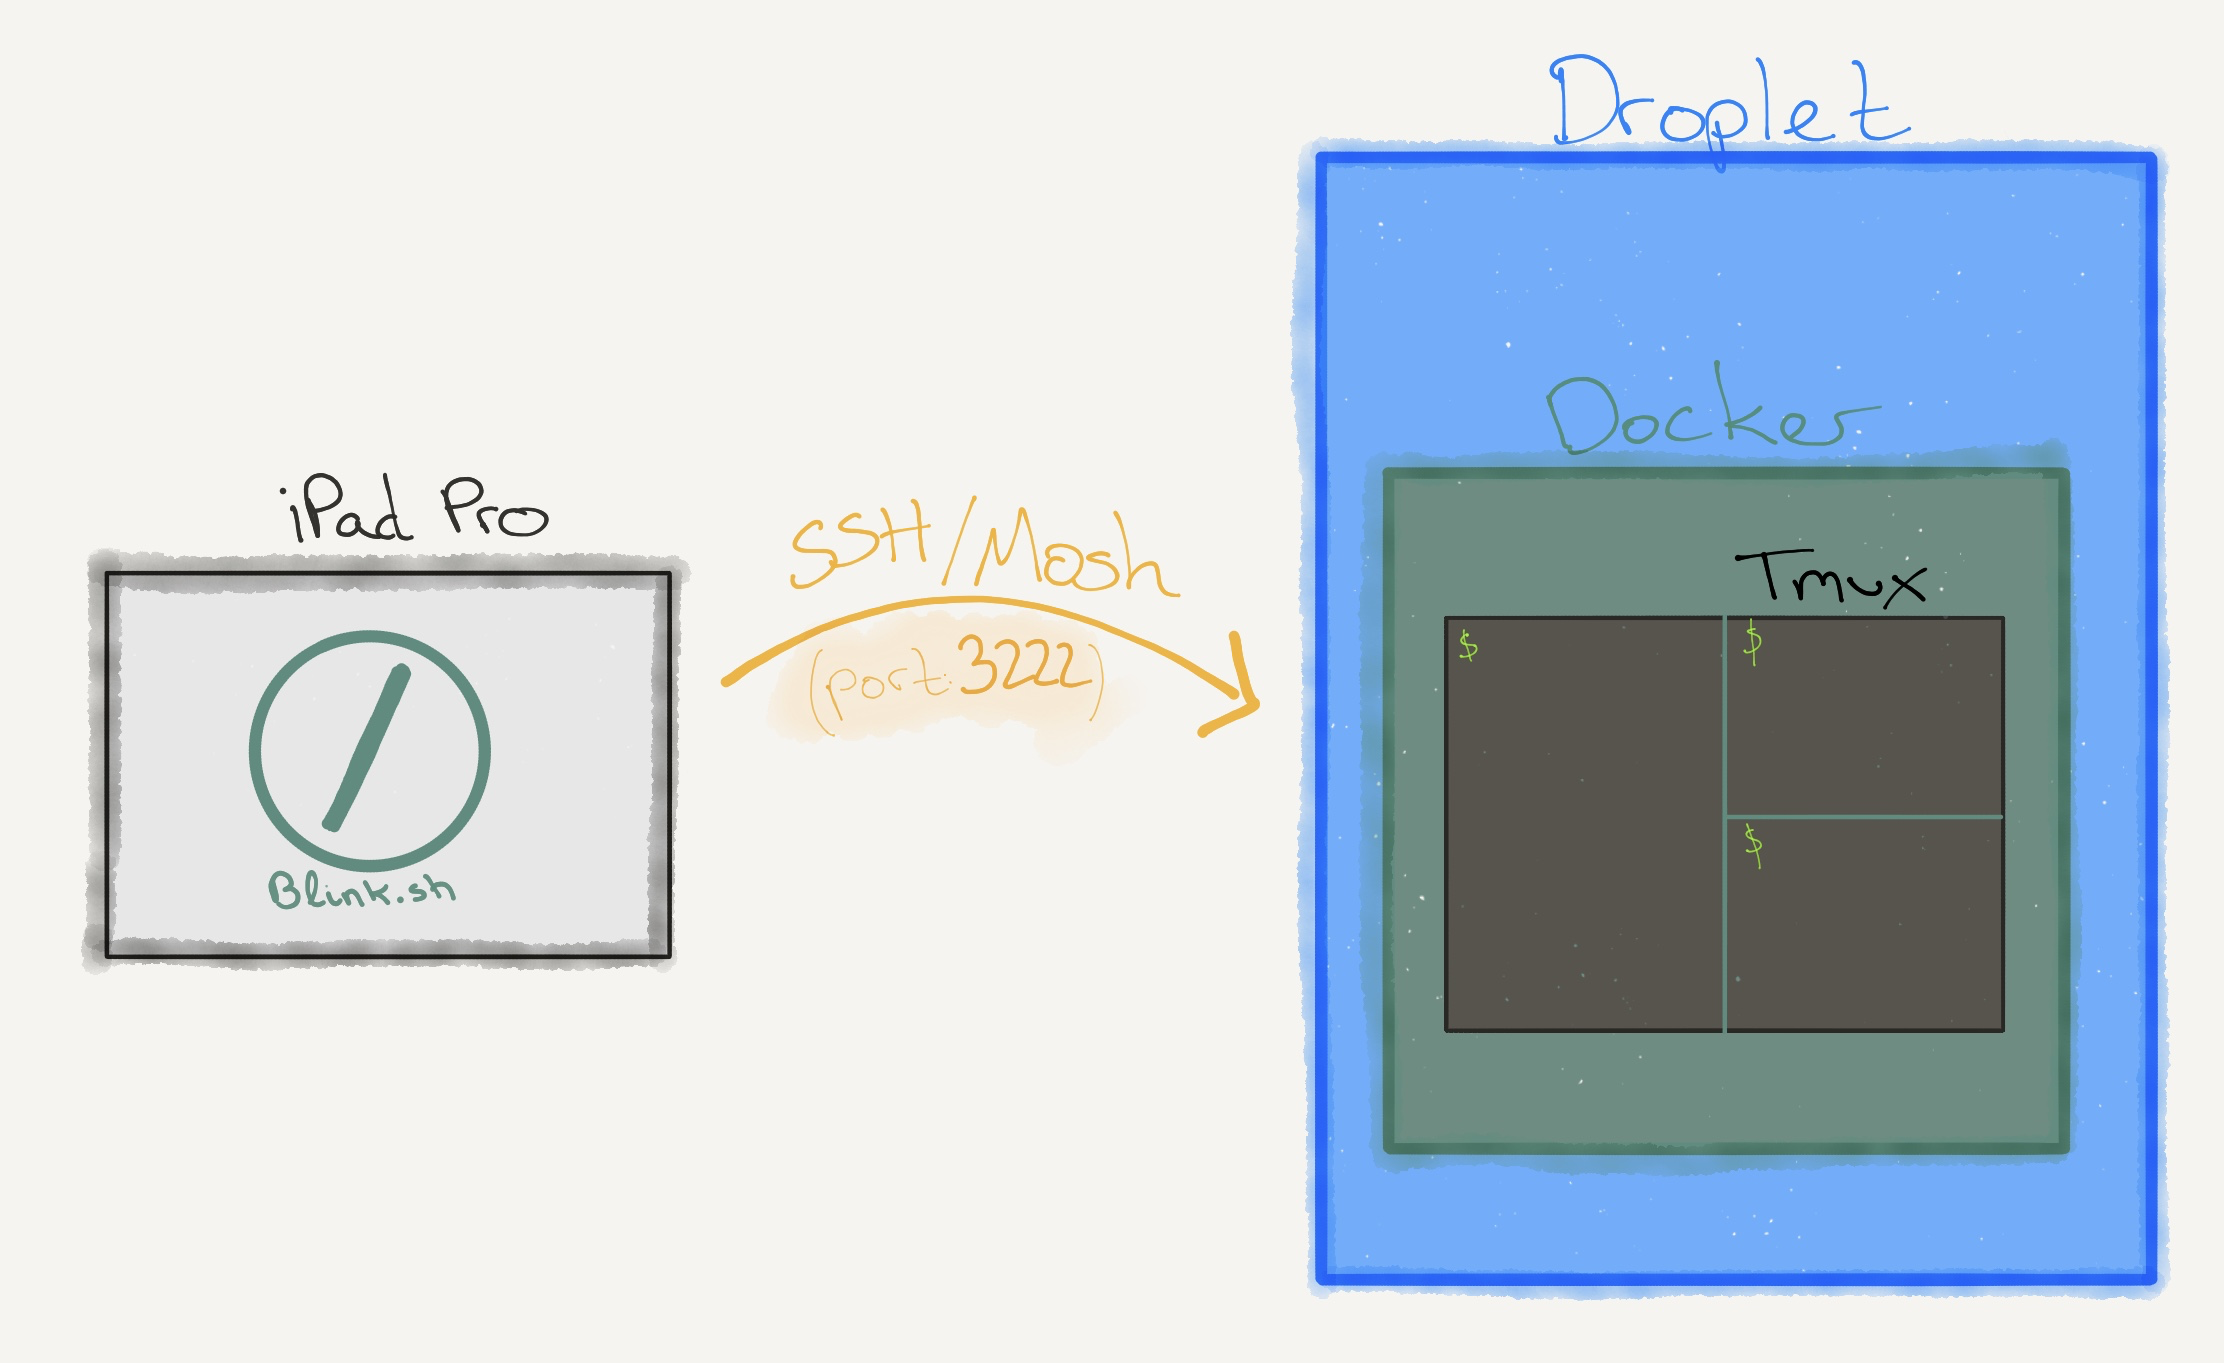
Hence since last month I've ditched completely using a Docker container and
started using a bare host with a simple provisioning script written in Bash.
The beauty of the script is that it's idempotent in the context that multiple
executions of the same script won't have any side effects on my system.
I wrote more on this in my "How to write idempotent Bash
scripts"
blog post.
Creating the workstation
To create workstation, all you do is to run:
$ export DIGITALOCEAN_TOKEN="Put Your Token Here"
$ terraform plan
$ terraform apply -auto-approve
Let me give a quick overview on what it does:
- First I'm using
terraformto create my instance. This allows me to also setup other additional resources, such as a Firewall, that is automatically configured based on the droplet. Terraform also makes it easy to provision your VM using a simple Bash script or more sophisticated tools, such as Chef, Ansible, Salt, etc.. You don't need to use Terraform of course, but it's nice to have. - The terraform script has a
bootstrap.shscript, that provisions my VM with all my tools and important packages. This script is idempotent, which means I can update it (such as adding a new package or tool) and run it again without affecting the overall state of my machine. It's quite simple and does the work for me. Feel free to migrate to a more advanced tools, such as Ansible, Chef, etc.. if you like to use them. - From outside, I can now SSH directly to the
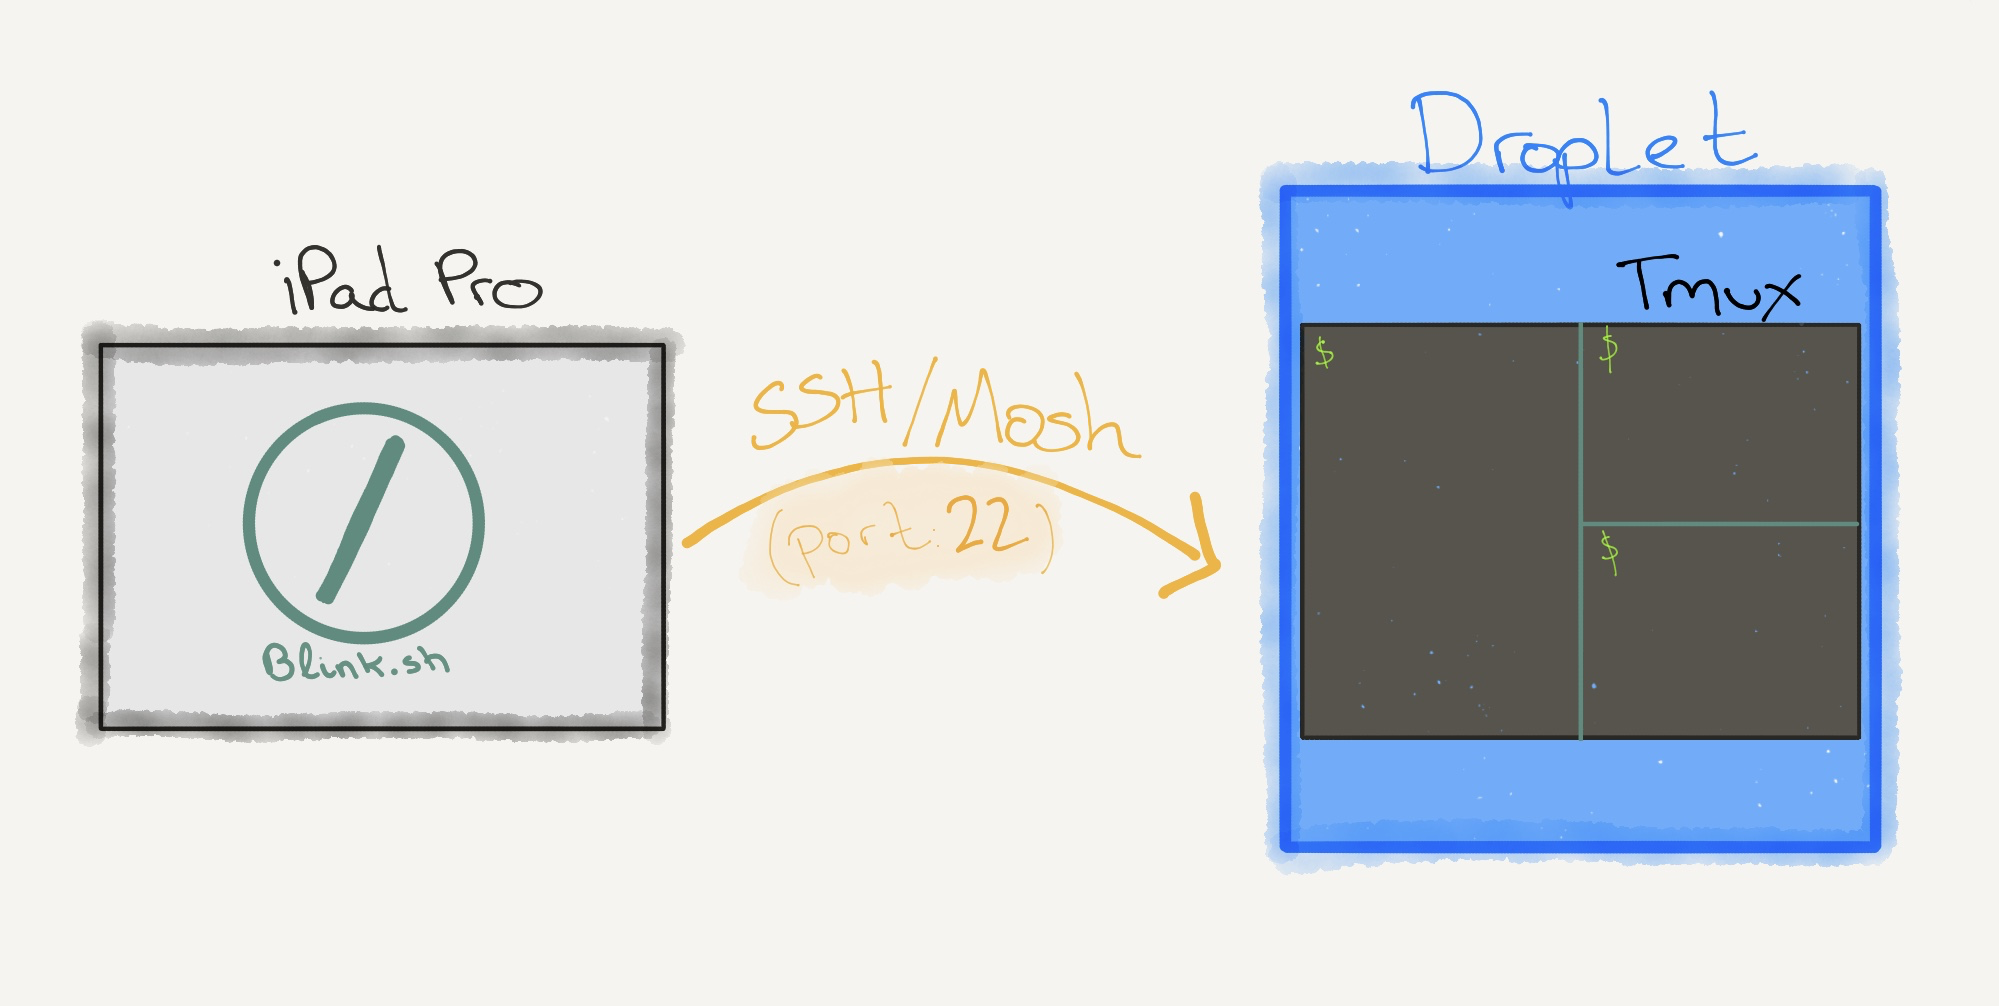
hostvia port 22. If you also check my firewall rules in the terraform file, you'll see that the ports60000-60100for UDP are also open. These are needed to connect to the remote workstation viamoshinstead ofssh.
Once the host is created, you're now able to SSH into the droplet:
$ mosh --no-init root@<DROPLET_IP> -- tmux new-session -ADs main
I'll explain what the tmux command means in a bit. Note that you can also SSH into the container if you don't want to use mosh:
ssh root@<DROPLET_IP>
Tmux
I'm a huge fan of Tmux and it's one of the things you definitely need to know/learn if you plan to use your iPad Pro with a remote workstation.
I had a small issue though. If you somehow attach to a tmux session, say from the iPad Pro, close the lid and then attach to your Container by using a different client (say my iMac), the screen size will be not resized to the big screen. This means I'm still seeing a 11" Tmux windows on my 27" iMac. Why? Because that's the way how Tmux works and is used by many to share screens amongst multiple clients.
However, in my case, I didn't care about this because there should be always one single client and that should be me. To fix the issue, I always had to detach from my iPad Pro first before I could attach from my iMac. However this was cumbersome, so welcome to the magic command:
tmux new-session -ADs main
This command is called every time I'm connecting to my remote workstation. This is basically doing this: If there is no session available, create a new one, if there is already a session, detach all other clients and attach to it. To learn more about the individual flags, please check tmux man and jump to the new-session subcommand.
Another fix I've done in my setup is to detach from tmux if there is a single pane and window in Tmux. I'm always using exit to close a tmux pane, sometimes I'm using ctlr-d, but not very often. The problem with this habit is, when I'm on the last pane and I call exit, it exits tmux and quits it. But sometimes I still have something in my command line and the session should be alive. To fix it, I added the following script to my .zshrc:
exit() {
  if [[ -z $TMUX ]]; then
    builtin exit
    return
  fi

  panes=$(tmux list-panes | wc -l)
  wins=$(tmux list-windows | wc -l)
  count=$(($panes + $wins - 1))
  if [ $count -eq 1 ]; then
    tmux detach
  else
    builtin exit
  fi
}
This script overrides the exit command with a custom one. If you follow it you quickly see that I'm getting the number of panes and windows, and do a detach if there is only one left, otherwise I always call exit.
Secrets
One of the most important parts of this remote workstation part is how to store your secrets? It's not an easy task, unfortunately. If you check my bootstrap.sh file you'll see that nothing sensitive is provisioned to my host. However, I install op, the command line tool from 1Password, that allows me to fetch and retrieve secrets from my 1Password account.
First, I'm mounting a /mnt/dev/secrets directory. During the host provisioning, I also put a script called pull-secrets.sh in this folder. So when I SSH into my host, all I do is to run the following command:
cd /mnt/dev/secrets && ./pull-secrets.sh
The pull-secrets.sh script has the following content:
#!/bin/bash

set -eu

echo "Authenticating with 1Password"
export OP_SESSION_my=$(op signin https://my.1password.com ftharsln@gmail.com --output=raw)

echo "Pulling secrets"
op get document 'github_rsa' > github_rsa
op get document 'zsh_private' > zsh_private
op get document 'zsh_history' > zsh_history

rm -f ~/.ssh/github_rsa
ln -sfn $(pwd)/github_rsa ~/.ssh/github_rsa
chmod 0600 ~/.ssh/github_rsa

ln -sfn $(pwd)/zsh_private ~/.zsh_private
ln -sfn $(pwd)/zsh_history ~/.zsh_history

echo "Done!"
This authenticates with my 1Password account by asking for the Secret key and my master password. After downloading some of my private keys and relevant files I want to keep sensitive, I symlink them to the appropriate locations.
Even if I have to destroy and have to start from the scratch again, these files will be always there (because it's mounted from outside). This is not perfect of course, because this folder is not encrypted yet.
I'm not a security expert and I'm still looking for better ways of handling my secrets. The best solution I could find was this. My end goal is to have an encrypted folder that mounts whenever I ssh into my remote workstation, asks for a password and automatically decrypts the folder and symlinks to the relevant paths. Please let me know if you have any ideas :)
Mosh
As I said, I'm using Mosh instead of SSH. Blink.sh comes with Mosh support, this means it has the mosh client embedded and we're able to connect to any server that has mosh-server installed.
I won't go into details what Mosh is, but I really want to share this sentence from their landing page, which perfectly explains it:
Mosh is a replacement for interactive SSH terminals. It's more robust and responsive, especially over Wi-Fi, cellular, and long-distance links.
I was always in the SSH camp, but after using Mosh for a couple of weeks, I can't go back anymore using SSH. I was always skeptical of using Mosh because I didn't have any needs for it. But with the iPad Pro and the awesome Cellular feature it has, it's actually a very great fit. I couldn't believe about the connectivity but this was the first time I felt like I was coding on my localhost. There is still latency, I don't say there isn't, but if you have a server near in your region, it'll be really fast.
Another great feature is the "always-on" connectivity feature. To give an example of how insane it is let me share something I demoed to my friend:
- I setup a WiFi hotspot from my iPhone and connect my iPad Pro to it (I hadn't any data plan yet for my iPad)
- I connect to my remote workstation via Blink and started running a couple of commands.
- After that, I closed the lid of my iPad Pro. At this point, the connection should be gone already
- I also turned off my iPhone completely
- I went and turned on my iPhone again, turned on my hotspot, connect with my iPad Pro again
- Voila! It's still working, just like I left it!
Is this magic? I don't know but it really feels like magic compared to SSH. And I don't exaggerate. Just give it a try on what I mean, you'll see what I mean.
As you see, the idempotent bash script (bootstrap.sh) approach, combined with
the helper scripts and additional tools (such as Mosh and Tmux), makes this
setup highly iterative to develop, secure and easily maintainable.
So far I explained how I set up my remote workstation for my iPad Pro, now let me share my experiences on using the iPad Pro in other contexts.
File management
Dealing with files on a local machine is much easier. But the problem arises if you're working on a remote machine. How do you copy back and forth files? Especially in the era of iOS with the iPad Pro, where there is still not a perfect way of dealing with files? There are several options:
- Install Dropbox client. Dropbox has a great Linux client (works only with ext4 FS) and it's easy to install as well. Once installed, you can easily move in/out files and can use the Dropbox App on your iPad. Everything works seamlessly and I really liked that approach.
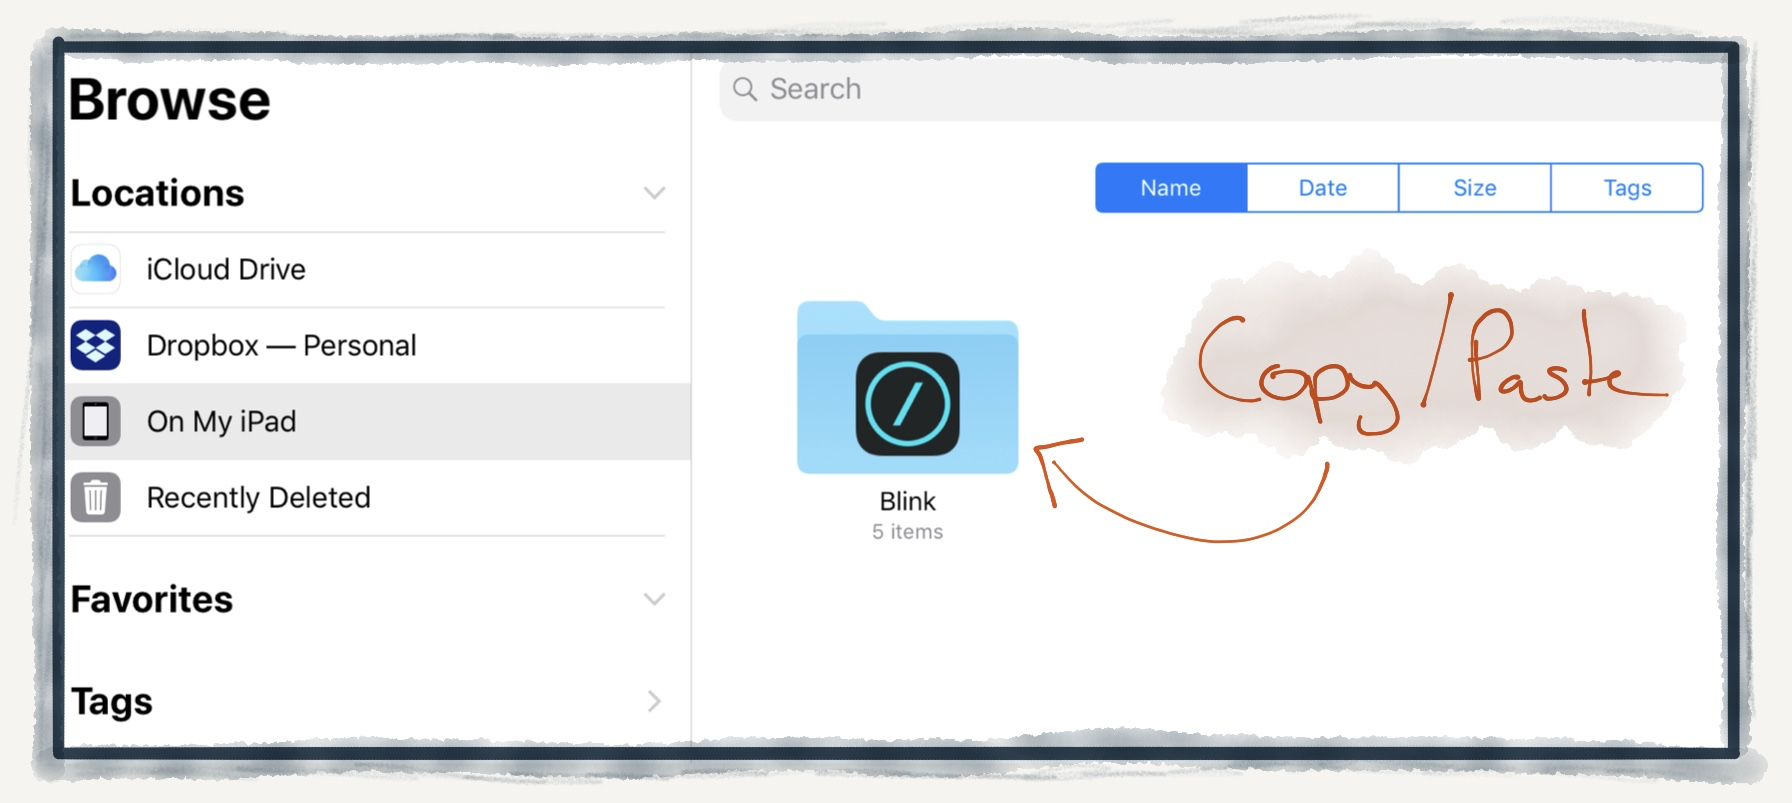
- Using
scpfrom within Blink.sh app. Blink has local storage, that you can use to copy files from your host or retrieve them withscp. The Files app has a Blink folder that allows you to copy/past any files into. So this means once a file is inside the Files App, you can theoretically copy anything to your remote host. Once you put a file inside the Blink folder, all you do is to call the following command (hostname is the name you define in Blink.sh):
scp localfile hostname:remotefile
There is only one issue with the scp command, it's not able to pick up the port from your config. You need to first ssh into the machine via the ssh2 command once, after that it'll pick up the change (because ssh adds esdsa and scp doesn't recognize it, whereas ssh2 adds the host to known hosts with rsa). There is an open issue: github.com/blinksh/blink/issues/564 Of course you can also copy from the remote machine to your local workstation as well.
Connectivity
As I said earlier, Mosh makes things so much easier and changes the way to use the iPad Pro. Even better is the constant connectivity when you opt-in to buy the iPad Pro with its cellular option. This means that the iPad Pro has a dedicated data plan and you can connect to the internet from anywhere.
This is the first time I'm buying an iPad with the Cellular option. I always wanted to try it out and so far I think I made an excellent choice. I know that I could use my iPhone to create a Personal WiFi hotspot, but it's still not the same experience. I could now theoretically take iPad Pro everywhere in the country and have instant connectivity.

So far it's just great. I even use in areas where the public WIFI really sucks or is not good enough (some cafes for example). Also in recent years, Cellular reception became better in quality, so I often switch to it.
I also have a private algo VPN on a $5 Droplet, which means I have a secure and fast connection whenever I need.
One benefit of having a remote workstation is also that your network connectivity on the remote instance is much faster than your local ISP. I know that you have to pay for the ingress/egress network data of your Cloud provider, but pulling and pushing docker images is way better than having to deal with it on my localhost. Pushing an image is around 30 minutes from my localhost, the same took 2-3 minutes from my remote workstation. It's unbelievable and changes the perception of how you're working.
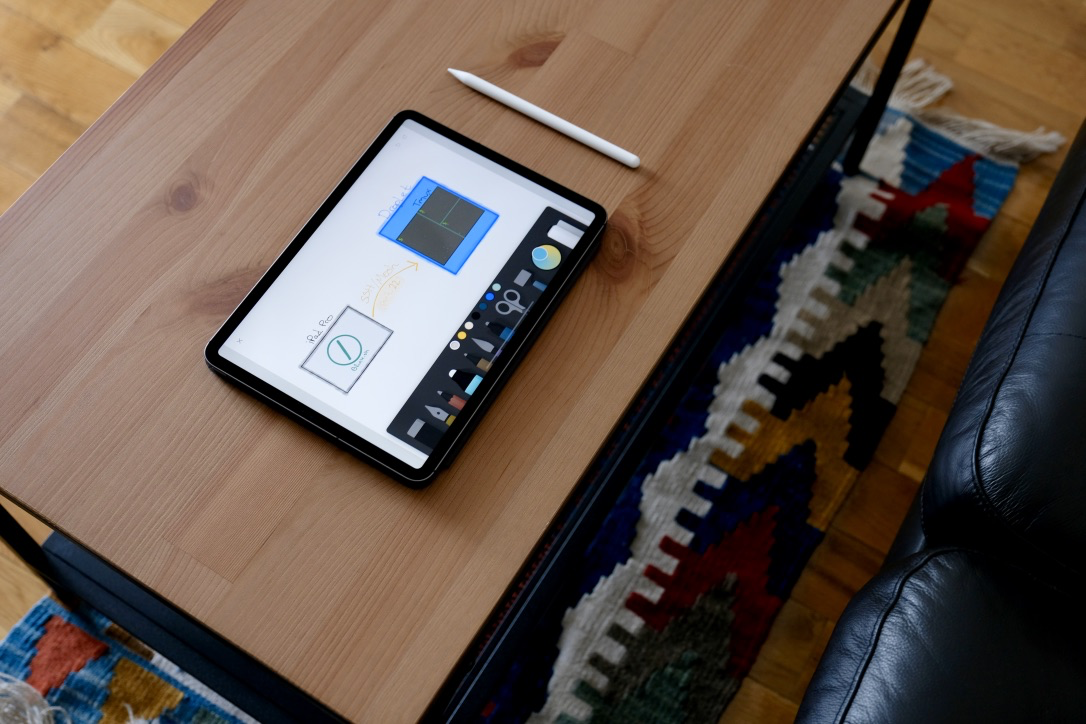
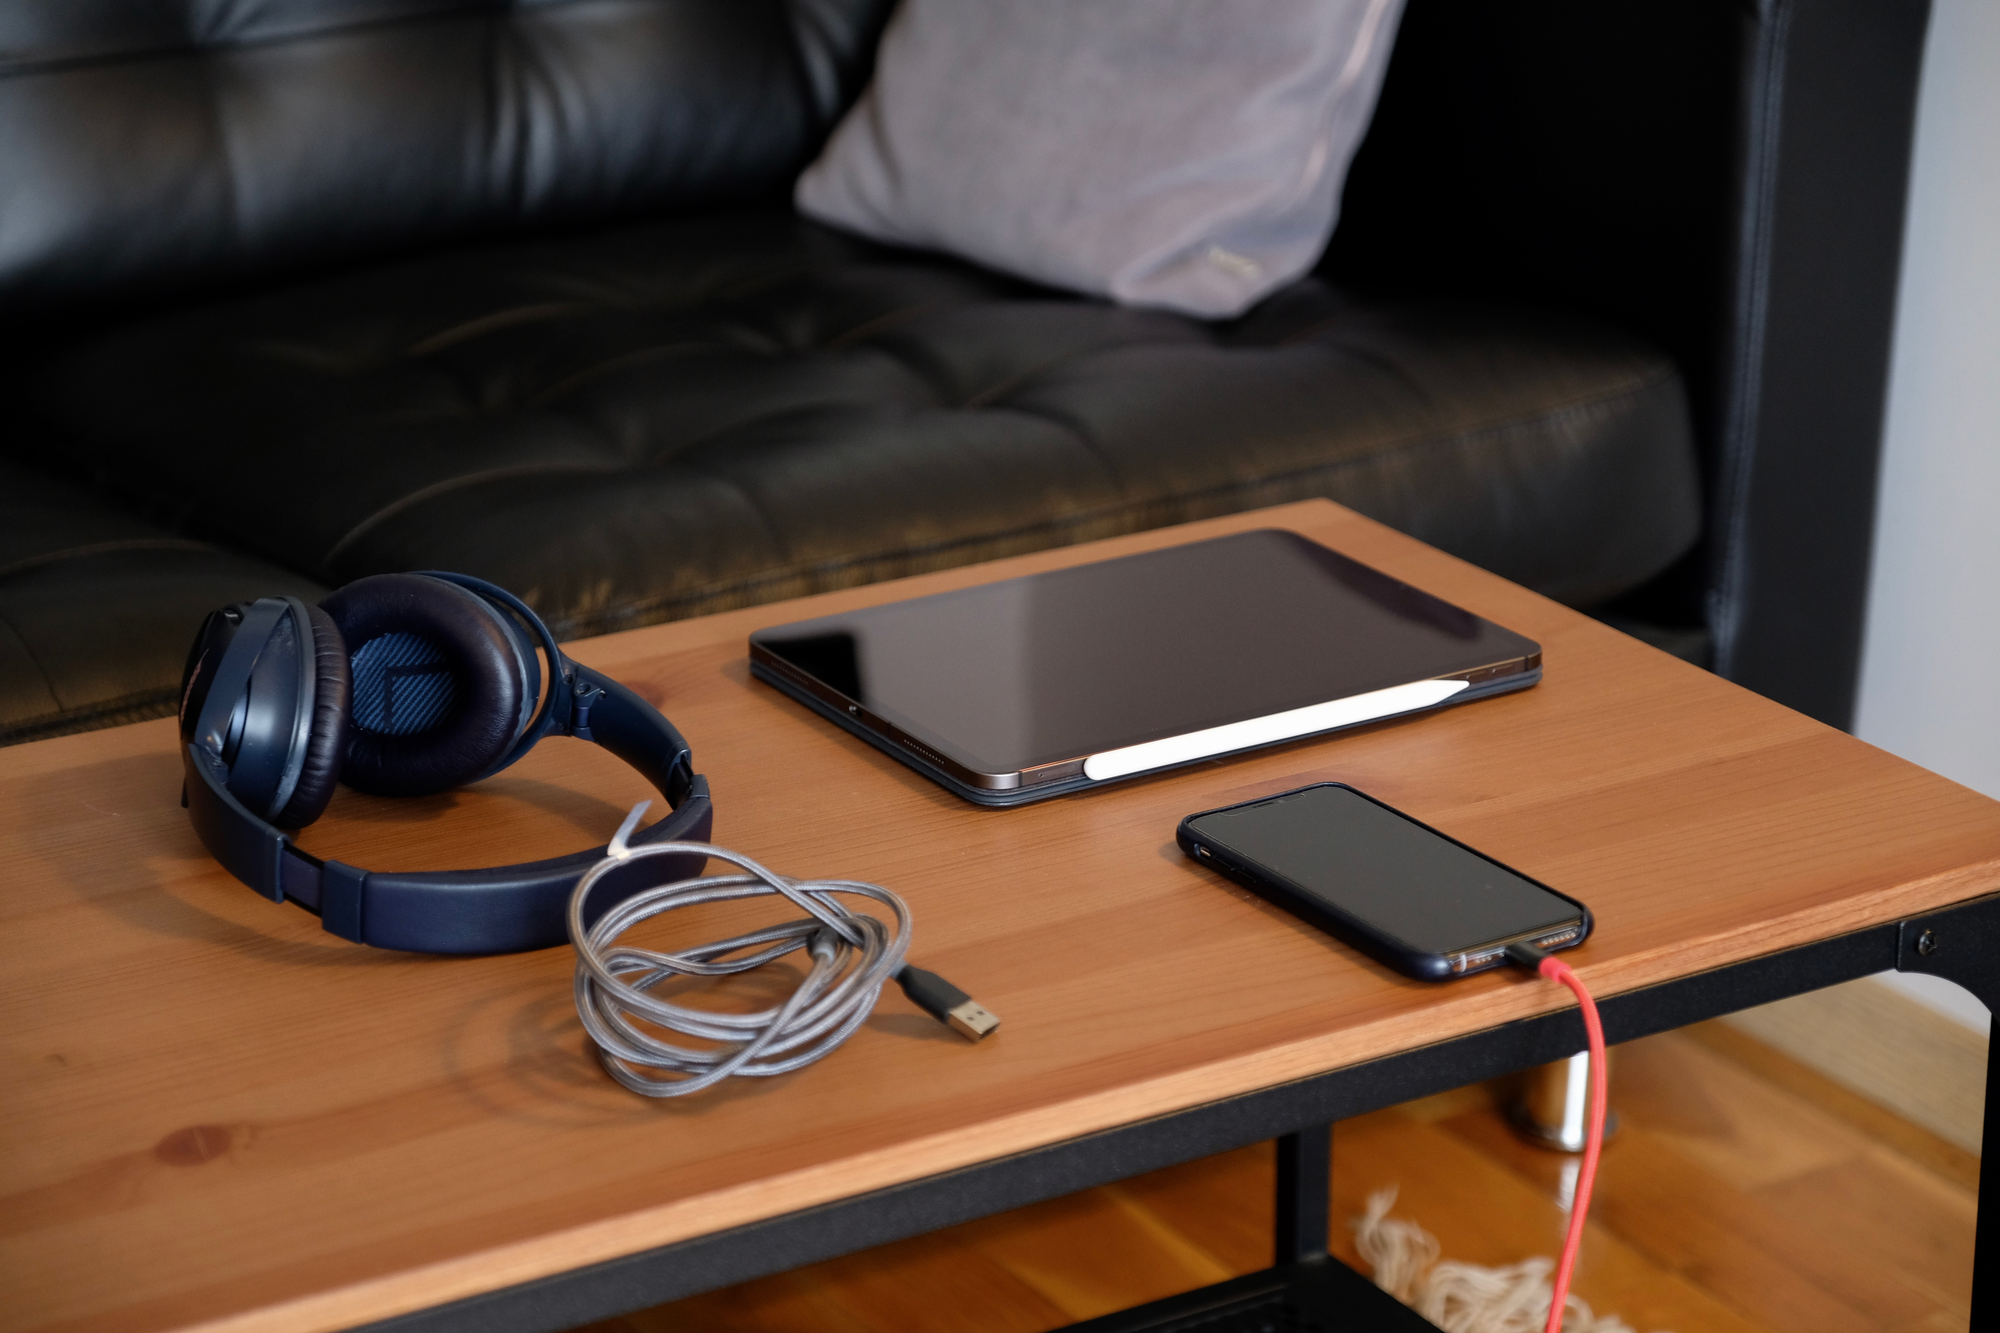
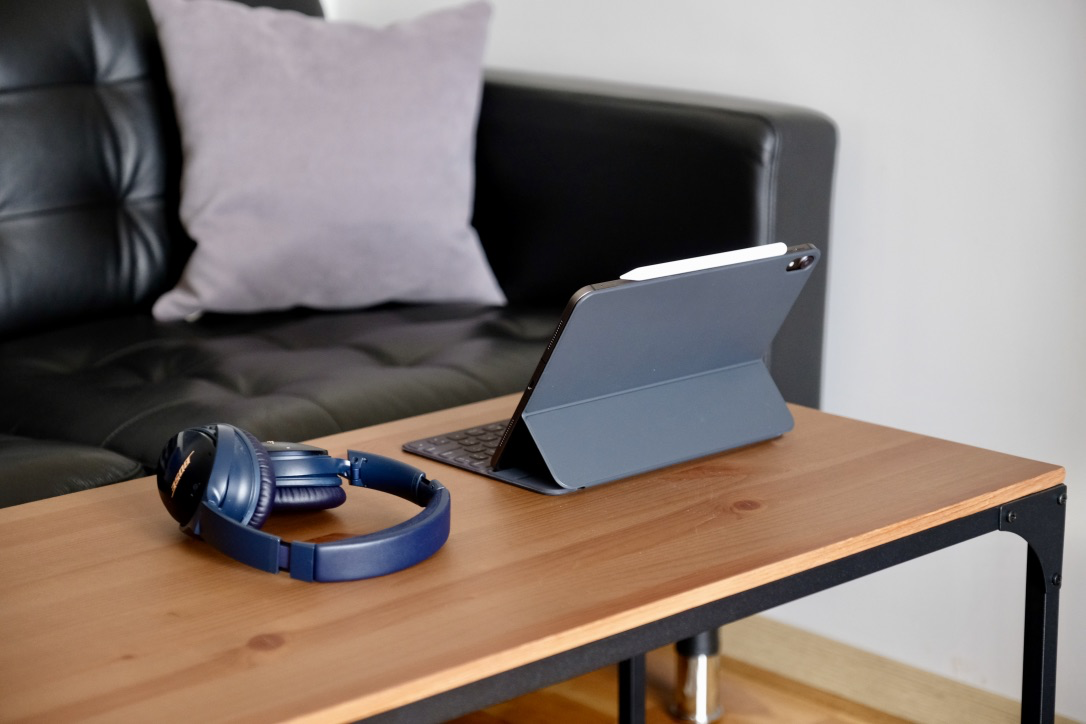
Usage
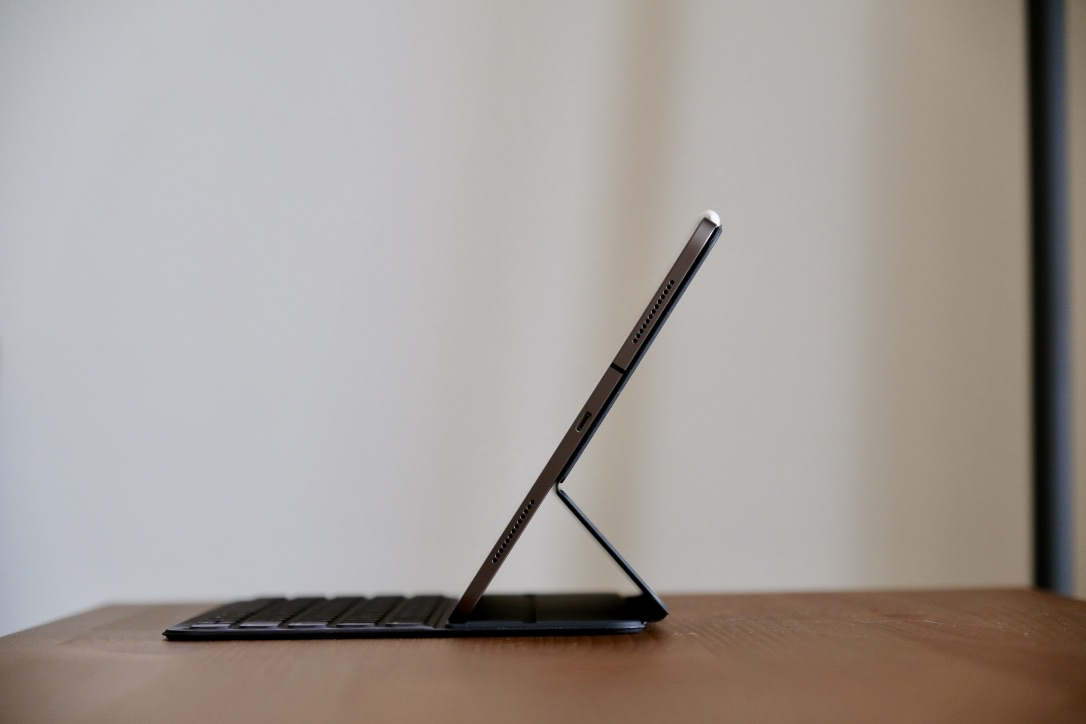
Using the iPad Pro is very different. Sometimes I use it on a table writing a couple of lines but sometimes I lay down on my couch and use it on top of my legs or just hold it with my hands (watching some videos, reading books, etc..)
I can't say that the 11" is very comfortable when you want to use it on a lap. It's very small and because it doesn't have any weight it wobbles a lot.
However, I can say that there is one great thing using it on your lap. It doesn't get hot! Normally when you use a MacBook it'll get warm after a couple of hours (depending on the work you're doing). I barely can use it and have to stop after a while. But this is not the case with the iPad Pro. It feels different because you always expect it to be warm, but it's not :)
Screen size
I went with the 11" because I'm using my iPad for many things, not just coding or writing stuff. It's my main consumption device, such as watching videos, reading books and articles, interacting on social media, etc.. Hence I always went with the smaller size.
Some of my friends have the 12.9 and I feel like it's too big. It's not comfortable to hold in your hands. I think I would pick the 12.9 if I had only one single machine at home. However, as an iMac Pro user, I already have a powerful machine with a big screen (27"). Therefore if I somehow need more screen estate I always can opt-in for the iMac.
I definitely recommend you to see it in real before you decide on a size. They are very different and I think it entirely depends if you feel comfortable using a bigger screen or not. I'm ok with the 11" and can use it for anything. This might be not the case for you.
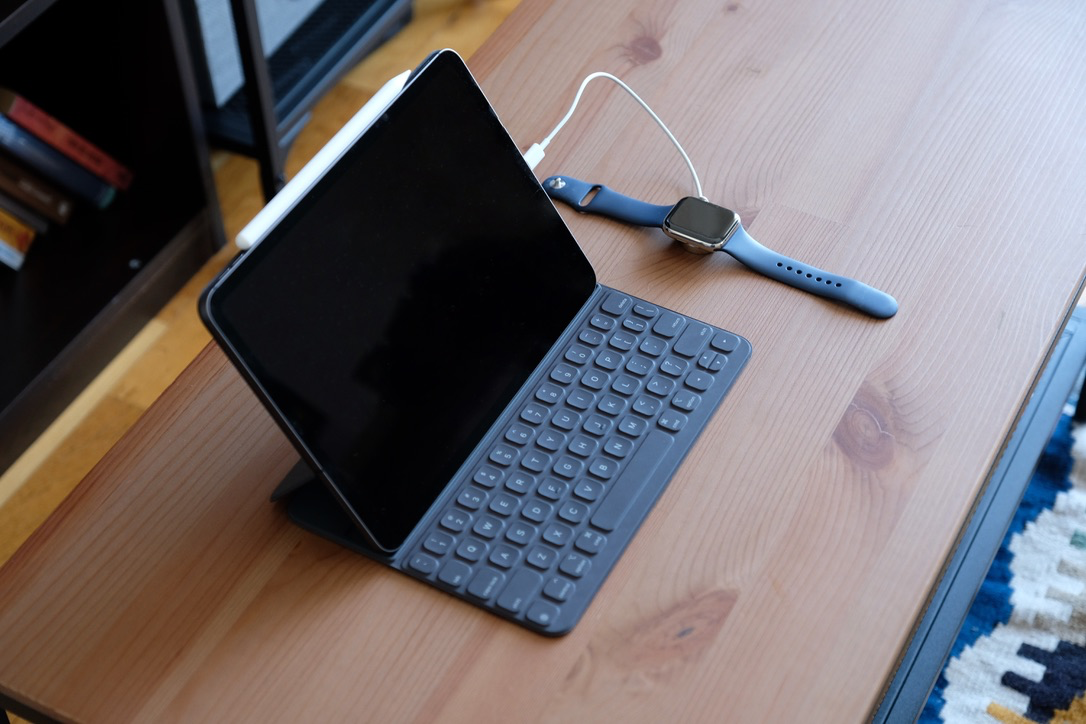
Keyboard
You can purchase a compatible keyboard for the iPad Pro, called Smart Keyboard. It doesn't require any battery and is attached directly via the connectors behind the iPad. So no pairing is required as well. You snap it and that's it. Also, it automatically shuts down if you close the lid or turns on if you open the lid. If you unfold it completely, the keys are also disabled, which is great if you plan to use the pencil to draw something or just want to read/watch on the iPad.
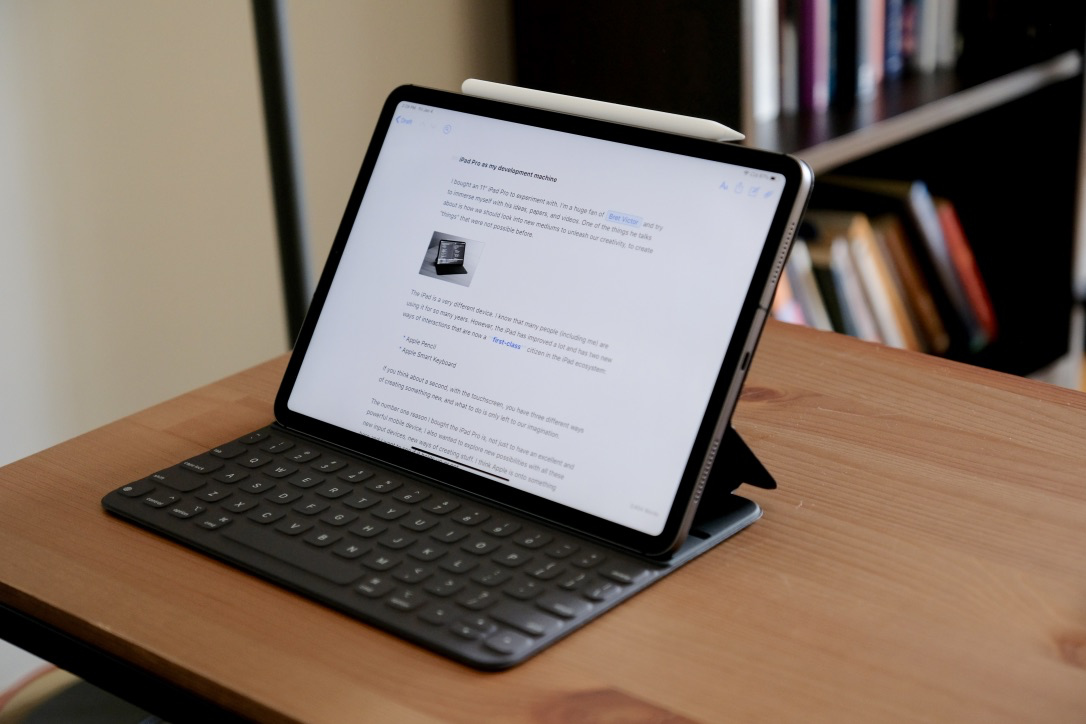
On the paper, it's really great and it works also surprisingly well. But I can't say it's perfect, especially if you coding. First of all, there is no ESC key or the function row. This means it's not easy to cancel anything (say to close a modal) or change the brightness of the screen. For that, you always have to use the touchscreen. The keyboard quality is ok, but I have to say that it's sometimes better to write on this keyboard than on a Macbook.
I don't use the Esc a lot nevertheless for Vim. To switch from Insert mode to Normal mode, I'm using either the ctrl-c shortcut or jj (my custom mapping in insert mode). However, now the problem begins. Because I use ctrl so much, my Caps Lock is mapped to ctrl. It's not only Vim where I use ctrl a lot, think of the readline shortcuts, such as ctrl-e or ctrl-a to jump to the beginning or end of the line. There is no way to change Caps Lock to ctrl system wide.
Luckily, Blink has an option to map Caps Lock to Ctrl, but that's only visible and useful when you're Blink.sh. Even with that, there are times it doesn't detect that I've pressed Caps Lock, so I can't say it's perfect. Another issue with this approach is because you constantly press Caps Lock when you exit Blink.sh, you don't know in which state Caps Lock is. It's either enabled or not, so when I start writing somewhere else, I have to disable Caps Lock 50% of the time. It's just annoying. You could use an external mechanical keyboard where Caps Lock is absent, but then you lose the portability and all the great features of the Smart Keyboard.
A lot of applications have keyboard support, such as Twitter, Ulysses, Things, etc.. Most of them are really good, but some doesn't support it at all. For example, Apple Photos doesn't support the keyboard, so you cannot delete photos or scroll over them with the keyboard. To see if an App supports any kind of shortcut, you have to press and hold CMD key. This will show a modal with all the shortcuts you can use.
Just like on a macOS, you can use cmd + space to jump or open anything. This works really great and I love it. I hope Apple continues improving the state of the keyboard software wise in iOS 13 so it's even better. In this state, you constantly fight with the limitations at some point.
Pencil
Like the keyboard, you can also buy the Apple Pencil in addition. It's fundamentally very different compared to the old version. I didn't use the older version of the pencil, so I don't have to add much and can't compare. However, the one I'm using (latest iteration) is amazing. It feels like a pencil and the way it charges (snaps automatically on the bezel) feels very natural. I never care about the battery life of the pencil. It's ready to go whenever I want to use it.
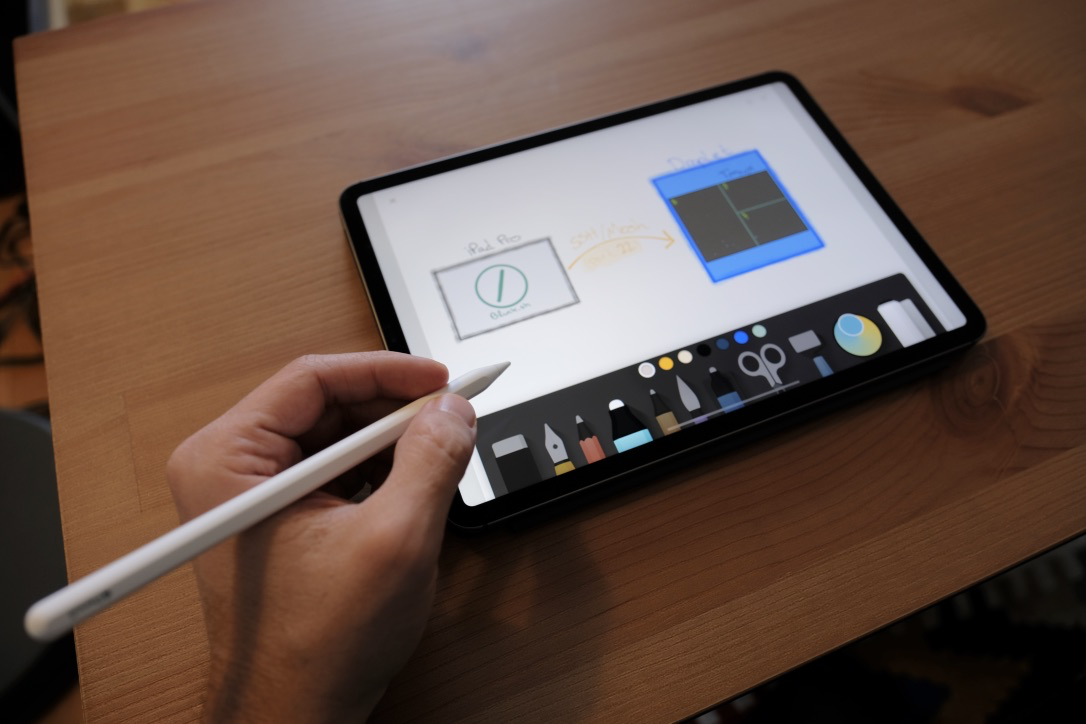
One thing I have to clarify is, I'm a Software engineer and my main area is distributed systems. Nothing in my job description is about drawing or designing something. So you might think, why did you get an Apple Pencil? Well because it's not just for designing, it's also usable for taking notes, annotating screenshots, editing pictures, creating diagrams, etc...
Especially annotating pictures is one of the highlights of using the pencil. If I want to show something, I just take a screenshot and immediately start annotating it with the Pencil. It's amazing how wonderful it feels and it let me quickly finish my job.
Secondly, creating diagrams with the pencil is really great. There are several applications you can use, I really like Paper from WeTransfer (old Paper53). It has a Diagram mode where it allows you to create diagrams in natural mode. So you draw a circle, it becomes a perfect circle. You can even connect shapes together.
Face ID interaction
The new iPad Pro uses now also Face ID. This is important for people who use the iPad Pro with the keyboard, because it makes the interaction with everything so much easier. You don't have to touch anymore to unlock the iPad.
Secondly, with the new Password Manager integration (I'm using 1Password), login into websites is so convenient. Whenever you see a login page, you click on the password button, Face ID unlocks 1Password and your login data is then pasted into the login form. It feels very magical.
The only caveat I here is the Face ID sensor placements. I think the Face ID cameras should be placed a little above, near the buttons. Most of the time, if I'm holding the iPad, my hands always cover the cameras. I have to make sure I don't accidentally hover the cameras. I think Apple made a mistake by putting the Face ID cameras in their current position. They should be just below the place where we snap the Apple Pencil to the bezel. Maybe I'm the minority (as a user holding the iPad always horizontally), but the iPad with the Keyboard is also in its horizontal mode, so it's not a bad idea in my opinion.
Accessories
The iPad Pro now has a USB-C input (instead of Lightning). USB-C was introduced first with the new TouchBar MacBooks (in the Apple ecosystem). Of course with that, they also removed all other ports, which means you have to buy tons of dongles. I'm now carrying a bag with a lot of dongles (it's not fun IMHO). But on the bright side, all these dongles and cables now work with the iPad Pro as well. This is such a huge step because it enables tons of new opportunities.
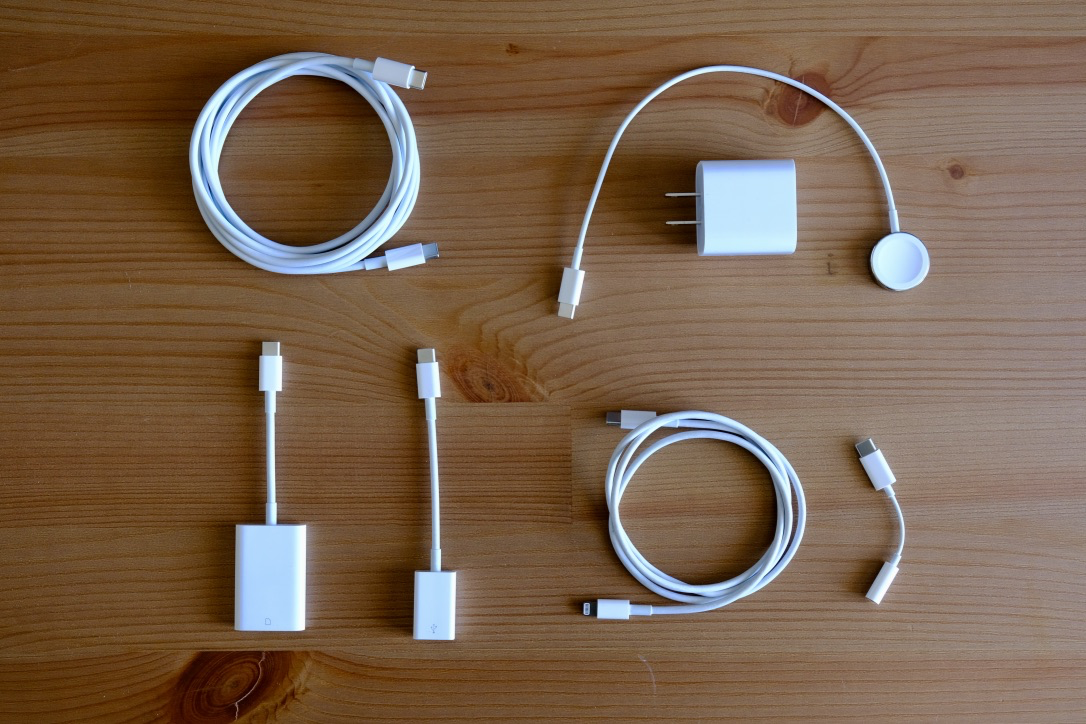
What do I carry with me? These are the following dongles and cables:
- USB-C to Apple Watch Magnetic Charger. Needed to charge your Apple Watch. This is unfortunately very short to be used with your USB-C charger. It's intended to be used with a device (iPad Pro or MacBook)
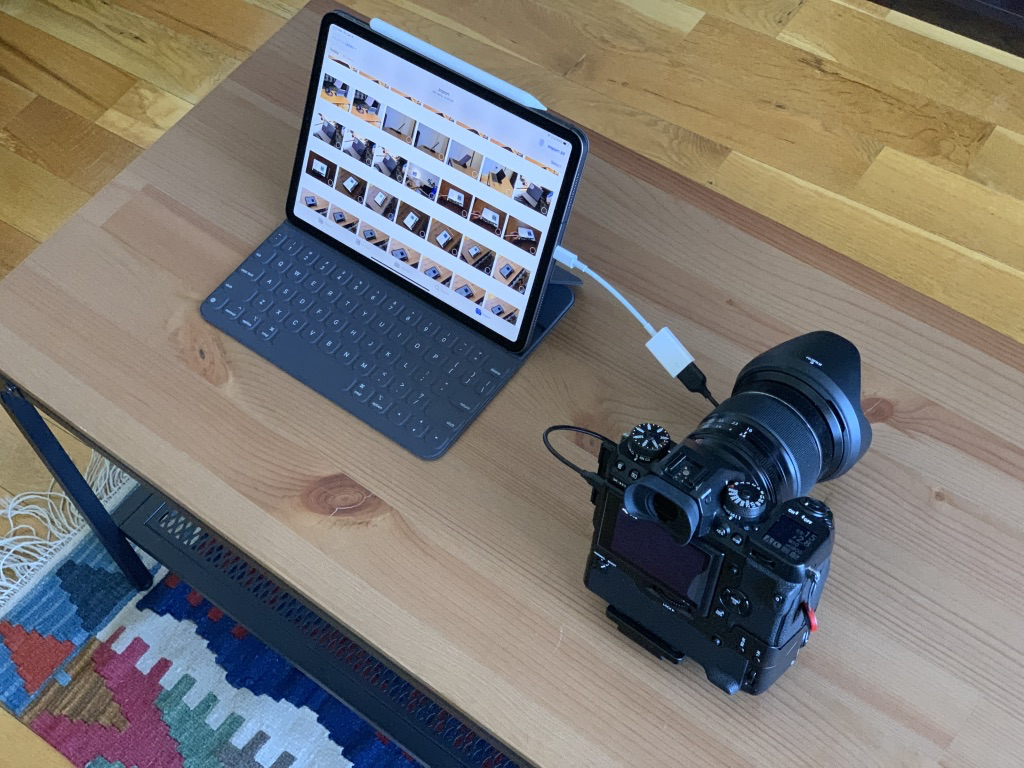
- USB-C to SD Card. Perfect if your camera doesn't have any USB interface and you want to import photos
- USB-C to USB. This is used for inter-compatibility with old devices. For example, my Fujifilm doesn't have a USB-C output, this is the cable I have to use.
- USB-C to Lightning. This is to charge my iPhone
- USB-C to 3.5mm adapter. I'm using my Bose QC35's which has Bluetooth, but if the battery dies, this is needed because the 3.5mm jack no more exists on the new iPad Pro's.
Before the iPad Pro, I really hated using the USB-C accessories because my MacBook (work laptop) was the only device that could use it. But now that iPad Pro also uses USB-C, everything is much easier to use. I'm looking forward when the iPhone also switches to USB-C so I can get rid of all my cables and start to use USB-C for everything.
Photo management
I like taking photos. I'm an avid user of my Fujifilm X-H1 and use it a lot. One thing I really love about the iPad Pro is how easy it's to manage your photos and edit them. First of all, I'm using Apple Photos to store all my photos (I have the 2TB plan). I have used Dropbox and Google Photos in the past, but I eventually settled down with Apple Photos 1-1.5 years ago because of these benefits:
- A strong stance towards Privacy. I can be sure my photos will be not used for anything else. I'm the consumer, not the product
- Native iOS integration. Everything works out of the box. Uploading/downloading or any photos interaction just works without having to wait. If you're already into the Apple ecosystem, it works really well
- I can backup all my photos continuously by downloading the originals to a macOS machine. Google Photos allows you to download all your photos, but it doesn't have a native application or a way to sync the photos back to your local. Whereas all my photos can be downloaded locally and I pair with Arq to backup it to somewhere else.
Having said that, Apple Photos is not perfect. It has these two fundamentals issue in my opinion:
- Search sucks. It doesn't work well and the number of photos is increasing, making it harder for me to find the photos I'm interested in. Google Photos in comparison was (and still) the best in terms of searching
- Sharing photos is not convenient. Again, Google Photos has the ability to quickly share the photos instantaneously, whereas Apple Photos still is really slow and awkward to use. Try to share a simple Album with 100 photos to see what I mean.
I think these problems will be eventually fixed in the upcoming versions.
Back to the iPad Pro. I bought the 512GB version because I wanted to have the ability to quickly and instantaneously edit and see my photos. I have around 220GB worth of Photos, so the 512GB is perfect in this sense. I'm still using iCloud to sync my photos between all my iDevices but on the iPad and iMac, I enabled the "Download Originals" options. This allows me to edit the photos and manage my photos easily.
If you don't have a lot of photos or don't want to work on big files, I don't think it's worth buying the iPad with bigger storage. I think the 64GB is perfect for lots of people, but I would opt into the 256GB just to be on the safer side (because you won't be able to upgrade it later)
iCloud Sync (Continuity)
I think this is something worth mentioning. If you're into the Apple ecosystem, the way iCloud syncs all your settings and files are just amazing. Don't think iCloud as a Dropbox replacement. It's more than that.
First of all the whole idea of moving seamlessly between your iDevices (iPhone, iPad, iMac, MacBook, etc...) is called "Continuity". Under the hood, it uses iCloud, which is the universal sync system that makes sure everything works fine. If you're using iCloud, this means all your notes, photos, etc.. are synced across all your devices. Take a photo with your iPhoto and boom, it's on your iPad and MacBook immediately. Write something down in Apple Notes and it'll be available immediately in your other devices.
But this all is not the only great thing. I especially like two things that work very well for me. One is "Handoff" and the other one is "Universal Clipboard".
Handoff enables you to start something on one device and later pick it up on another device, without losing focus on what you're doing. For example, I wrote this blog post mainly on my iPad Pro with Ulysses. However, sometimes I have to jump back to my iMac and do some errands. I can easily continue writing on my iMac by opening Ulysses. It's immediately there and ready to be used. This works on so many apps that it's just amazing. For example, suppose you're browsing something on your iMac. You grab your iPad, leave your home and open your iPad and boom it's there.
Second, "Universal Clipboard" is an amazing feature. This feature allows you to copy paste from one device and paste it on another. For example, I can copy from iMac and then paste it on my iPad. It's not text, you can even copy/paste images as well. This feature is amazing, just like "Handoff", because it allows you to seamlessly switch devices.
Copy & Paste
Talking about copy&paste, there is a serious issue when you use a remote workstation (or let's say something very annoying).
Everything you copy there, unfortunately, won't be available in iOS's clipboard. Suppose you copy a line in Vim via yy and then want to paste it into Apple Notes. Forget it. It's not possible because both of these systems use a different clipboard.
What we need is "Universal Clipboard" integration in our remote workstation. If you're using SSH and Blink, copying into Tmux's clipboard buffer actually forwards it to the iOS clipboard. But this doesn't work with Mosh at all. I hope Blink implements (and documents) a proper clipboard sharing between the host and remote workstations, that can be used with Mosh or SSH as well.
Notable apps
Some notable apps I'm using and I think you should give it a try:
- Ulysses: I write all my blog posts with Ulysses. You might think it's an ordinary markdown editor, but it's not. Adding images, showing previews, publishing, writing, etc.. all these actions are integrated seamlessly and it provides one of the cleanest user experiences ever. I tried so many applications, but I keep coming to Ulysses. It's worth every penny if you write a lot
- Paper (former Paper53): There are many drawing apps but I like this the most because it's simple to use and it has a nice tradeoff between easiness and feature set. I don't have any strong recommendations for this app if you like it go for it if not, there are plenty of others you can try
- Blink: I already mentioned about this throughout the blog post, just adding it to the list. There are also other Terminal Emulators, please let me know if you think they are comparable or better
- Dash: I'm using this already on macOS and find it great to have something we can use also on the iPad. This is a Document viewer and it's really great to see and read the API of various frameworks and programming languages. I'm using it mainly for Go's stdlib packages, but it can be used for almost anything.
- Things: This is one of the best looking To do managers out there. It's expensive and you need to buy the same app for all of your iDevices. However, Things is one of the applications that have full keyboard support, which many applications lack. Once you start using it, it's addicting because the way it's designed and feels is amazing. I haven't seen many apps that feels so natural on iPad (maybe Ulysses).
Cost
I mentioned many things throughout the blog post, but I think I also should mention a little bit about some of the costs if you're planning to use the iPad as your main development machine:
- First of all, you need a remote machine powerful enough to meet your needs. This is minimum $10 per month for any cloud provider you choose. I know they are cheaper instances or even free tiers, but I don't recommend because you'll be going to need the network throughput and CPU/RAM.
- Blink itself costs $19.99, it's a one time purchase. Most of the quality and pro applications either have a subscription (Ulysses) or a one-time purchase (Things). This entirely depends on your use case so I can't say much about this.
- I think iCloud is needed nevertheless. I'm using the 2TB plan, which costs $9.99 per month.
- If you have the Cellular iPad Pro machine, you're also going to pay a monthly fee to your cell provider. This depends on where you live and which provider you choose. Let's say it's minimum $10 per month.
As you see, you're going to have a pay least $30 per month (remote workstation + iCloud + data). And this is just the minimum. You can say that iCloud is also used by all other iDevices, even if you think like that, I picked up the cheapest options for the remote workstation and your data plan for the cellular connectivity.
There are certain options to minimize these costs. For example, you could theoretically shut down your remote instance whenever you don't use it and only start whenever you start working. Let's say, you don't use it throughout the night, just shut it down.
Verdict
After using the iPad Pro for a while, you're starting to use sentences that start with "What if ... ?". What do I mean by this? Here are a couple of questions:
- What if I can't copy the data from the form on this particular website?
- What if I have to message someone with WhatsApp?
- What if I lost my internet connection and I need to work on my source code?
- ...
Importing and editing my photos, writing blog posts (note: this whole article was written on the iPad Pro), reading books, researching, etc.. All the ordinary stuff is very possible. On the coding side, I was able to develop, test and ship a new feature for Fixmie. However, I'm not sure if I could do the same if I had to test the website or had to fix something in the authentication workflow. I have mixed feelings here
The issue with the iPad Pro is, because it's not a real computer and IMHO not a laptop replacement, you don't know what the limits are or when you're going to hit the wall doing some stuff. There were so many times where I just couldn't continue with the iPad. I had to use my iMac to finish my job.
If you're using the iPad Pro in the mindset of "This is going to be my main work machine", then you'll be living in constant fear. I really mean it.
However, if you're using the iPad in the mindset of "This is a great device with a constant connectivity to the internet, I think I can use it for almost all my needs" then you're thinking differently because you know the limitations and therefore can prepare yourself.
I have decided that the iPad is the perfect mobile device for most of my work, but it can't replace my main work devices (MacBook or iMac). I know it sounds cool to use the iPad as the main development machine, however, the constant limitations you're hitting is just frustrating. I agree with most of the people out there that iOS is still limiting in several ways.
Nonetheless, I think Apple will tackle this with the upcoming iOS releases, so I'm positive and believe the future of development on iPad will be a first-class citizen.
If you have made it so far, thanks for reading! Please let me know if you have any questions and feel free to share your thoughts.