Review of the Kinesis Advantage360 Professional

The Advantage360 Professional is the successor to the well-known Advantage2. It comes with several new features, such as Adjustable Split, Wireless connection, Tenting, ZMK (highly customizable firmware), and many other minor things. In this blog post, I will explain the significant design changes and my experiences with Advantage360.
Before I can tell the main differences and the new features, I'll have to describe shortly how it all started. Please bare with me because it matters to understand why the Advantage360 is superior and better to the existing Advantage2 in many ways.
My hand and fingers started to hurt around 2-3 years ago. It wasn't that bad initially, so I didn't pay much attention to it. However, one day, my right pinky finger began to hurt excruciatingly, and I could not move it in any direction. After waiting a couple of minutes, It began to recover, but the pain was there. I started looking around and found an ergonomic, good-looking keyboard. It was time to get my health back.
I've found the Moonlander MK1 from ZSA, an ergonomic split keyboard. I also wrote a review about it if you're interested: My review of the Moonlander MK1 keyboard I've used the Moonlander for like 6-12 months; However, it wasn't for me, not because of the quality or hardware, but the design didn't work out for my small hands. So, I switched again to a new keyboard.
My new keyboard was the Advantage2 from Kinesis.
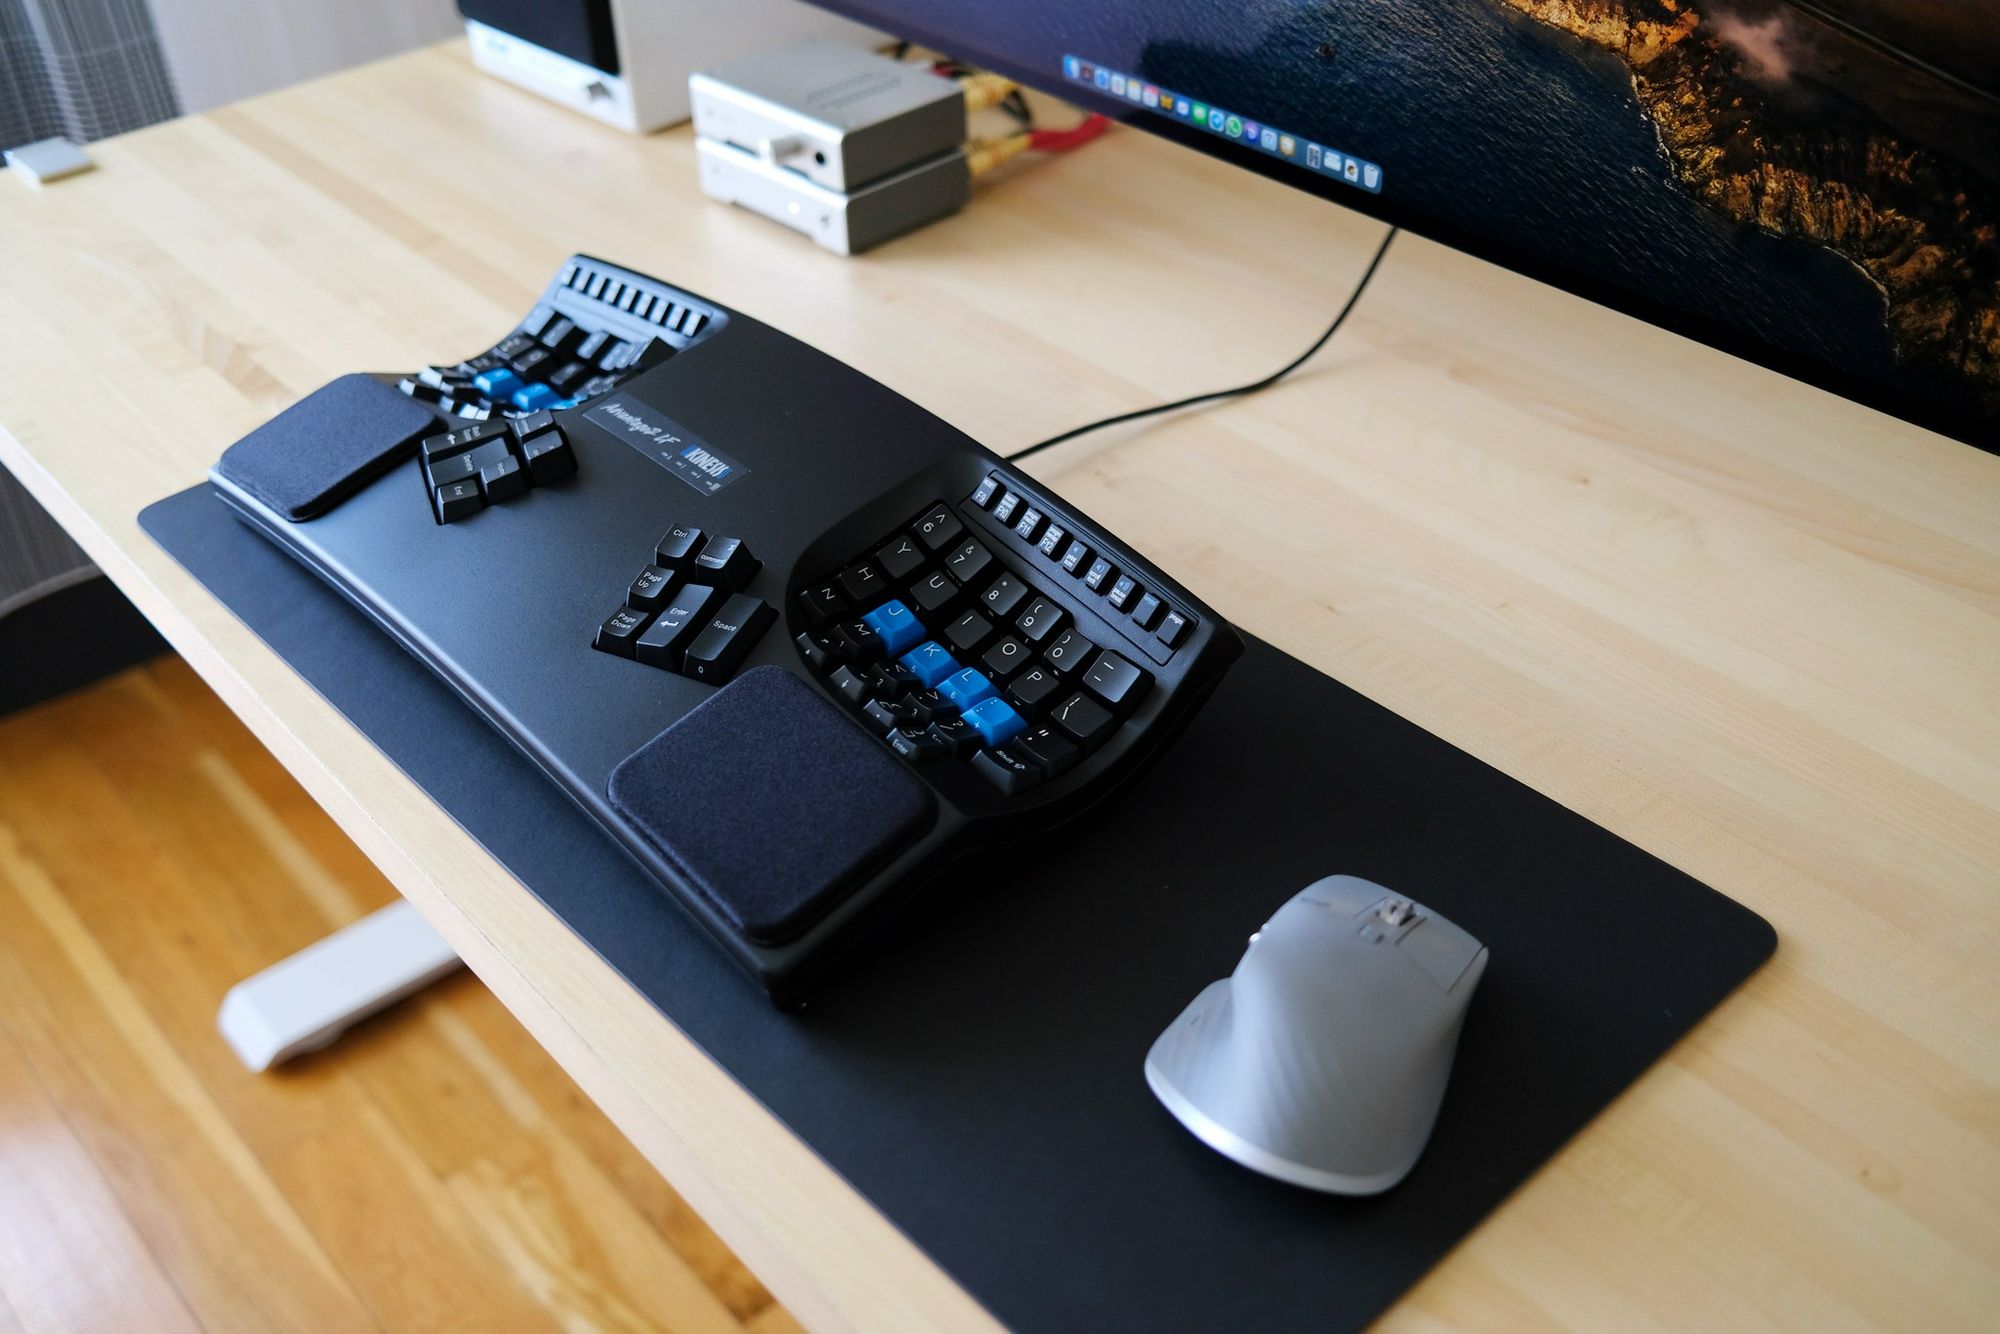
After receiving the Kinesis and starting to use it, I couldn't go back to any other Keyboard any more. Thanks to the Moonlander, I was accustomed to using a split keyboard. I struggled for a couple of weeks, but it wasn't as hard as I had imagined. The only problem I had was I loved QMK (the custom Keyboard software Moonlander was also used under the hood), and the Kinesis Advantage2 came with proprietary firmware that was nothing compared to QMK.
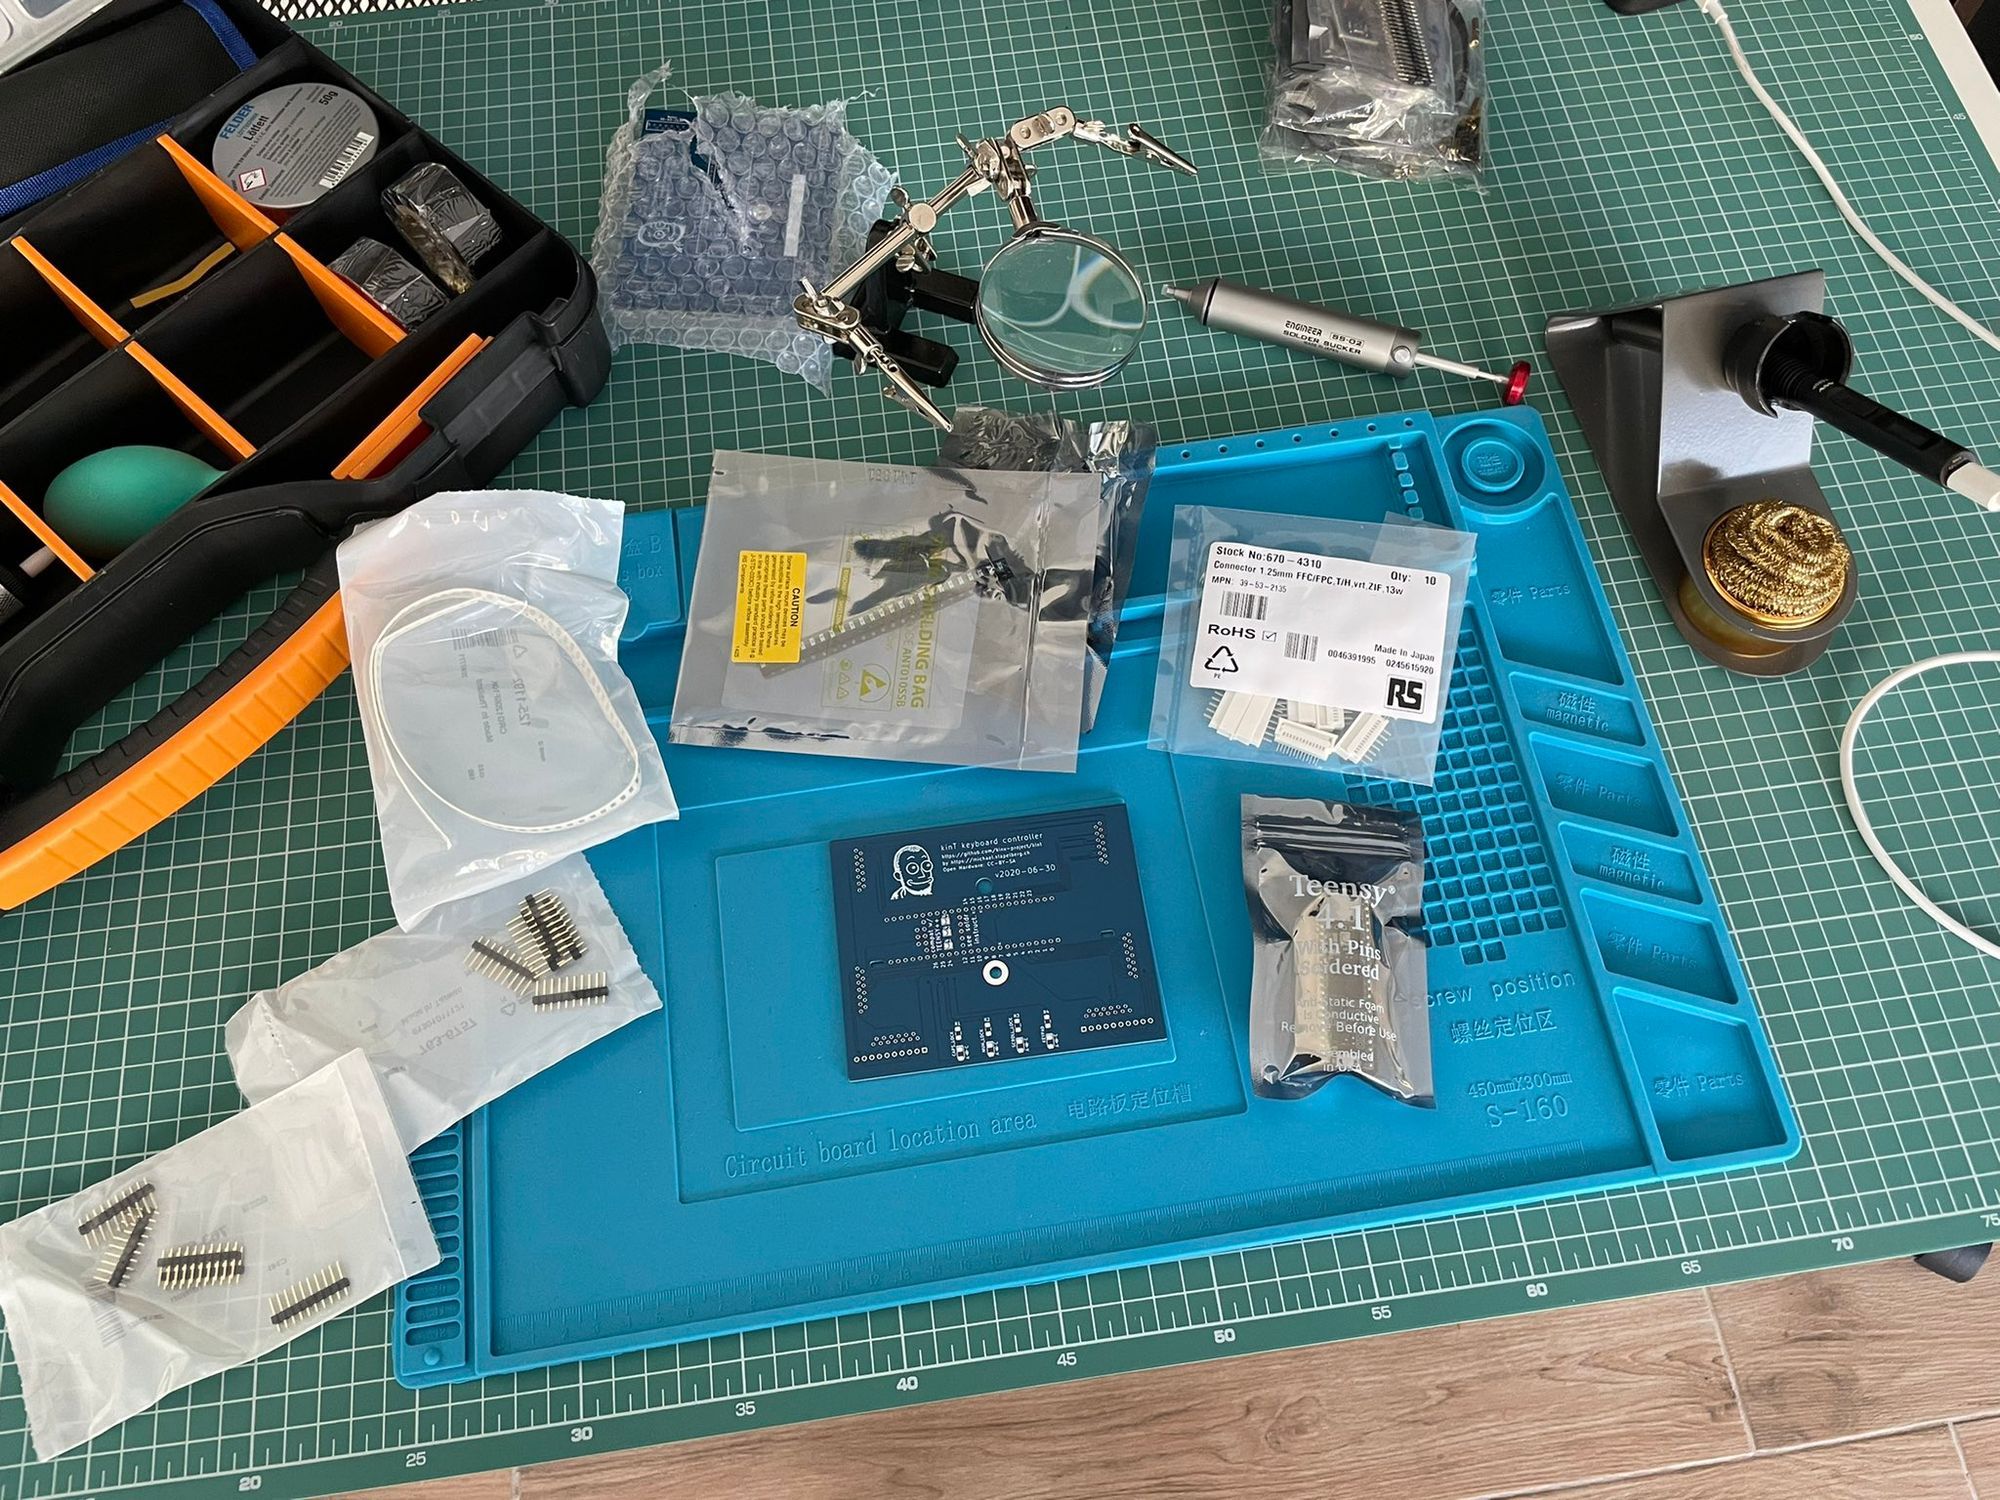
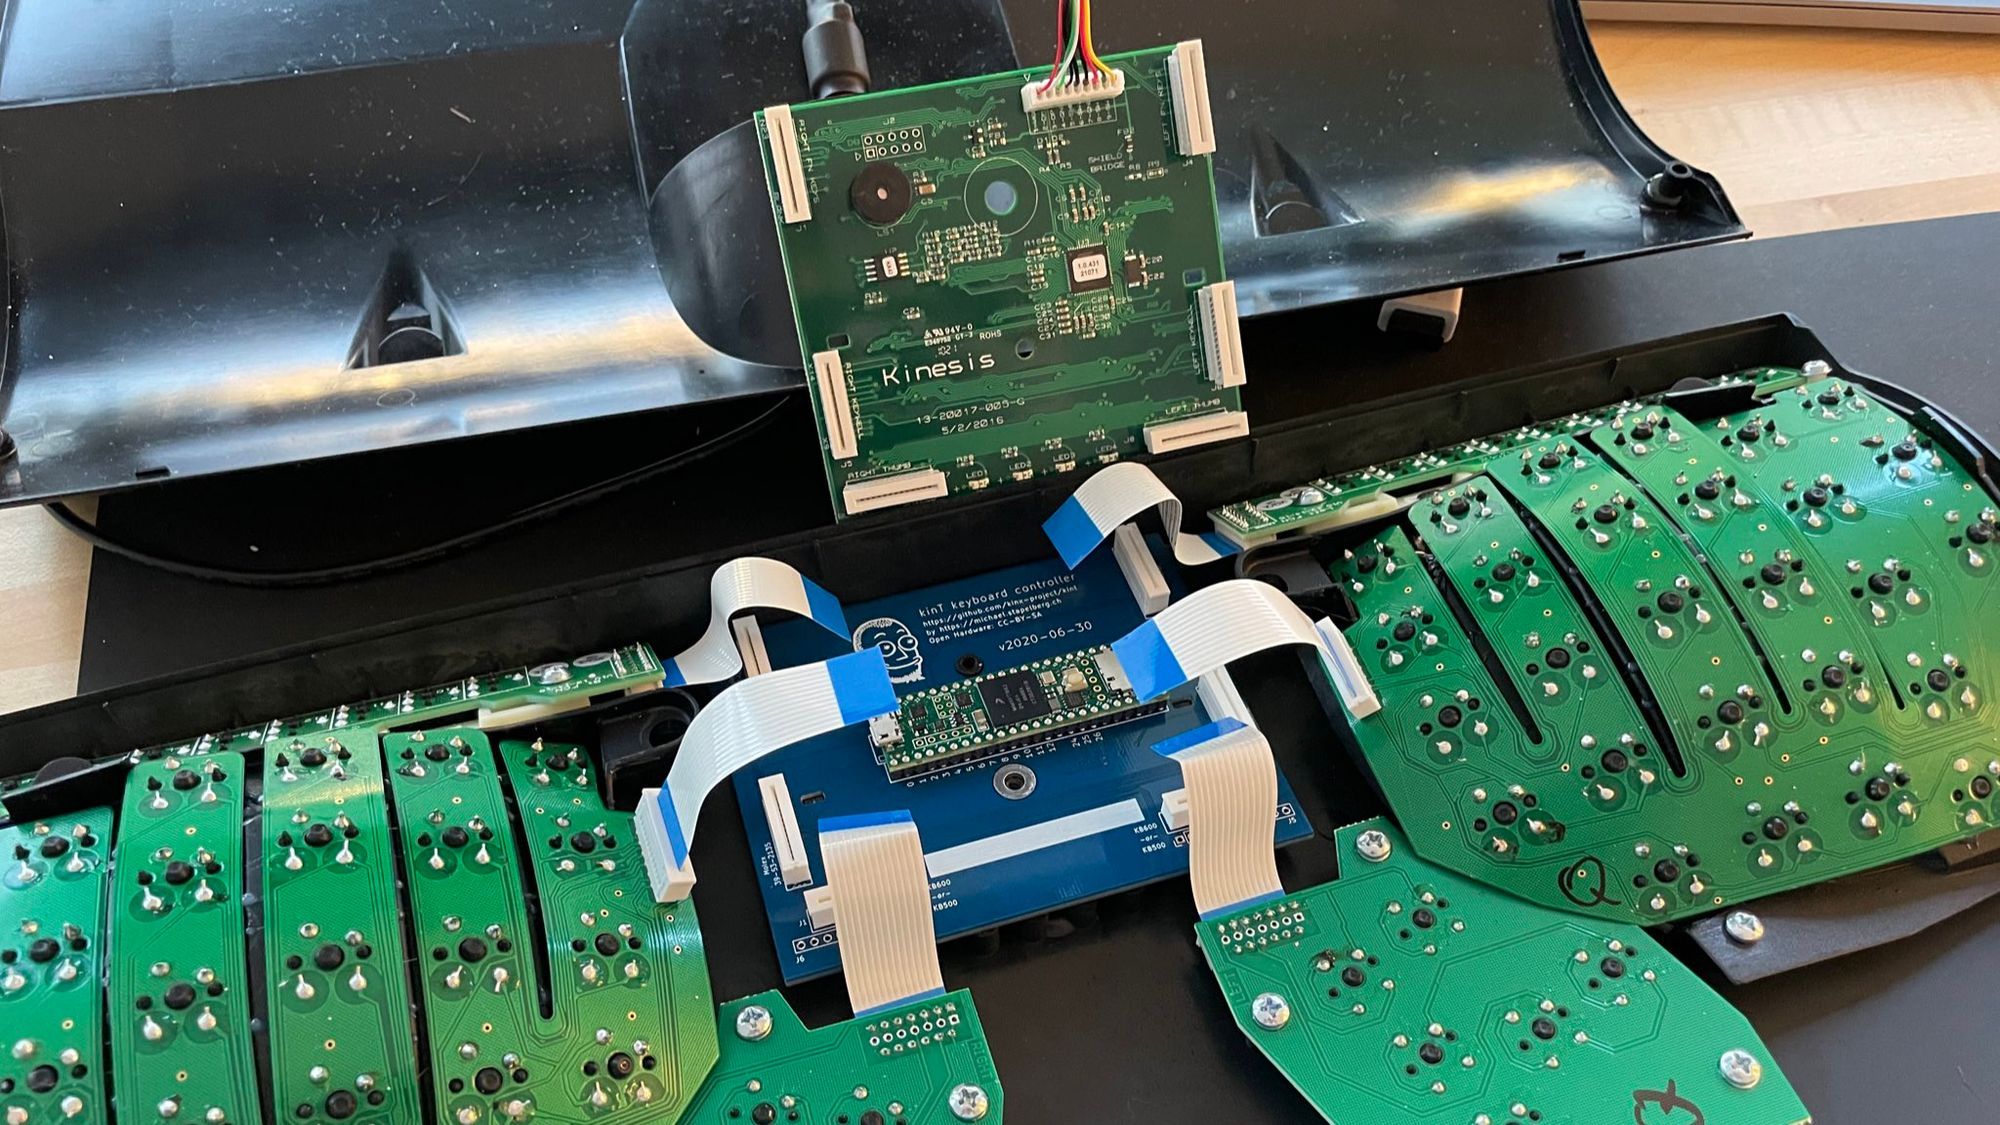
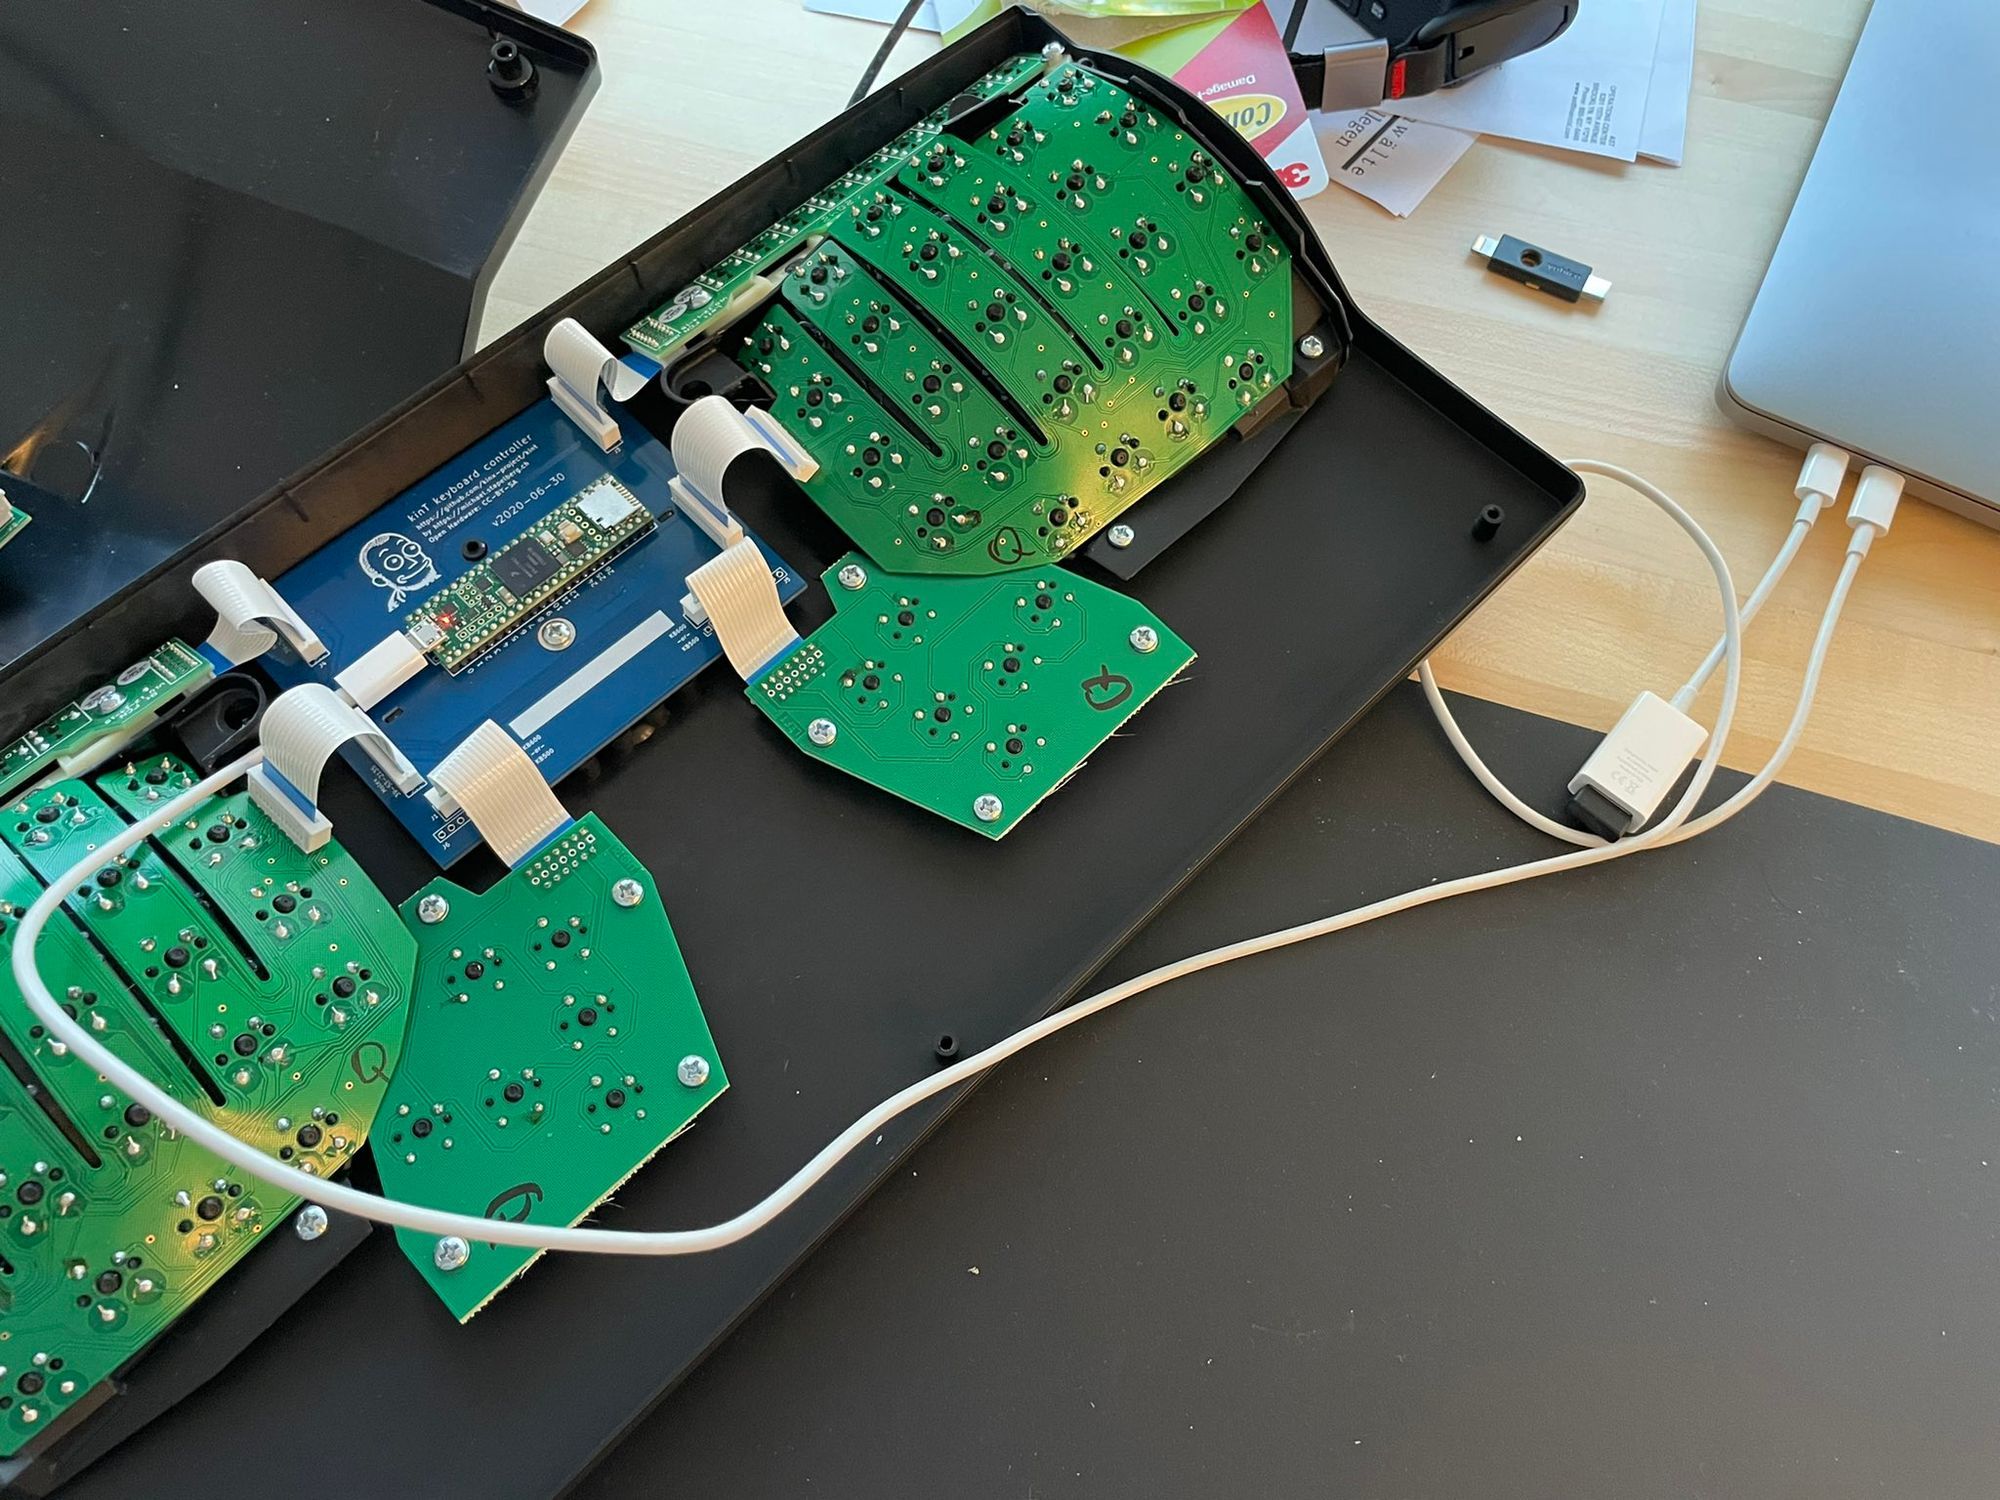
Modding Advantage 2 to add QMK support
Luckily, a person (Michael Stapelberg) thought like me, and they hacked and modded the Kinesis Advantage2 to support QMK. So, I went and purchased all the necessary pieces of equipment and modded my Kinesis Advantage2.
The Advantage2 was the best keyboard I have had so far. With QMK, it was powerful and highly customizable as well. However, I was still missing a couple of things from the Moonlander MK1 that I wish the Advantage2 had:
- Wireless. I like a clean desk, and all the new Keyboards I had were wired. I've used the Apple Magic Keyboard wirelessly for years with no latency issues.
- True Split design. The Moonlander could be adjusted to your shoulder width, providing another level of ergonomics.
- Backlight LEDs. I thought it was a gimmick, but you can combine it with Keyboard layers, and it provides a nice feedback loop when you switch layers.
- Tenting. The Moonlander hat tenting is yet another option to adjust the keyboard for your hands.
- Custom Keycaps, the Advantage2, came with shiny ABS keycaps. The Moonlander had better keycaps (PBT).
- Builtin ZMK/QMK support. I don't have to tell, but we shouldn't mod a Keyboard to add ZMK/QMK support.
Well, I don't know if Kinesis somehow listened to me, but they announced last year a new keyboard called Kinesis Advantage360 Pro, which was a genuinely split keyboard and would have all the features I was longing for. I was one of the first people to pre-order it.
After countless delays and waiting for almost eleven months, I received it last week.
Unboxing & Accessories
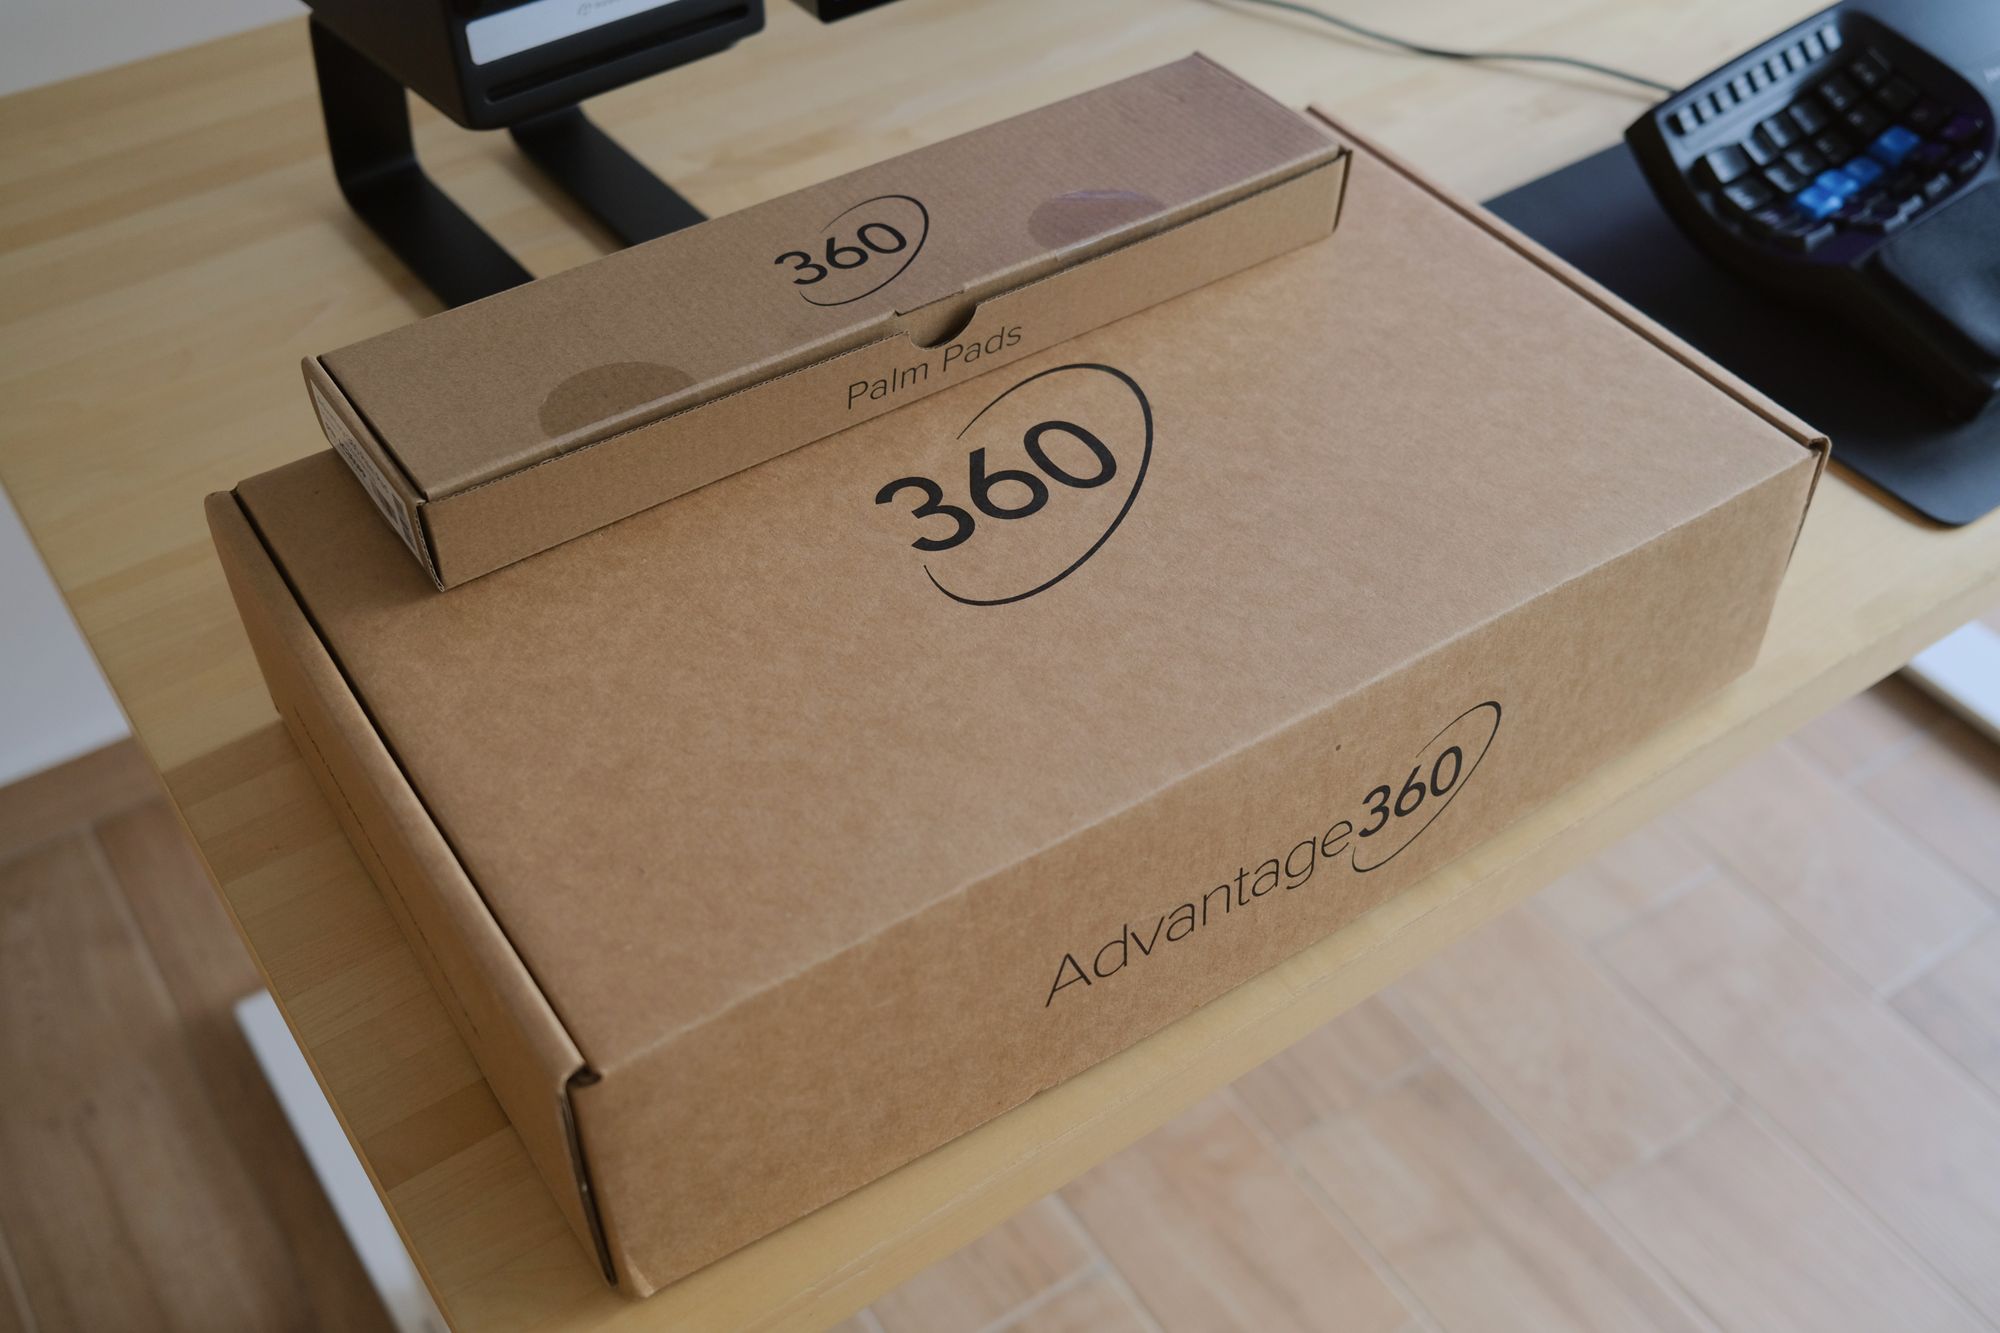
The Kinesis came inside a wrapped, big box, and the leather pads were shipped in a separate box. However, Drop.com put both boxes in another big container, which, I think, was packaged superbly. If you send a packet from overseas, it's essential to pack it safely because people who carry these goods don't typically care what's inside.
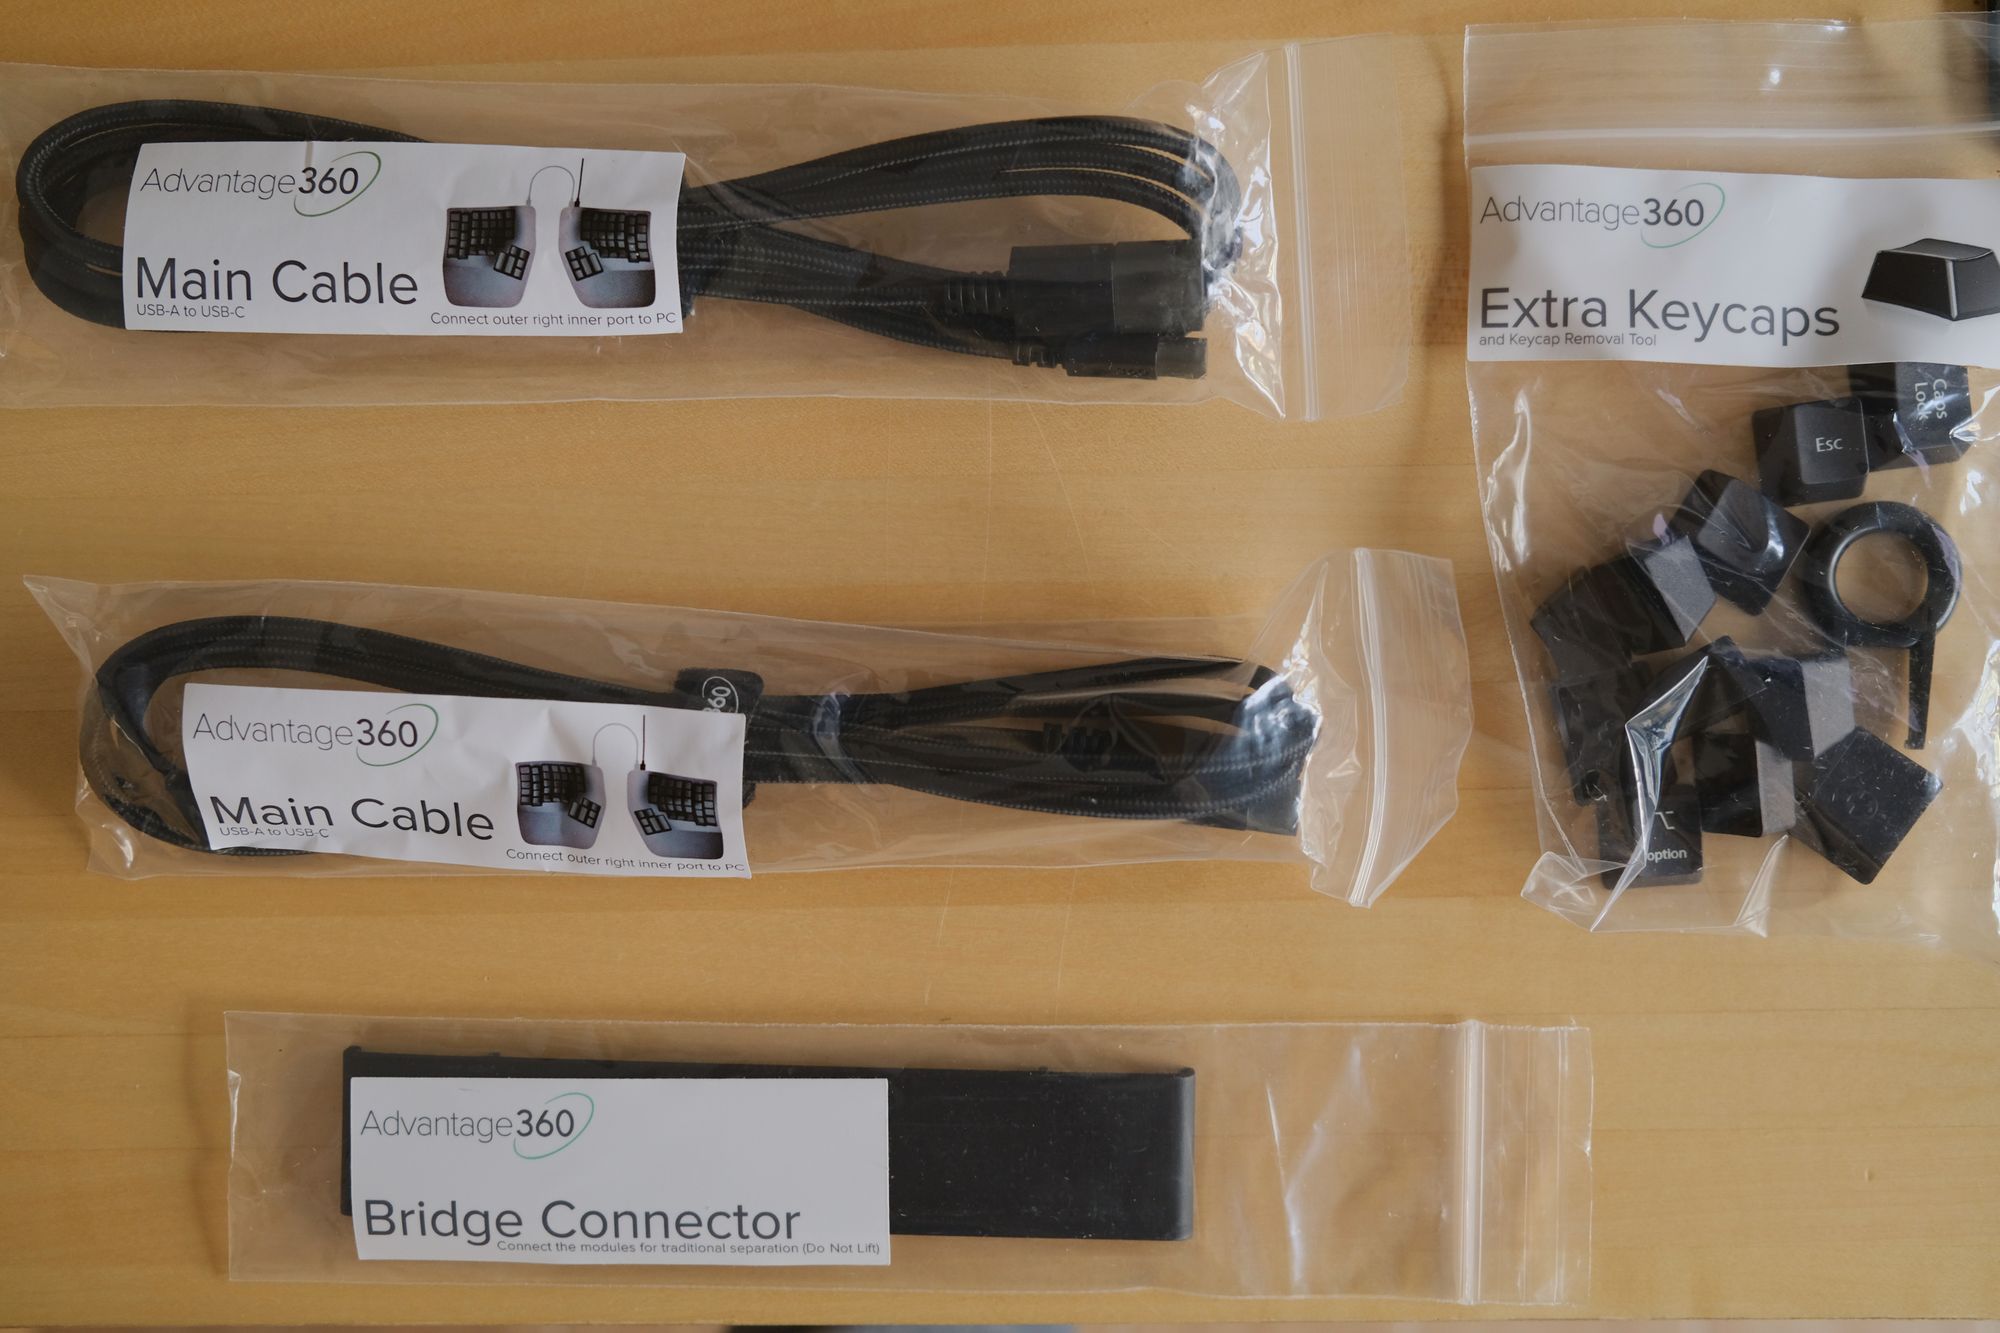
Inside the keyboard's box came four accessories: two braided USB-A to USB-C cables, a bridge connector to create the illusion of an Advantage2, and additional spare keycaps. A couple of comments on these accessories:
- Cables: Honestly, I'm baffled they sent us a USB-A to USB-C. I welcome the USB-C ports on the Advantage360; however, I wish it was a USB-C to USB-C cable. The cable quality is very lovely, though, and it's braided.
- Bridge: The bridge is plastic and flimsy, and I didn't open it all. After all, I bought the Advantage360 mainly because I wanted to adjust the gap between the two halves. So, the bridge defeats the purpose. A connector could be helpful if you want to use it on your lap.
- Keycaps: It was great they sent various keycaps. I immediately changed some keys, such as the default ESC to Blank, and replaced the Esc with the Alt key in my right thumb cluster.
Tenting
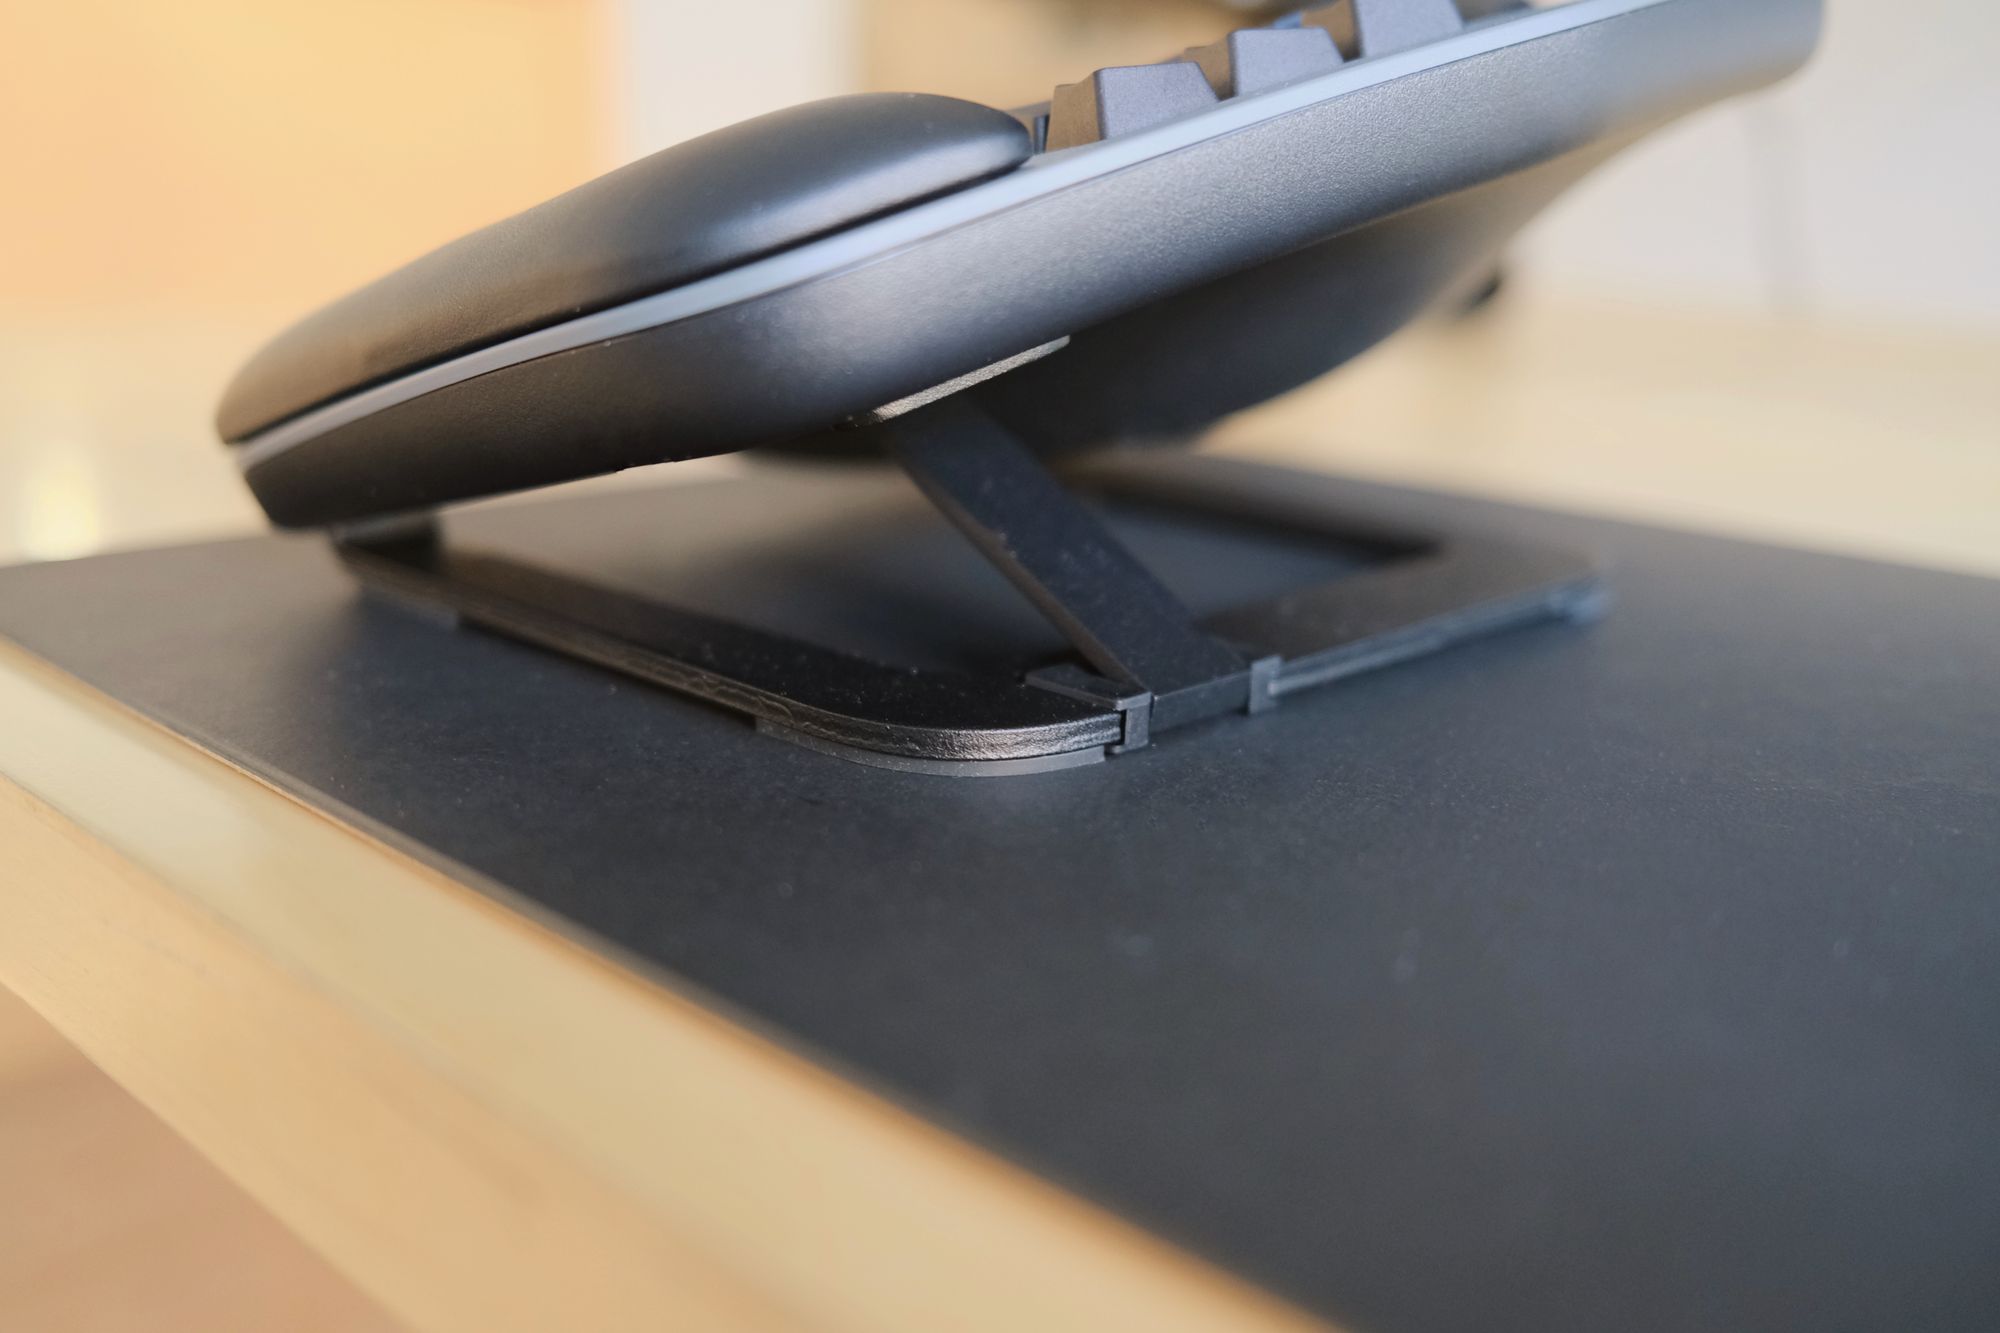
The Advantage360 is the first Kinesis keyboard with integrated tenting capability. It has three settings, the lowest one being the same as Advantage2. There is a button underneath you need to press to change the setting, and it's effortless to change the keyboard's height instantly.
The benefits of tenting are that it allows you to type in a more neutral position. However, I couldn't use the medium or high settings. For me, the initial stage is the most comfortable one.
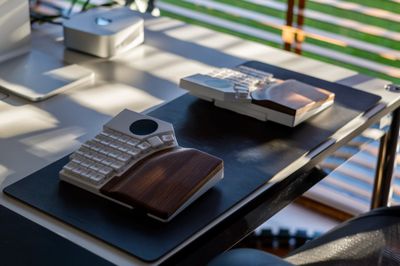
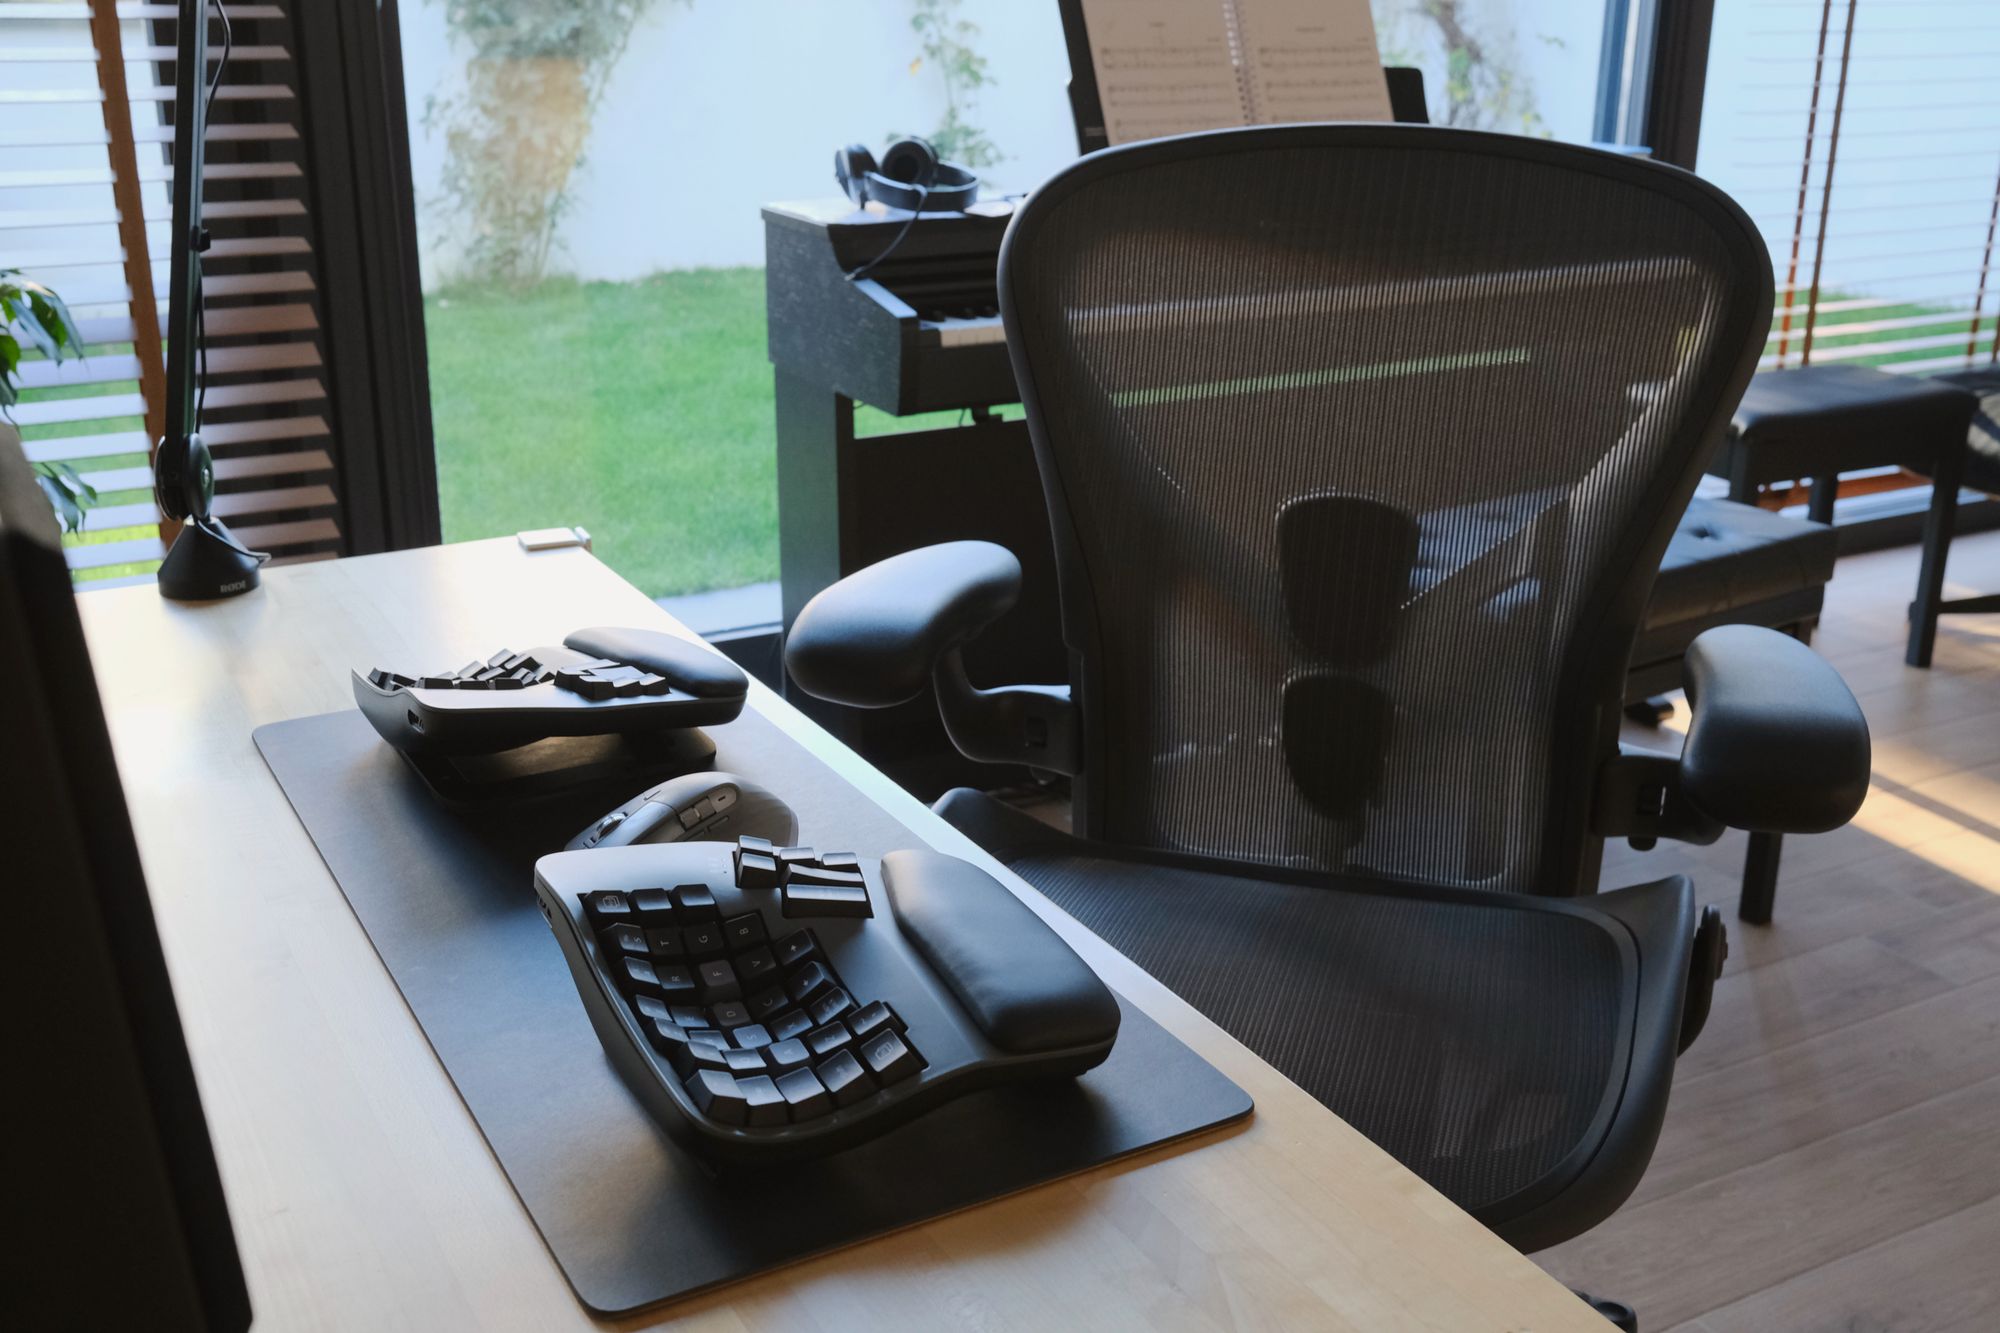
Palm support
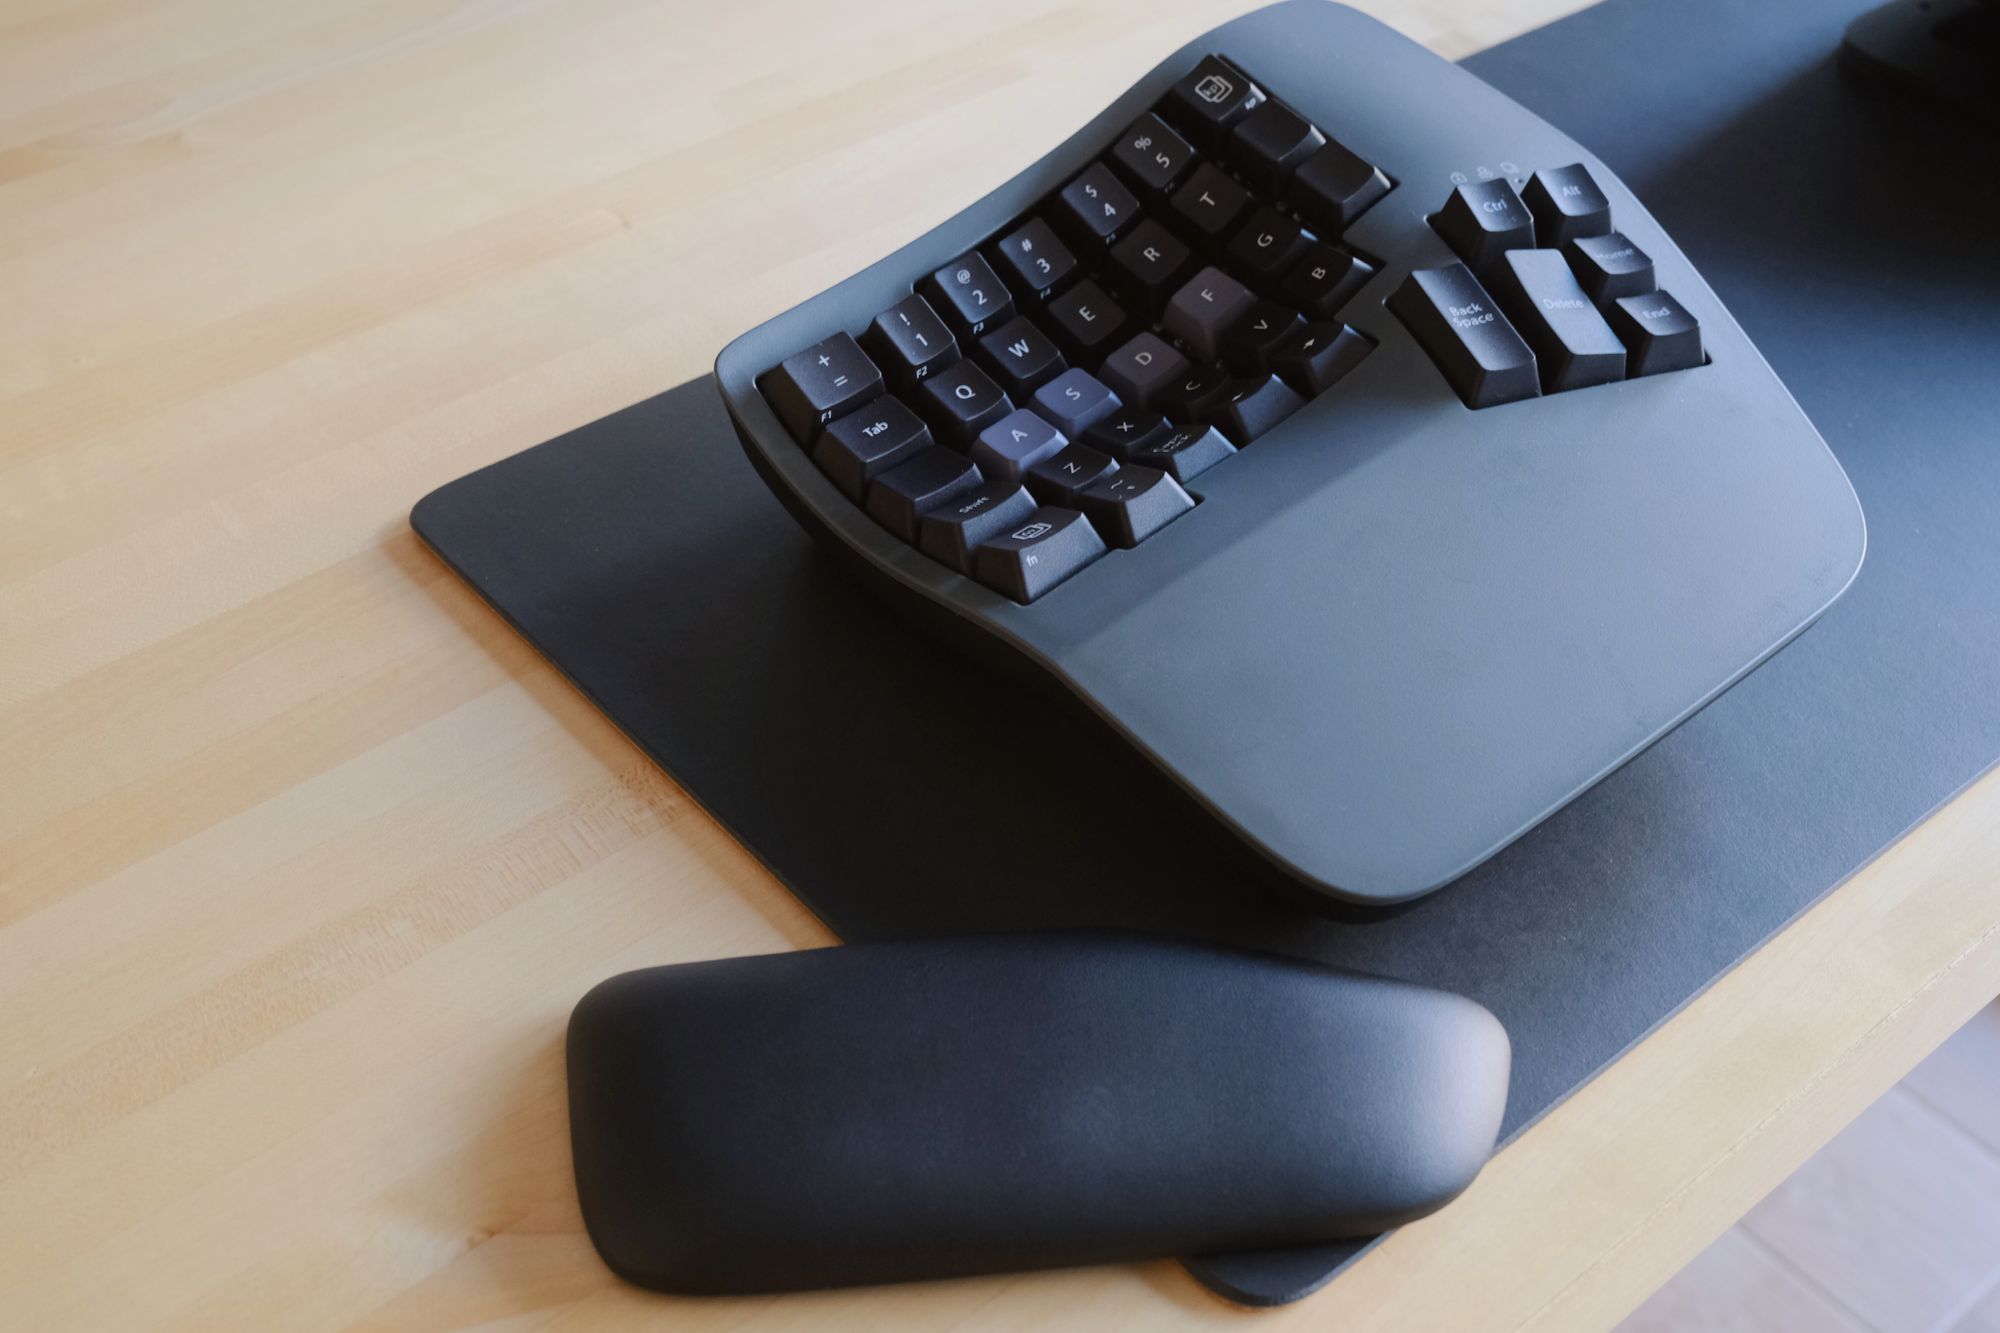
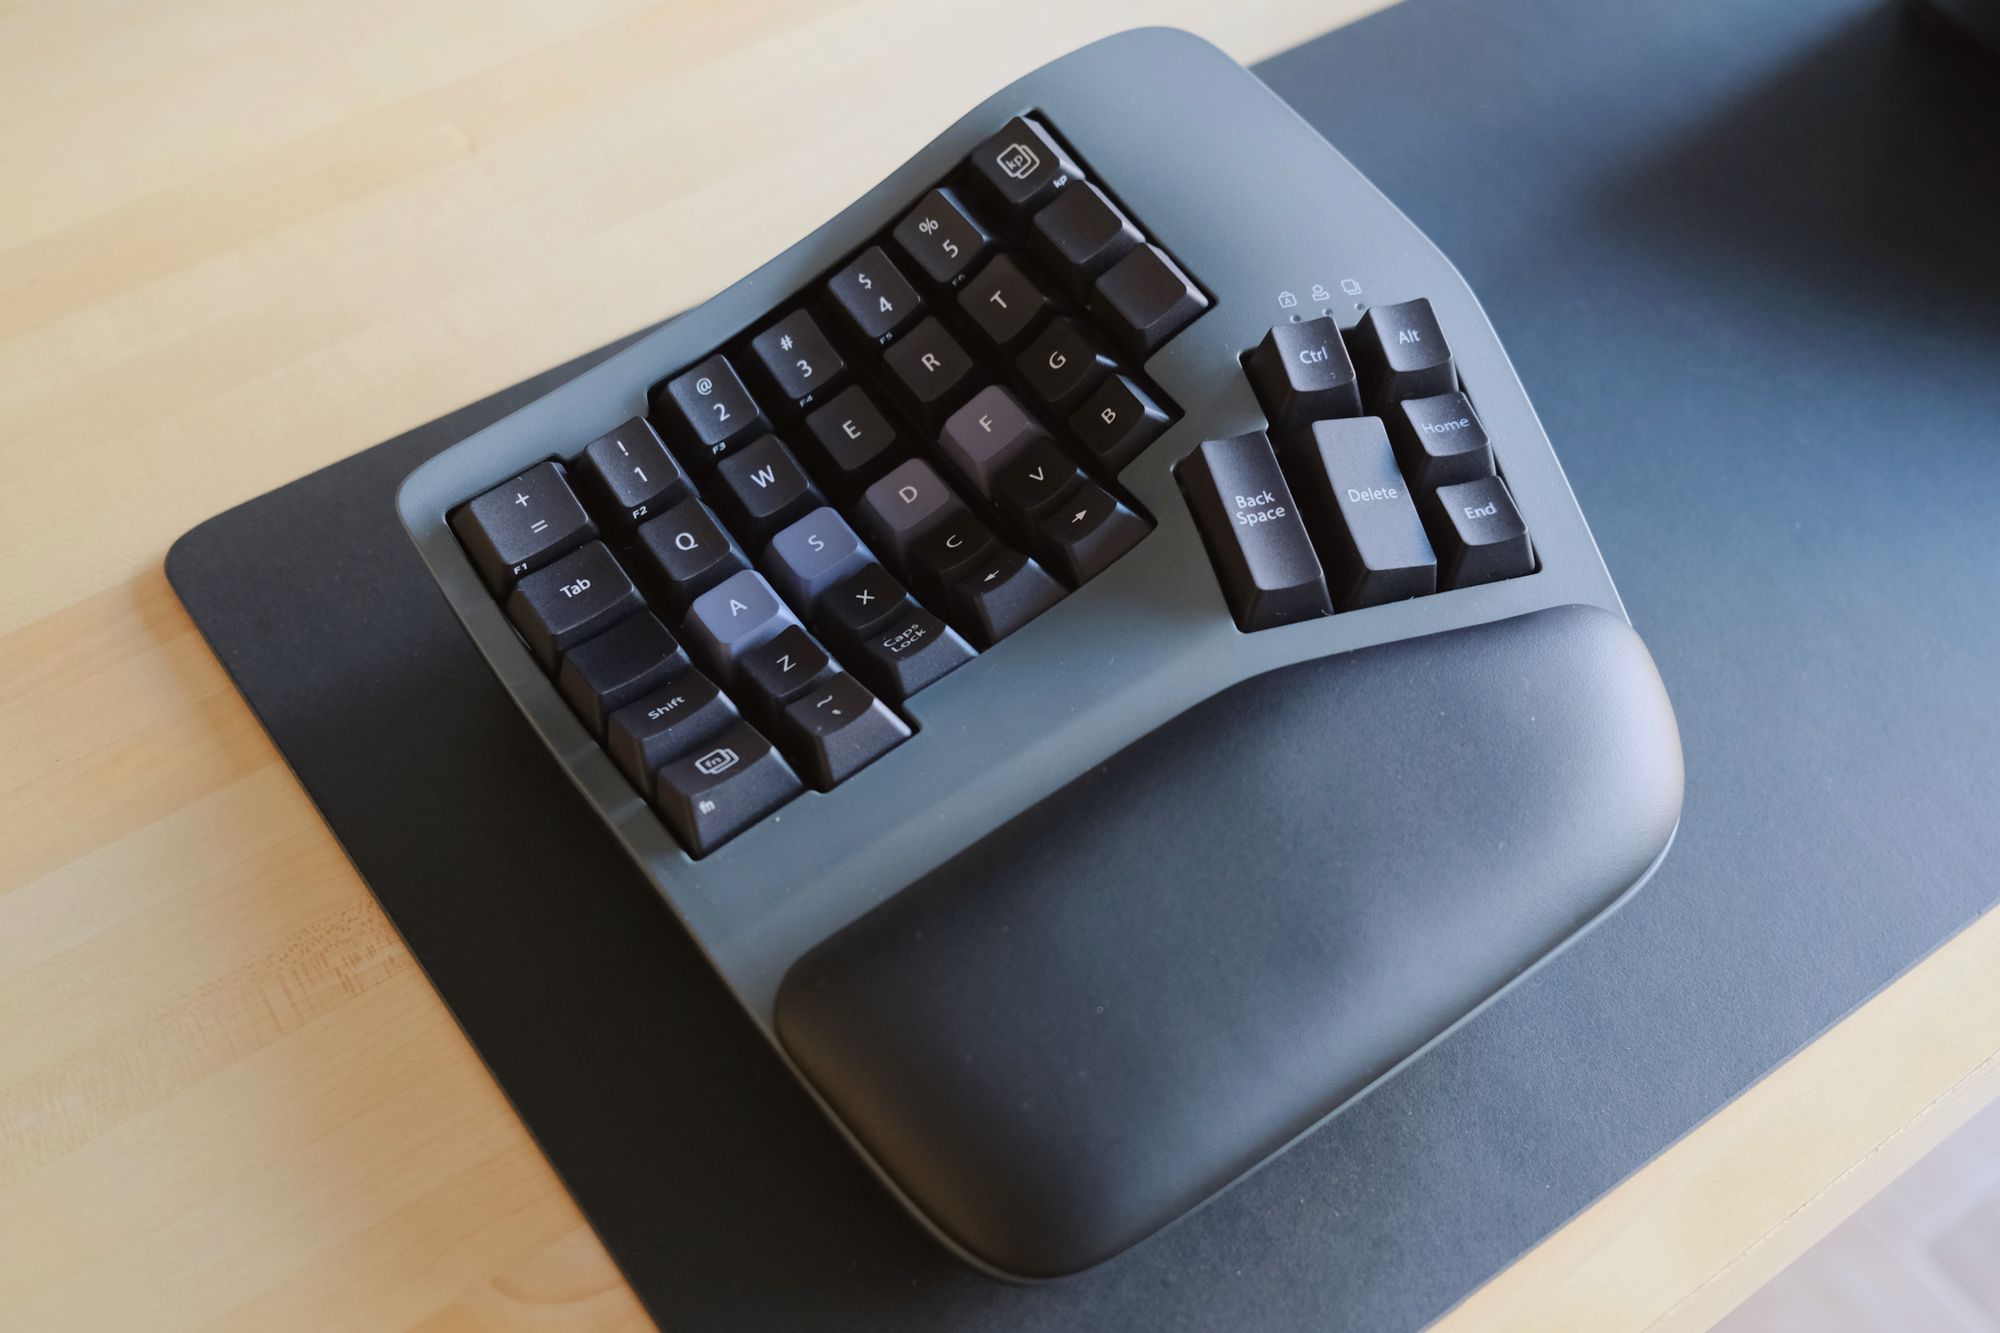
The Advantage360 keyboard, like the Advantage2 case, has integrated palm support. Unlike other keyboards, you don't need to purchase an extra wooden/plastic block or a separate cushion. For more comfort, though, Kinesis sells extra cushioned pads. What's very elegantly done is how they are attached to the keyboard. The palm has magnets, so they snap onto the keyboard case. It works out surprisingly well, and you can always take them out if you don't like them.
However, I discovered they had slid slightly on my usage in the past week. The magnets are not strong, so it doesn't hold in their place. I'm thinking of adding some plastic rubbers underneath to avoid sliding. The Advantage2 foam pads had 3M double-sided tapes, so they just stuck to the case. However, the new pads on the Advantage360 are way better in terms of comfort.
Key Switches and Keycaps

The Advantage360 Pro comes with Brown Switches (Gateron KS-9). I have never used Brown switches in my life, but I have used Kailh Red, MX Red Silent, and MX Clear. My last Kinesis Advantage 2 had the MX Red silents; I welcomed the change after switching to the Browns. I have my own office, so the sound is not an issue. And the Browns are not that loud, in my opinion. However, it surprised me how good it felt to get feedback when you pressed any key. The MX Red silents were linear; there was zero tactility or feedback; it felt like you were pushing into the void and suddenly hit a wall. But the Browns are different. It somehow made me also faster. I think it's a better choice for people who type a lot.
Here is a video about the sound and typing feel of the Advantage360 with the Gateron Brown keys:
Compared to my old Advantage2, I've explicitly chosen the PBT version for the Keycaps. The disadvantage is that the backlight will not shine through the keycaps; however, I also don't care much about backlighting, and I would care if they were RGB. RGB LEDs are cool because you can customize ZMK/QMK to change the color when you press certain combinations or switch layers. This time I wanted to use a keycap with more texture and something that doesn't shine with time.

I plan to use blank keycaps in the feature because, with all the customizations I made (more on this later), it doesn't make sense to use them. I also never look up the keyboard, so printed keycaps have little use.
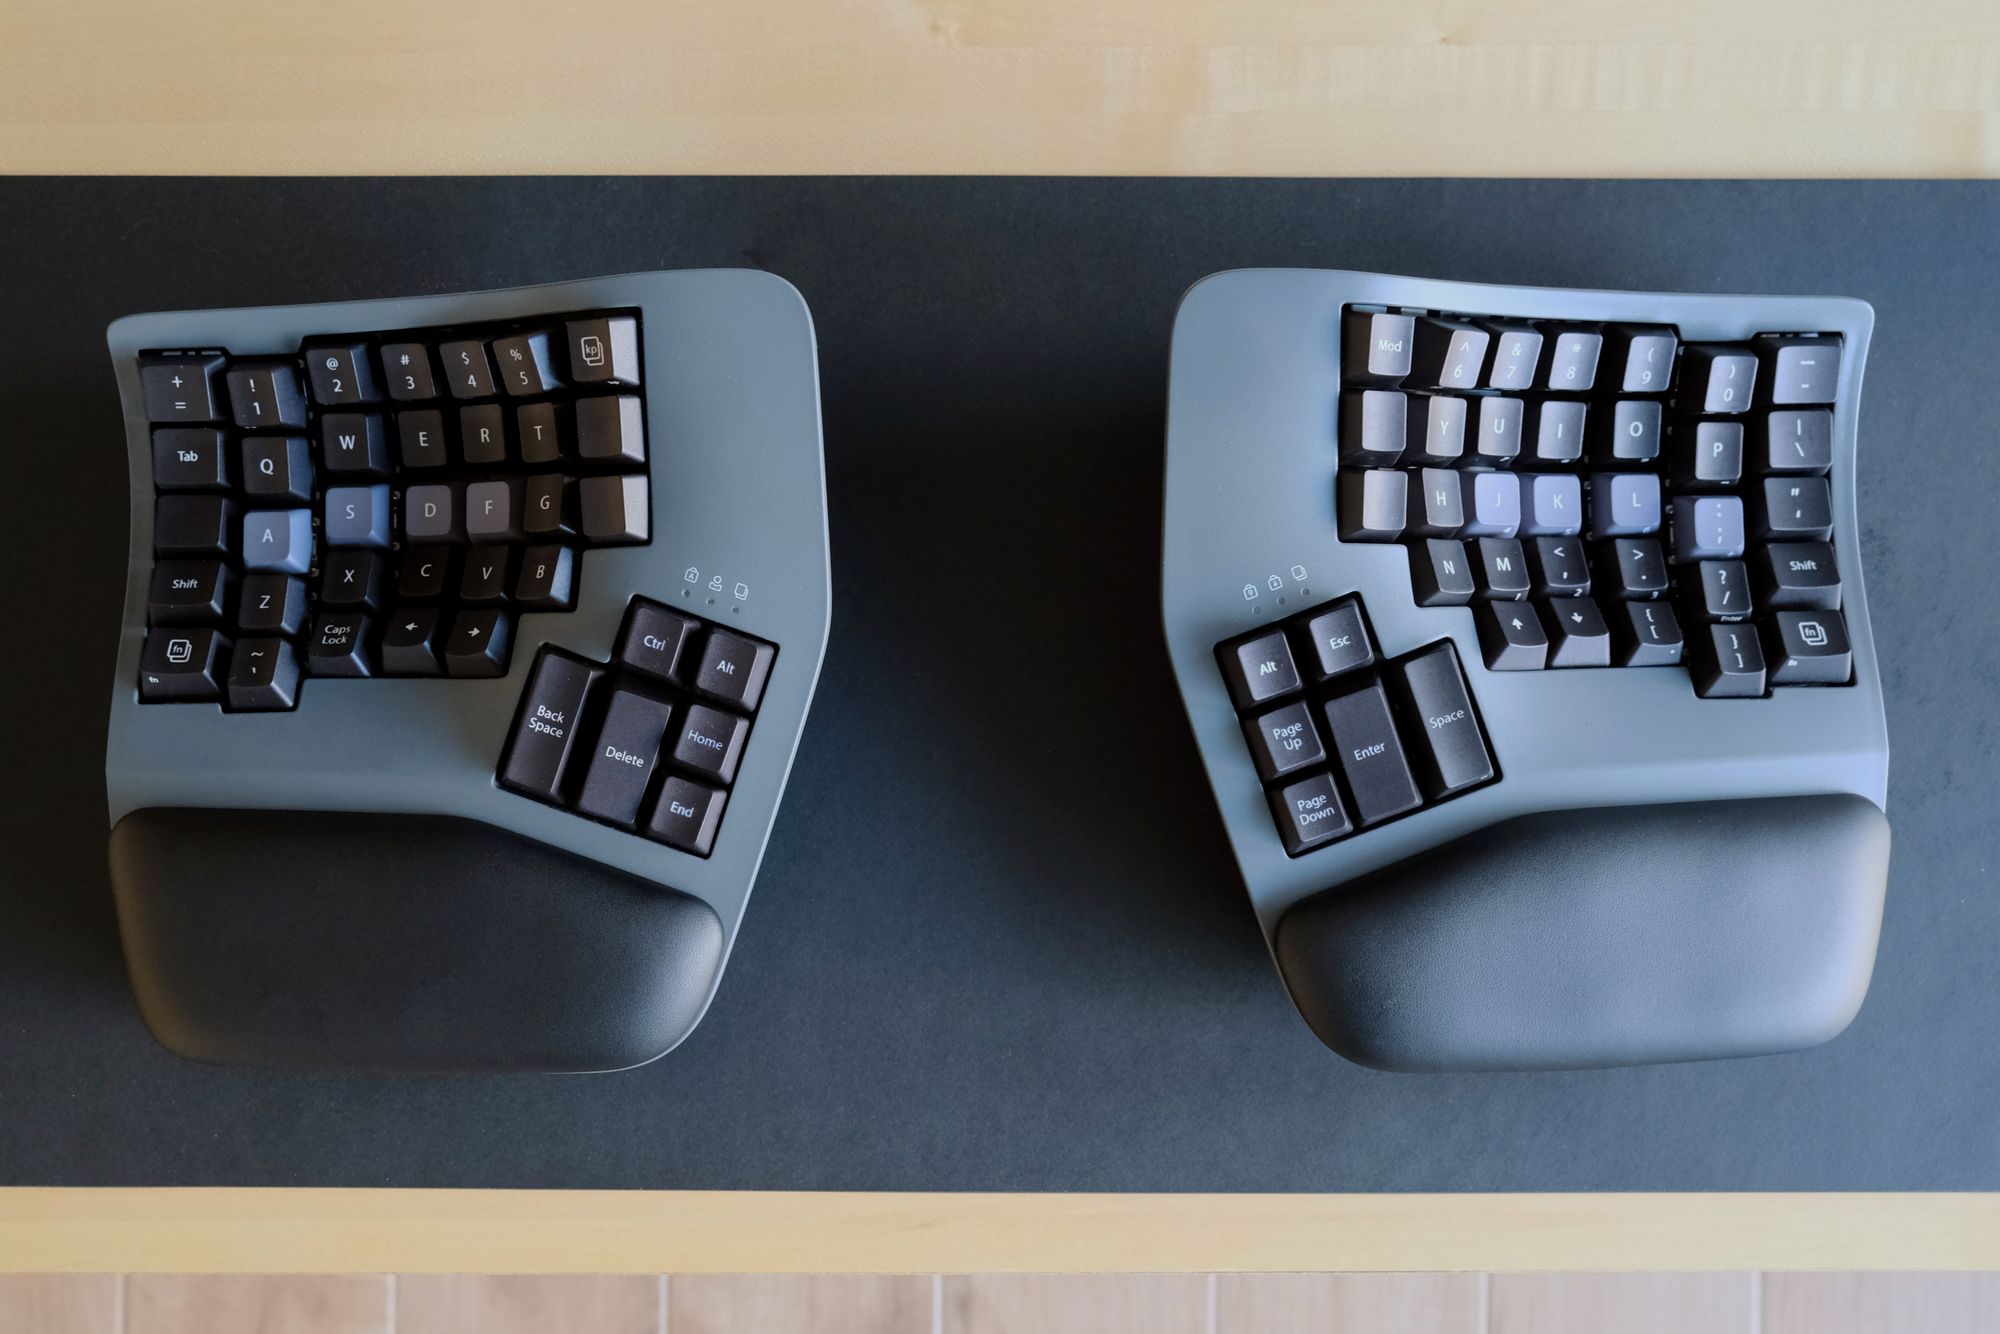
But there are some design choices that, I think, are better on Advantage2. First, the home row on the Advantage2 has sculpted, bigger keycaps, and it makes a difference because it helps with orientation. The sculpted keycaps allow you to find your place while typing quickly. With time, you get customized to the Advantage360, but I think it's a step back from the Advantage2.


Second, the thumb keys on the Advantage2 had unique, taller keycaps for the Ctrl, Alt, Cmd/Win keys. They were much easier to reach. They replaced them with a shorter keycap or, let's say, normalized it with all the other keycaps. Because my Raycast/Alfred (finder applications) and the ESC key are on those keys, I immediately found it cumbersome.
Six new hotkeys
The Kinesis Advantage360 doesn't come with the Function keys row anymore. They trimmed down that row entirely but gave us six standard-sized keys above the thumb clusters. I didn't use the F-xx rows that much, so the change didn't bother me. However, I welcomed the new hotkeys. They are also used for flashing your firmware and checking your battery level. I've assigned some to OS-specific functions, such as locking my MacBook.
Battery life

Each side has a 1500MAH battery that lasts for a couple of days when you use the backlights. However, if the backlighting is disabled, it can be used for weeks. Since I unboxed the package, I didn't charge them for the past six days. The Advantage360 also goes into standby mode (after 30 seconds), so they don't consume much energy when not in use. Surprisingly, it also wakes up instantaneously. You charge both halves by using a USB-C cable. Both halves also have a switch to turn them on/off.
Firmware flashing and ZMK
The Advantage360 Pro comes with ZMK, an open-source firmware that allows you to customize every keycap. It was one of the reasons I purchased the Advantage360, so I don't have to mod it again to add QMK or ZMK support. There is no chance the SmartSet proprietary firmware that Kinesis uses for Advantage2 is better. ZMK is miles ahead in terms of functionality. Yes, it's not as easy as SmartSet to configure; however, it takes a couple of docs to read to understand what's happening. Once you get the hang of it, it's easier. Because ZMK is also used by plenty of other people, you get more support in the long term.
What I found interesting is how you built firmware. Kinesis has an open-source repository that you fork and make your changes. It has a GitHub actions workflow, and each push triggers a workflow run, which generates the final firmware files. So, you don't have to install anything on your local host to update the firmware. I've found it pretty neat. Of course, It's faster to build it locally on my machine, and the repo also has a handy Docker image and script that you can use. The whole setup is straightforward.

I have one issue with it, though. Kinesis's documentation is all over the place and not obvious; some were outdated. It also leads you to use a UI, which you need to authorize with your GitHub repo so that the UI can push and commit your changes. I started using this Web app initially but found it lacking features (like there was no way to define new constants or change existing ZMK settings, such as quick_tap_ms).
The firmware upgrade process is also cumbersome because of the two halves. Unless my previous QMK-based keyboards, you'll have to update each half separately. Luckily, it's easy to flash the keyboards. You press Mod + Hotkey 1 or Mod + Hotkey 3 keys, which mounts the halves and puts the keyboard into Bootloader mode. You drag & drop the files, and the flashing is automatically done. The keyboard halves unmount themselves after successful flashing. The process is easy after doing it a couple of times, but doing it for both halves is cumbersome.
Custom ZMK configuration
I was able to port all my QMK settings properly to ZMK. I struggled initially because the syntax was entirely different, and ZMK lacked some pre-defined macros, such as the Hyper key. But I've added them and configured ZMK to feel like my old QMK.
Some notable changes I've made are:
- Backspace is mapped to Cmd ⌘. I use ⌘ a lot, and having it on my thumb cluster makes my everyday tasks more ergonomic.
- Delete is mapped to Backspace because it's more natural.
- Right Ctrl is mapped to Esc, and I think it's the perfect place for the Esc key. Close to when you need it, but not so close that it hinders you.
- Because there are no Function (F1, F2, …) keys on the Advantage Pro 360, the Esc key is moved to the CapsLock. I never used Capslock, either, and it was always mapped to Ctrl. So now, instead of mapping the Capslock to Ctrl, I mapped Esc to Ctrl.
- The
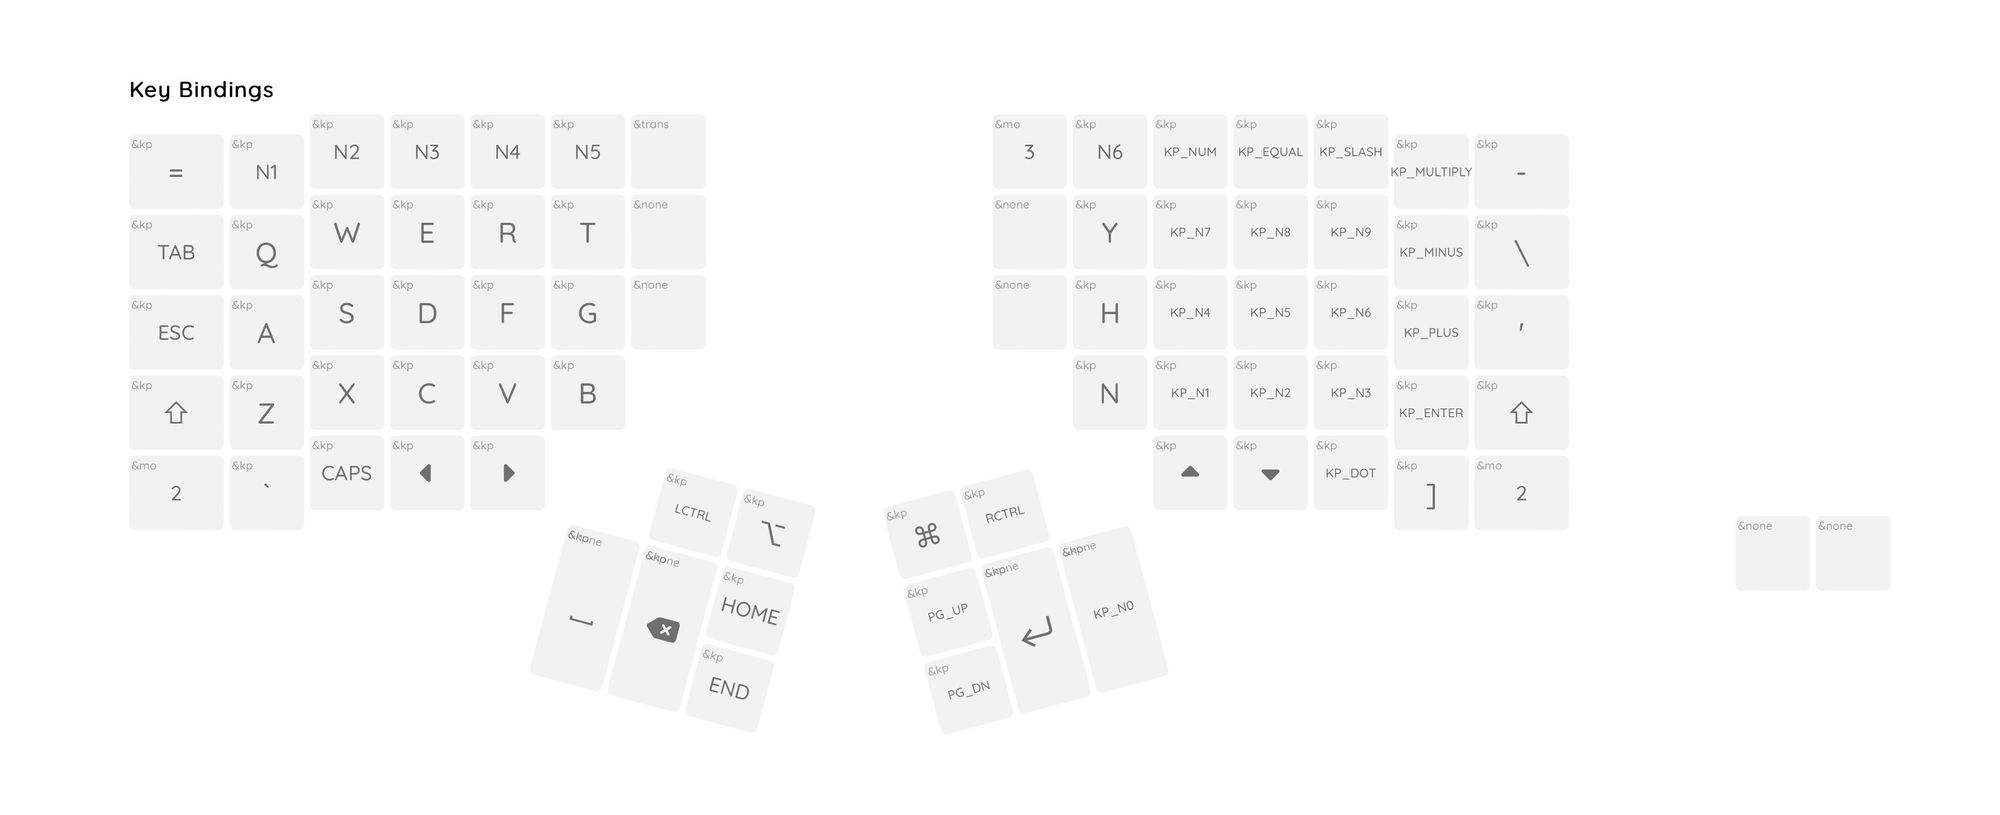
“quote key above the Shift key is a mod-tap. It means holding it means Ctrl, but tapping outputs the'or"characters. I found it very ergonomic to have the Ctrl key on both sides of your keyboard, and depending on which ctrl key combination I use, I use the opposite Ctrl key. So ctrl + p means I press the left ctrl key and the P key. Ctrl + a means I press and hold the right"key (which triggers the right ctrl when holding) and the A key. - The F key is a layer tap and holding the F key switches to the Keypad
kplayer. That way, I can tap any output number by holding down the F key and pressing any of the keypad keys on my right keyboard halve. - Space is a layer tap, and holding it switches it to the Function
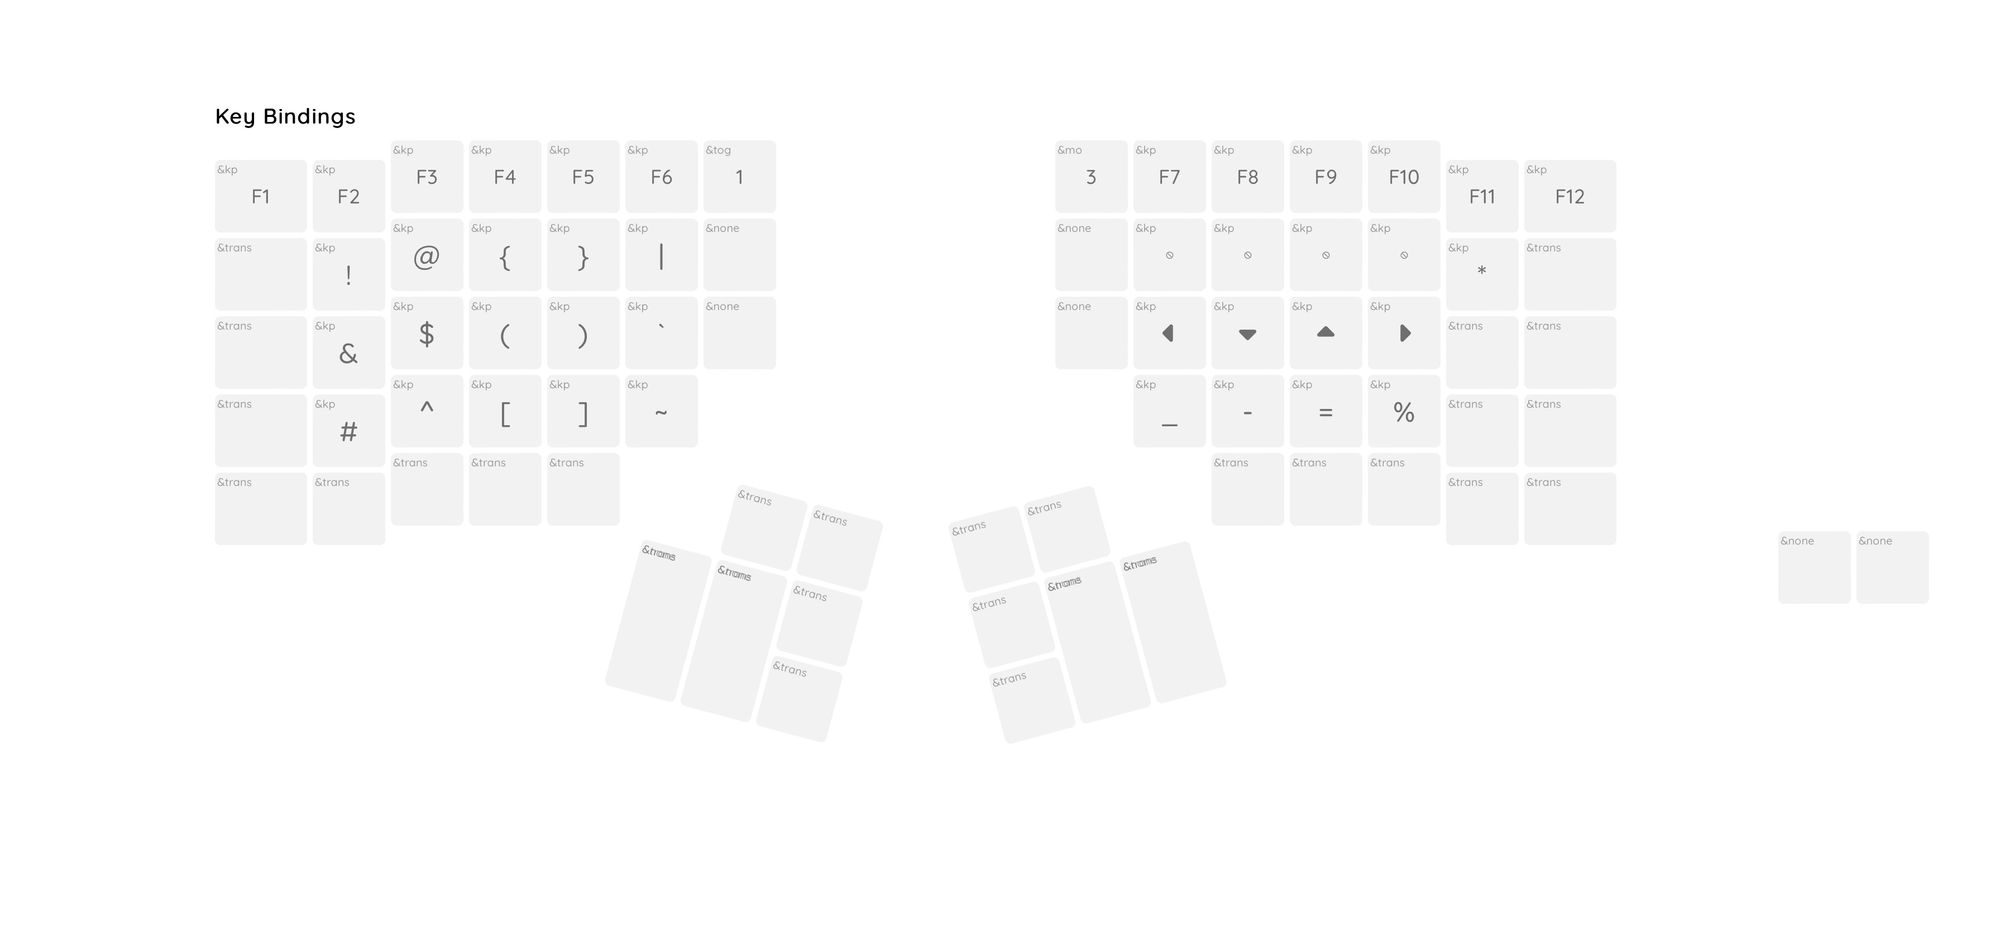
fnlayer; a tap is Space. But I also configured withquick_tap_ms = <200>;, this has the effect that if you quickly tap Space several times and hold it, it behaves like a Space button and is no longer a switch key for the FN layer. It's handy if I want to indent lines or code via Space instead of Tab. - The whole FN layer contains a set of all my highly used symbols. Holding Space and pressing a key on the left half of my keyboard prints symbols like
! @ # $ % ^ & ( ) { } [ ] | ~ `Once you get used to it, it's much faster than using Shift and numbers to print them. You can see the full fn layer config here: https://github.com/fatih/Adv360-Pro-ZMK/blob/V2.0/config/adv360.keymap#L79 - I have defined two constants,
HYPandHYPER. Hyper is a combo key that simultaneously presses Cmd + Option + Alt + Shift. Pressing all four of these is not very comfortable, but the beautiful thing about a Hyper key is you can create custom global shortcuts to apps. Like Hyper + 8 opens 1Password for me, Hyper + 5 CleanshotX and Hyper + 7 Raycast. Previously, I had to use some key combinations to avoid race conditions or duplications. The Left Ctrl, Left Alt, Home, and End keys on my left thumb clusters are all Hyper keys.
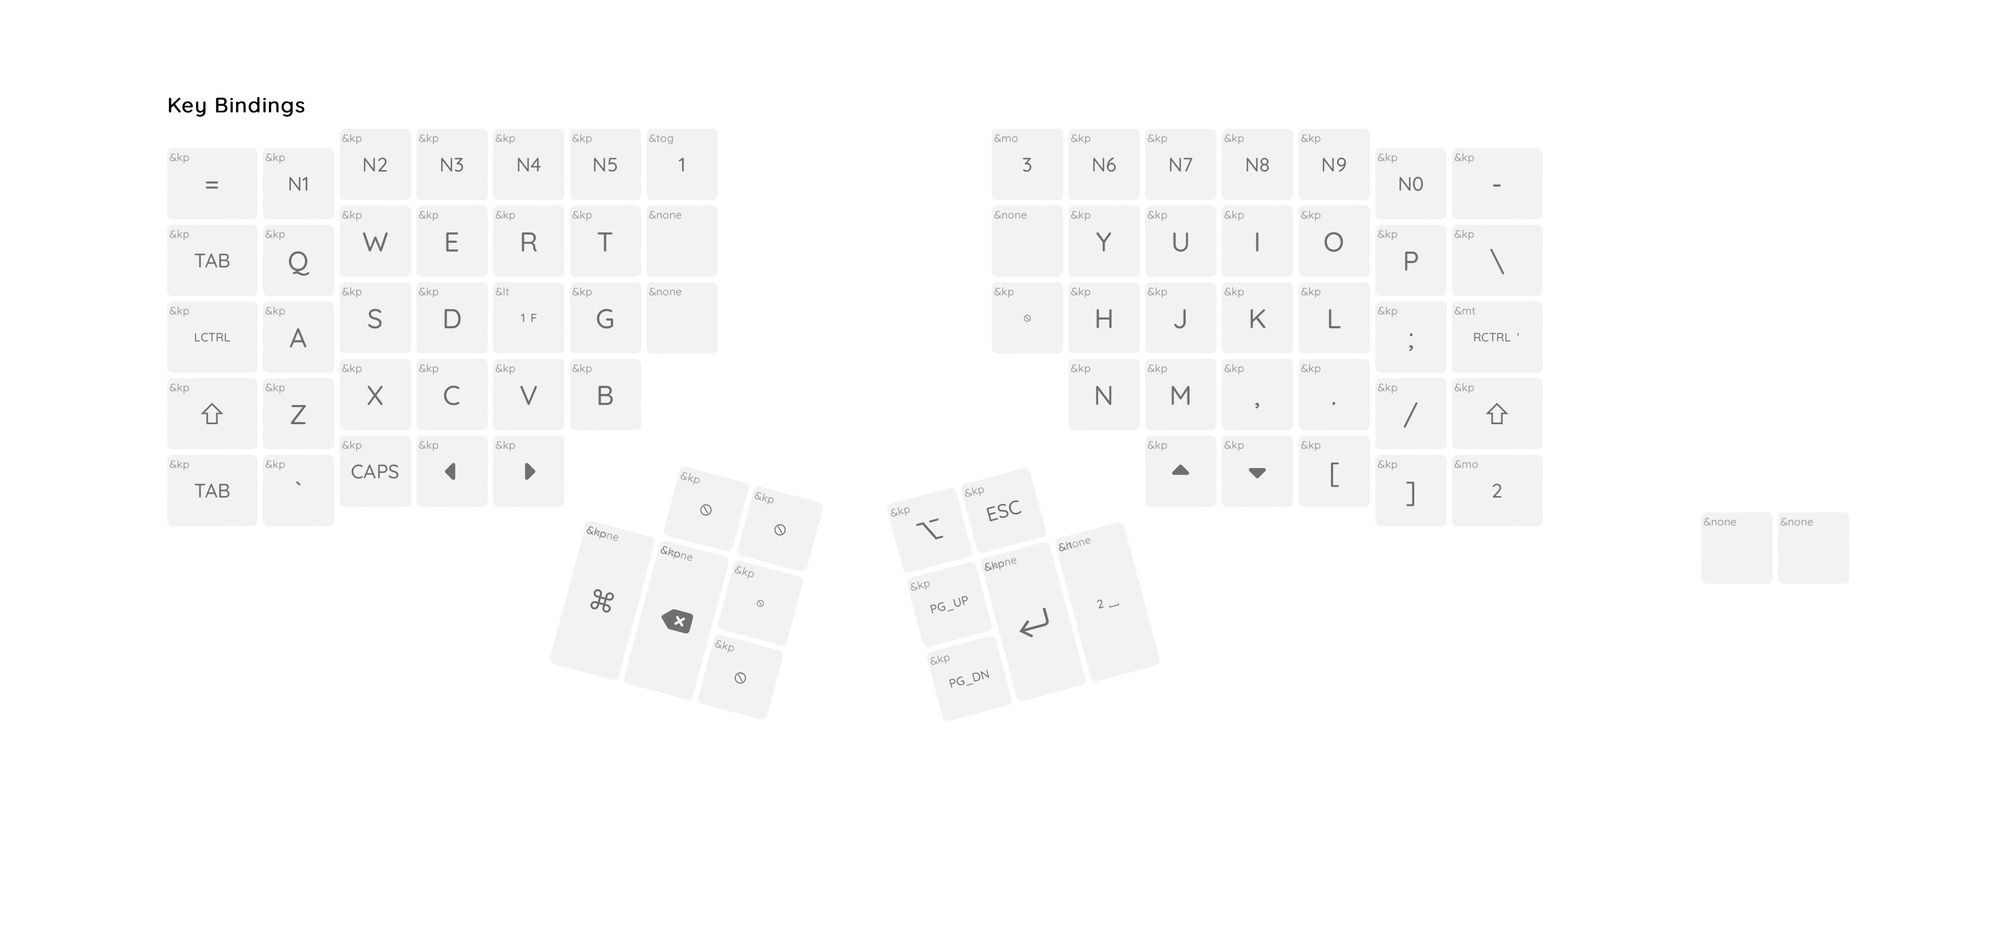
To see my complete ZMK configuration, take a look at the .keymap file: https://github.com/fatih/Adv360-Pro-ZMK/blob/V2.0/config/adv360.keymap
Price and Customs
I live in Turkey. It's hard to buy custom goods, especially a keyboard such as Advantage360. Luckily, Kinesis released the first batch of Adv360 keyboards via Drop.com. And Drop.com would ship from the U.S. to Turkey.
During these eleven months of waiting, the customs law here in Turkey changed numerous times. Because the keyboard cost more than 150 euros, I could no longer withdraw it from customs, and I had to arrange a company specialized in importing goods from customs. After some time preparing notarized documents and paying almost %50 of the base price I paid for the Advantage2 360 Pro, I received it last week. I spent the followings:
- Advantage360 Pro with Dye-Subbed PBT keycaps: $439 (this was a pre-order price)
- Palm pads: $25
- Shipping: $20
- Customs & Tax: $225
So, in total, I paid: $709.
It's not cheap, but neither was my initial Advantage2. However, it's something I use daily, sometimes up to 8 hours, and I think purchasing and spending this kind of money is OK if it's part of your daily job. At least for me.
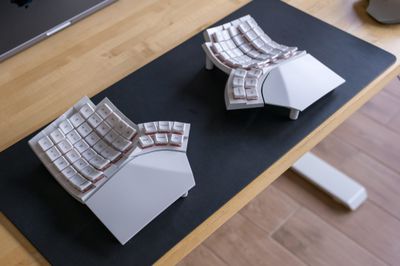
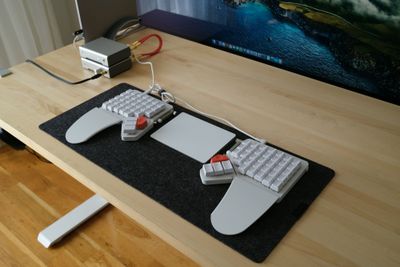
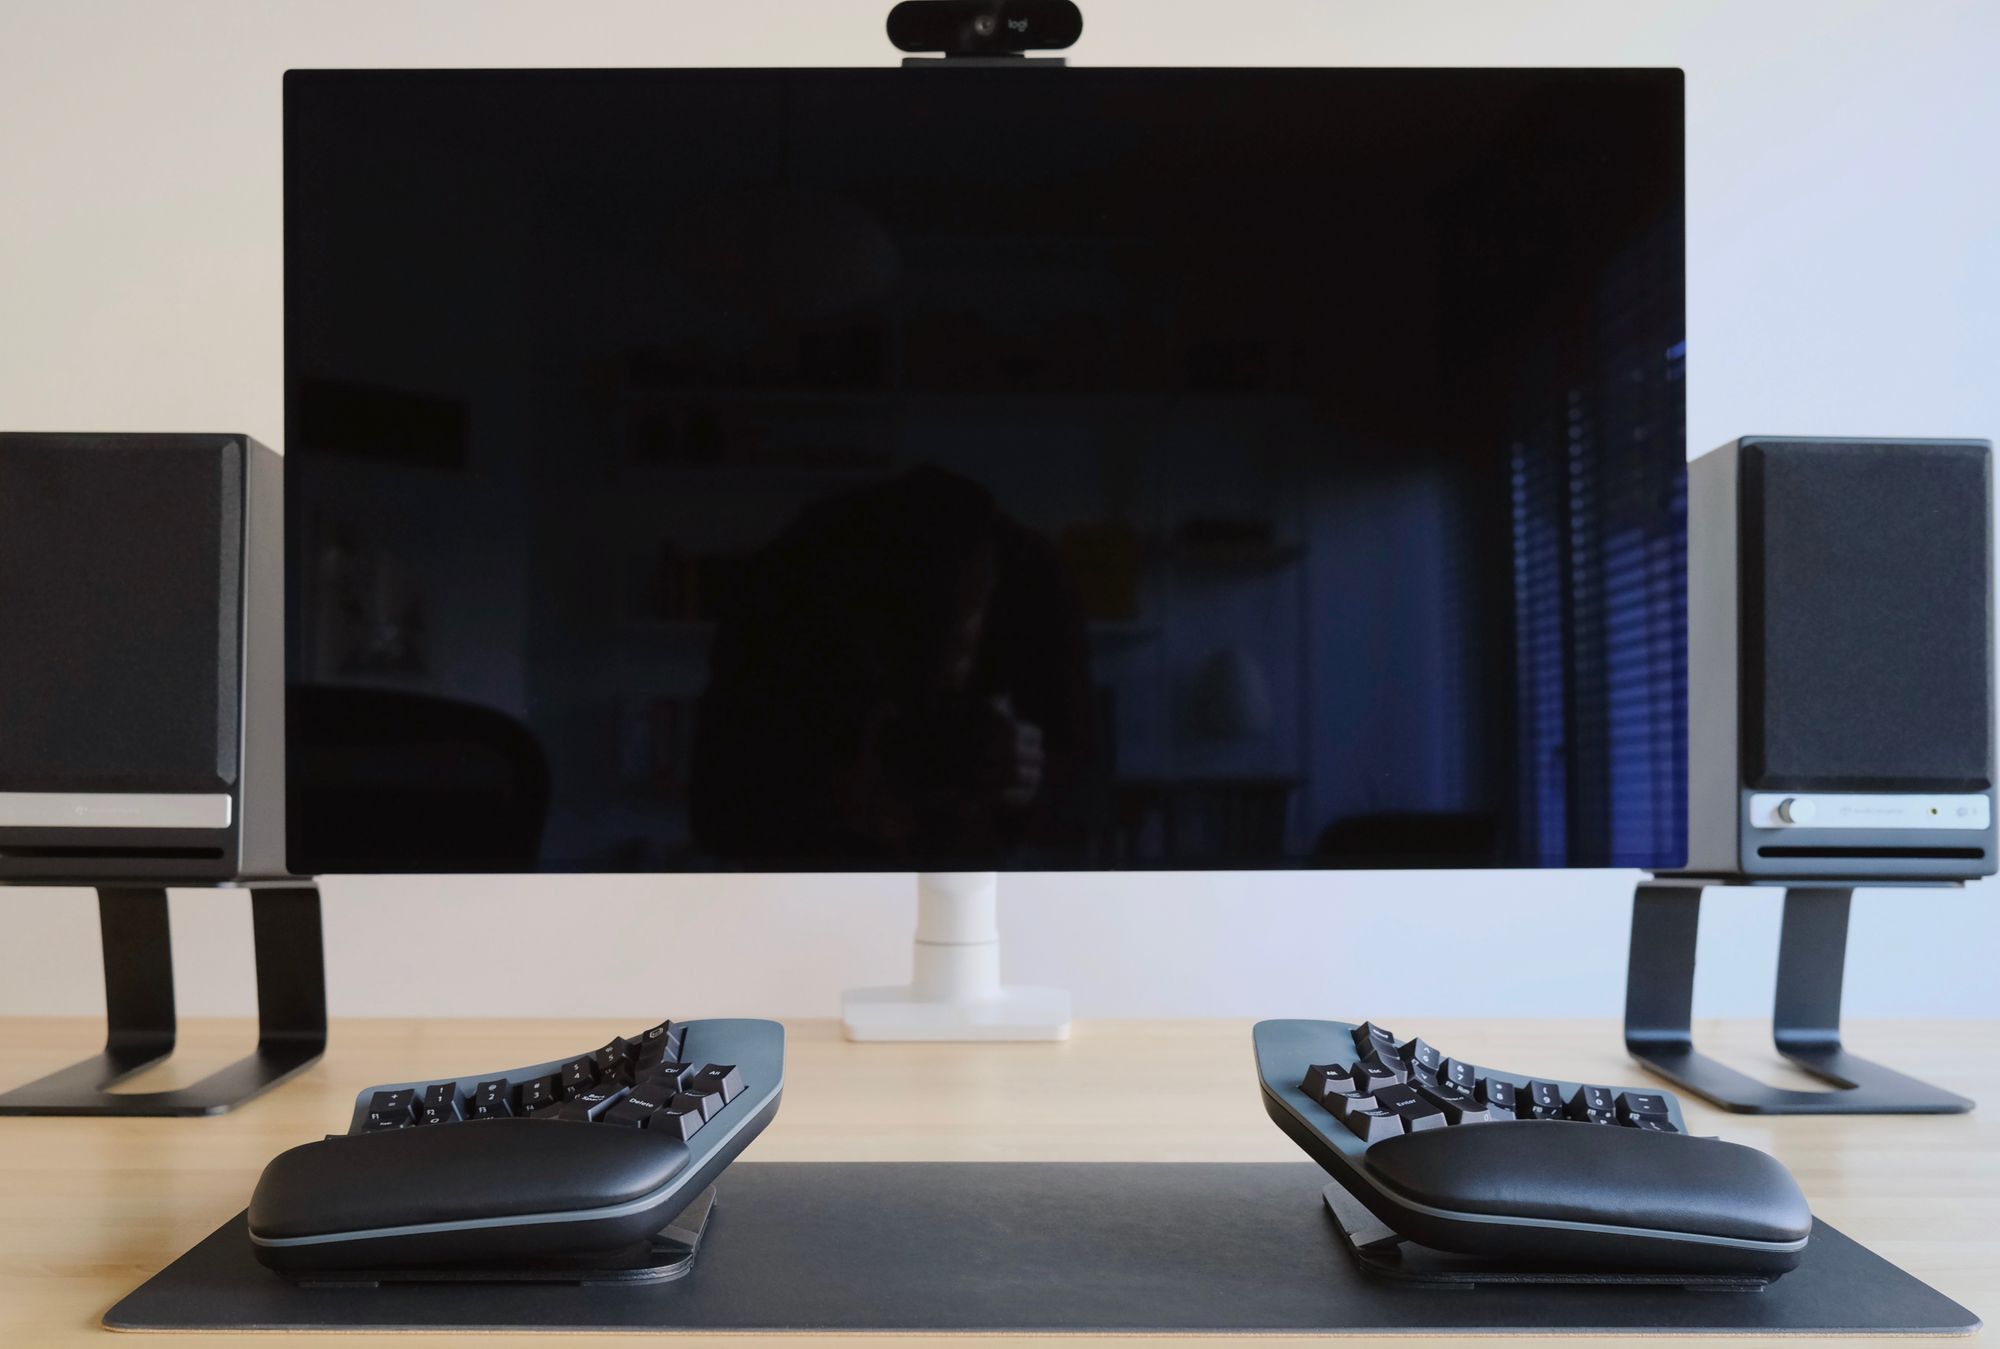
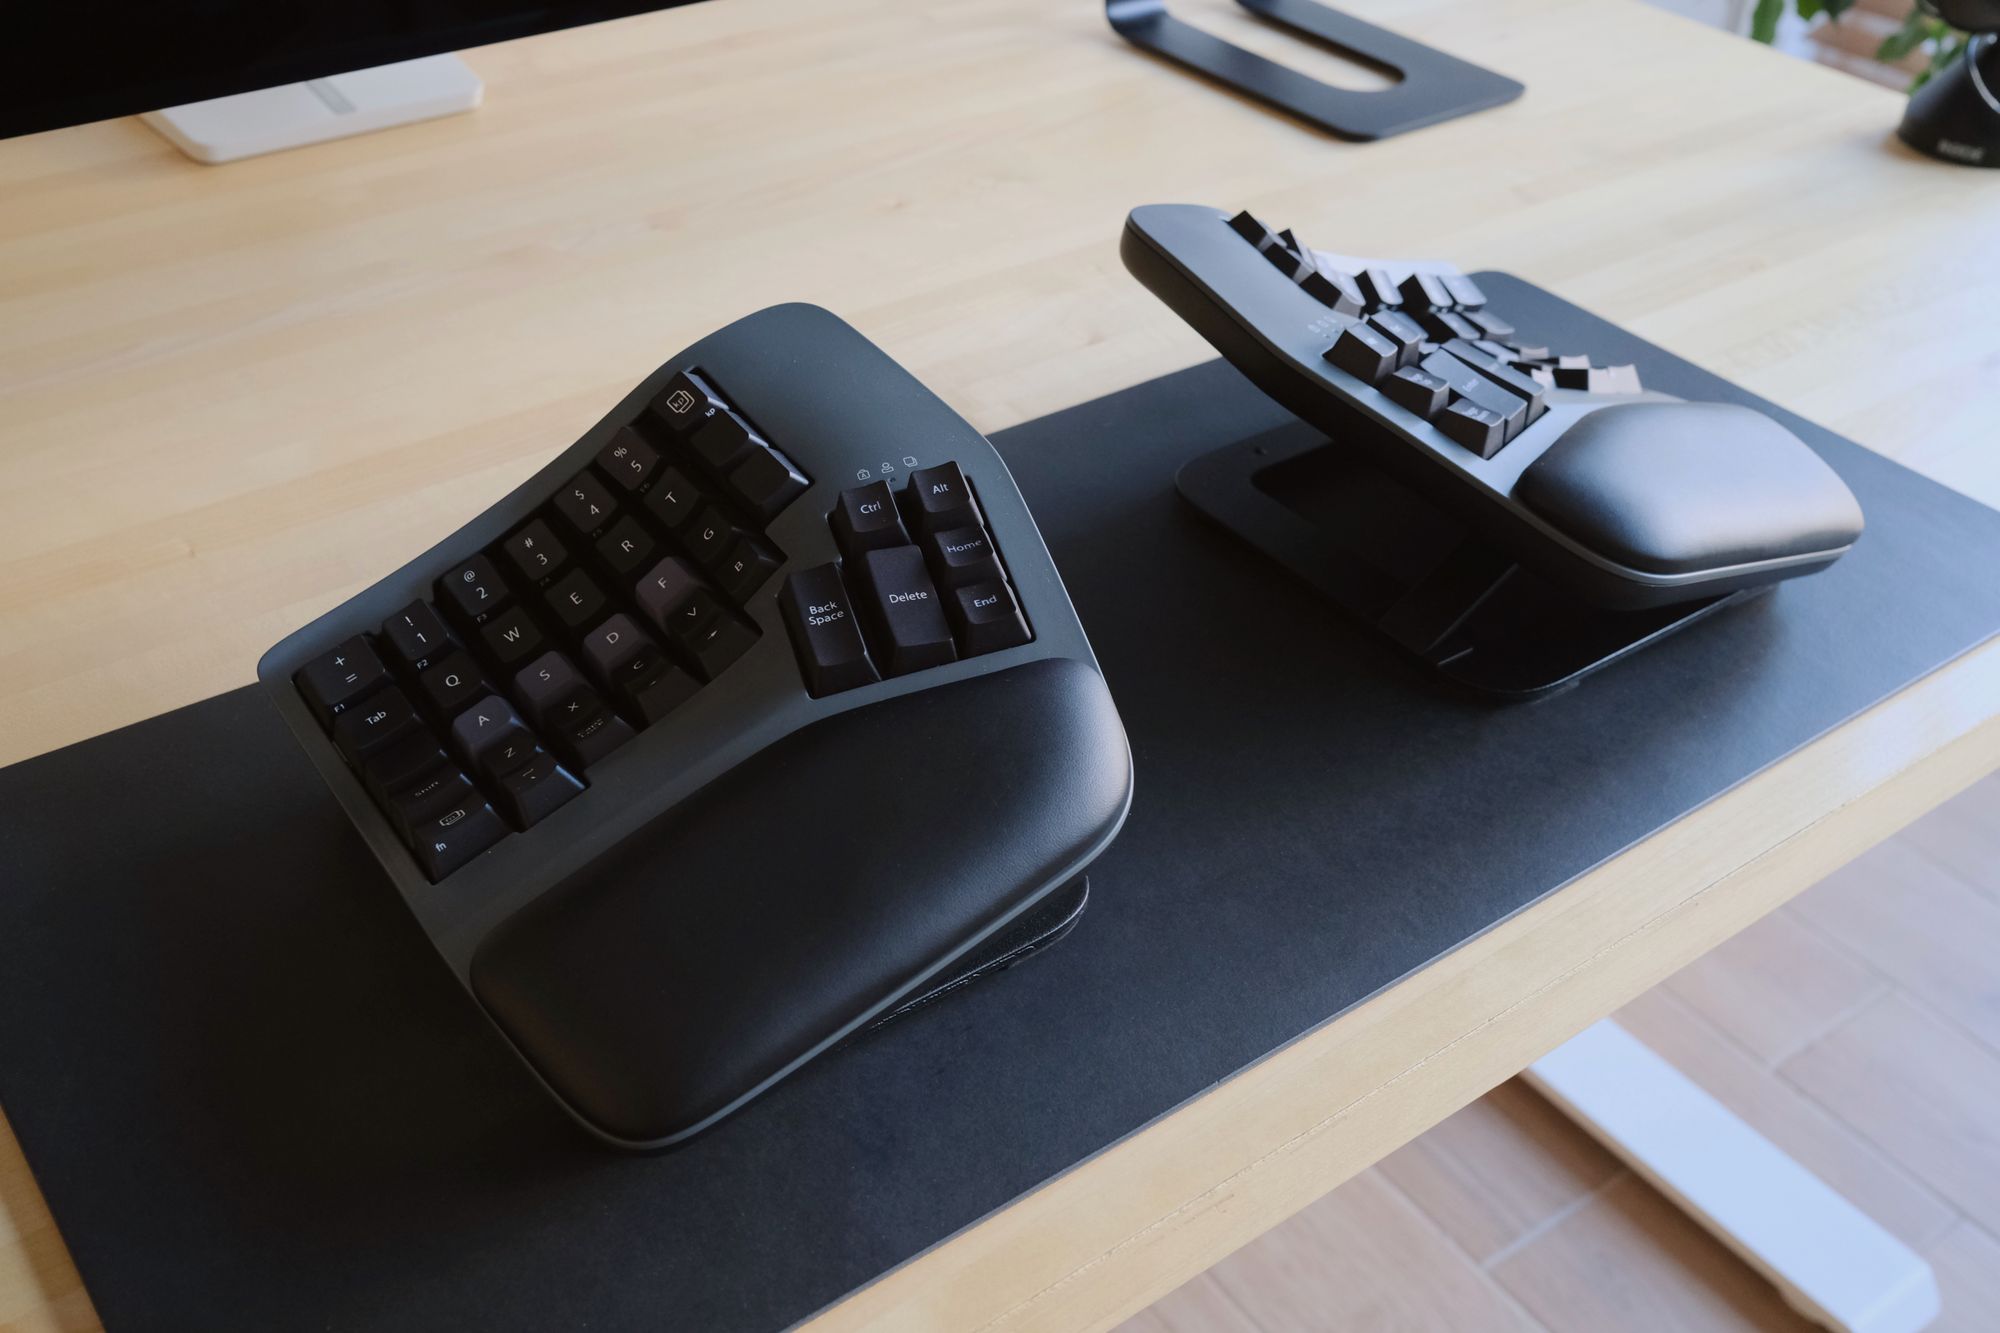
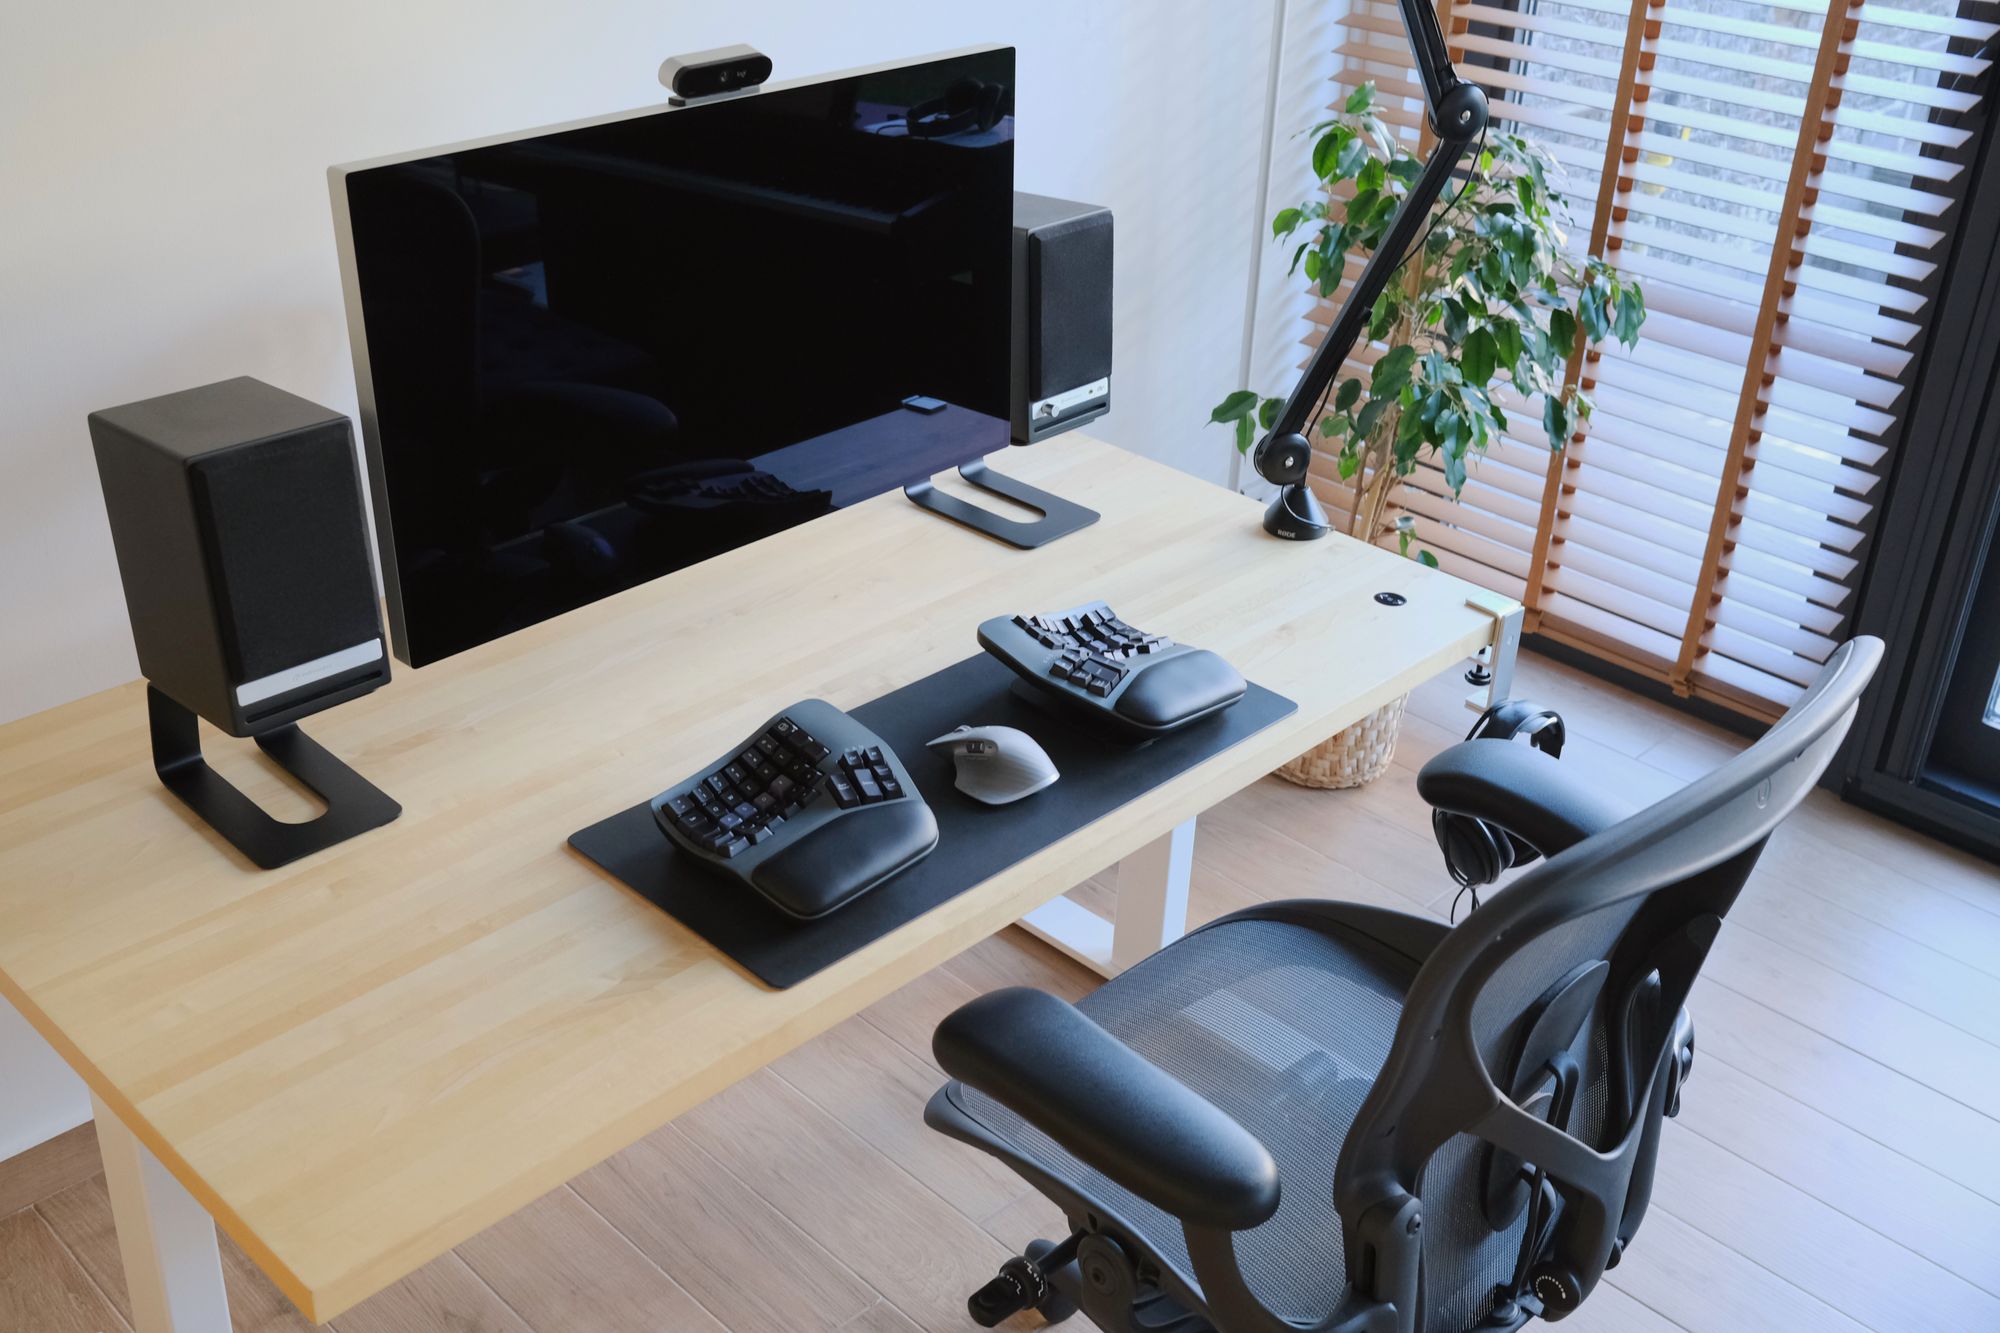
Wireless Split Design
One of the most significant changes and the number one decision to purchase the Advantage360 was its wireless split design. You don't even need to connect each half. Thanks to ZMK, both half units work together (one works as a primary, the second as a secondary), and they work wirelessly communicating with each other. Yes, they are annoyances, such as during the firmware flashing, but you don't do that often. Once you settle down on your custom settings, you rarely change them.
Second, the split design allowed me now to move the halves to my shoulder widths. They are more comfortable compared to the old version. It's not a big difference, but I felt a more relaxed shoulder the past few days. The split design also allows me to put the mouse (or trackball if you have one) in the middle of both keyboards, which makes using the mouse more comfortable.
One question I had in mind was whether Bluetooth would introduce any lagging. But it works surprisingly excellent. The keyboards wake up from sleep immediately, and you barely feel any latency. It works like it's wired. There was only one issue that I've seen recently. I restarted macOS, and I couldn't type because Bluetooth was disabled. Somehow, plugging a cable into my Advantage360 also didn't work out. I wasn't sure whether it was a Firmware issue or a limitation of ZMK. I'll update the blog post if I find out the main reason.
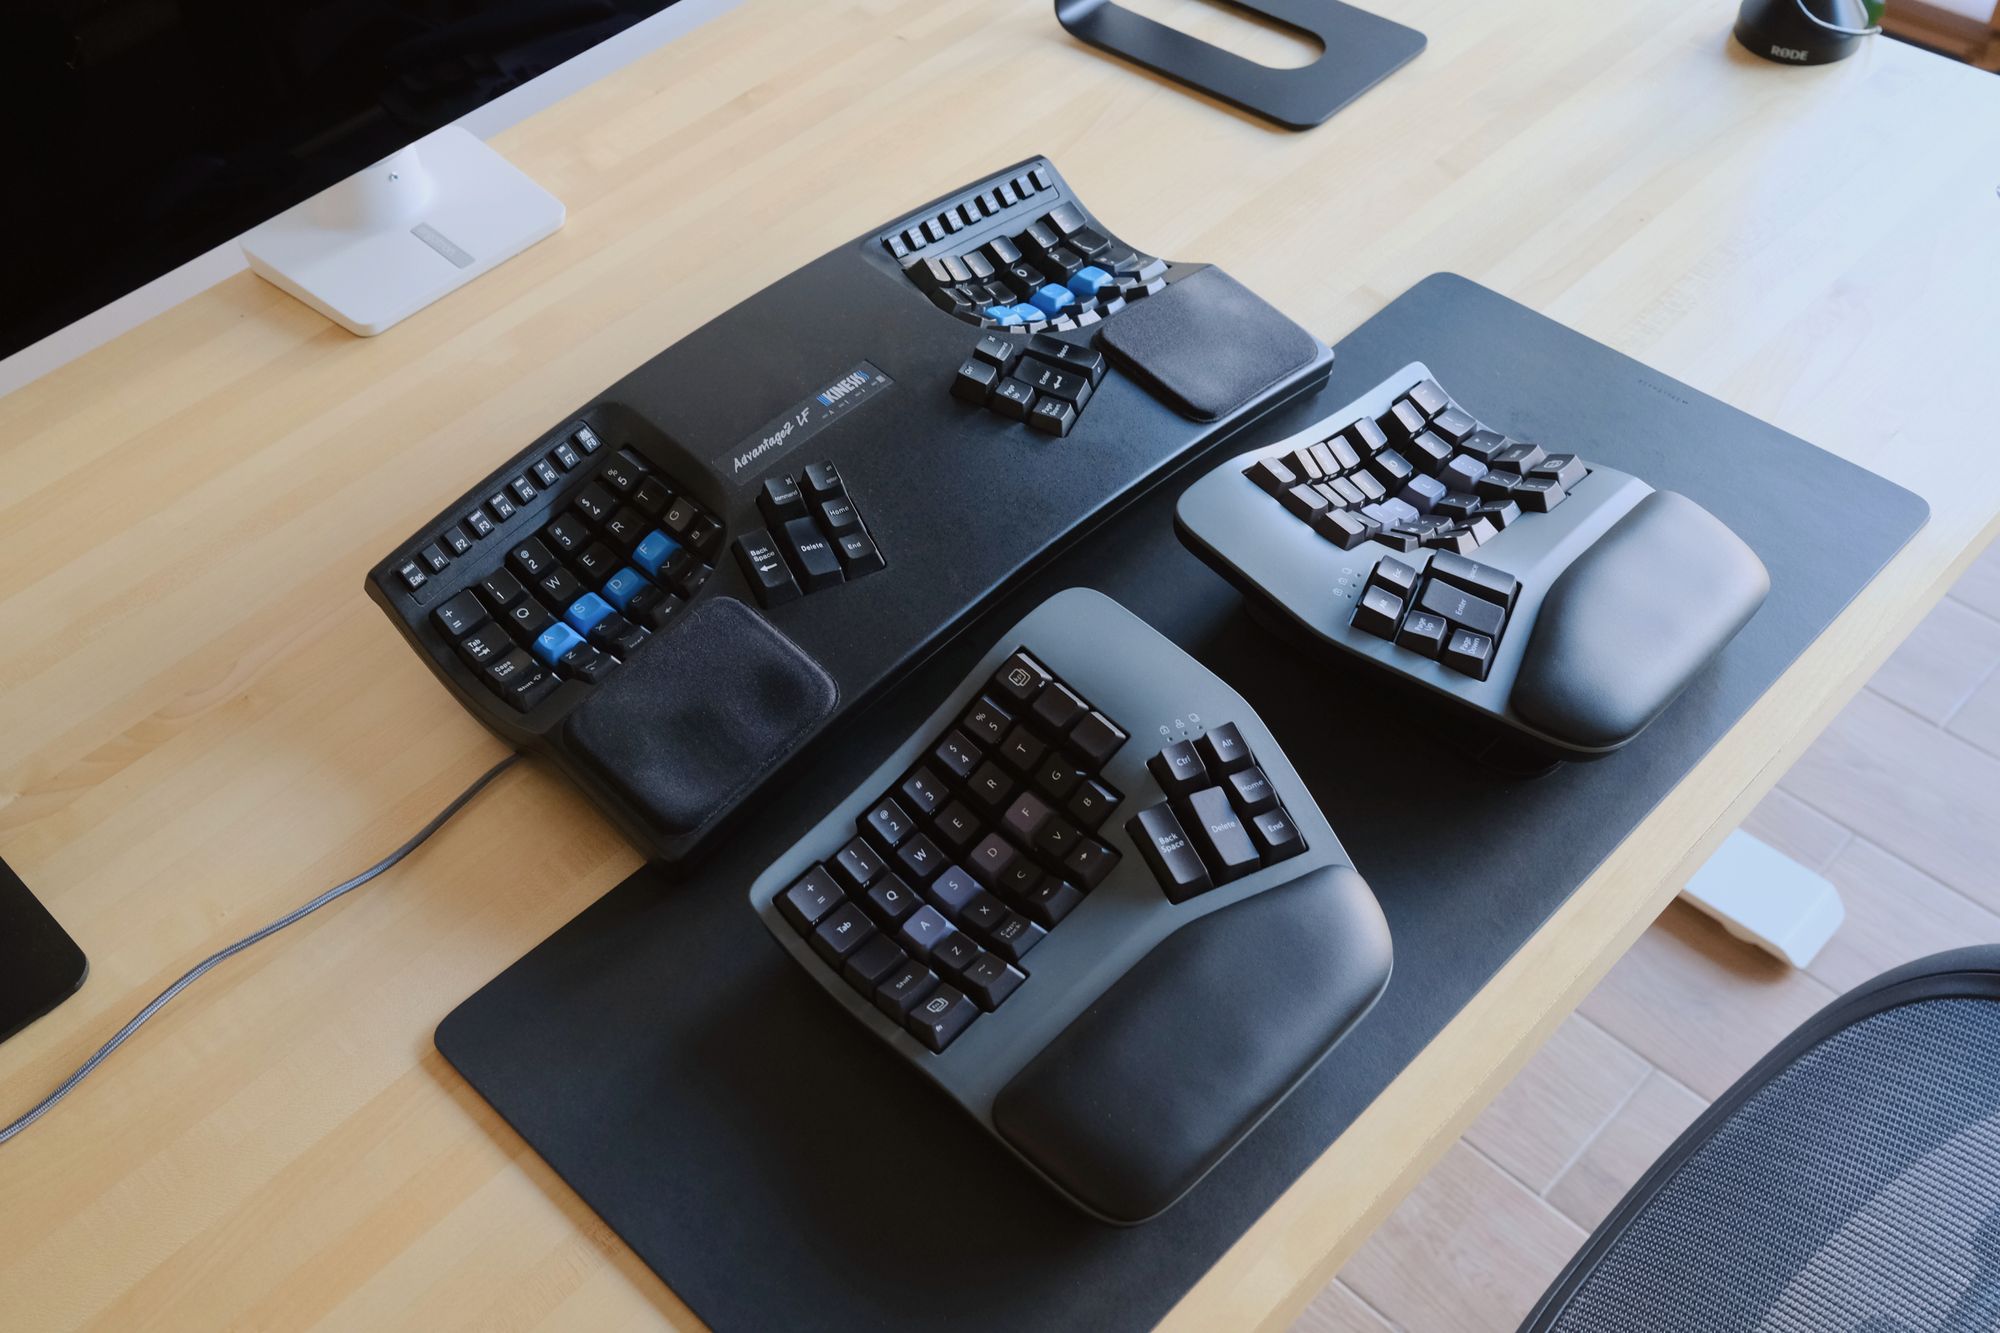
Advantage2 vs Advantage360
I tried to list each advantage and disadvantage of the Advantage360 vs. the Advantage2. One thing worth noting is that the Advantage360 feels more solid. There is a heft on it. The Advantage2 was flimsy and shallow. Typing on it would cause echoes inside the case because it was empty. That's not the case with Advantage360. It feels more premium. Its design feels more premium. The color palette is better, and no big logos exist on the case. It feels more futuristic than Advantage2.
Verdict
The Kinesis keyboards are not for everyone. I would always wonder why people would use Advantage2. I've seen countless times in conferences or meetups people would bring with them. It was absurd, and I thought people were crazy. My thoughts on this changed dramatically when I started using Advantage2 last year. The moment I put my hands on the Kinesis Advantage2, I knew it was something I would use for years to come.
How can you improve a design that has been out for almost 20 years? (The Advantage was released in 2002, which is also the current design of the Advantage2). People who used the Advantage2 loved their keyboards, most of which were nerds and geeks. They want more customizability, a sleeker and cleaner design that adapts to the latest trend. But they want all these without compromising on the well-established Design of the original Advantage2.
I think Kinesis nailed it with the Advantage360 update. Yes, there are minor issues there and here, but overall it's a solid upgrade over the Advantage2. It has everything I wished for a long time and Kinesis, happy for us, listened to us thoroughly.