Review of the MoErgo Glove80 keyboard
It's time for another keyboard review. I've previously reviewed the ZSA Moonlander and the Kinesis Advantage 360Pro. When I read raving reviews about the Glove80 from MoErgo, I had to try it out. I sent an email to MoErgo, and we talked about the Keyboard. When they saw my previous reviews, they were kind enough to send me the Glove80 from MoErgo a pair with my configuration. I want to thank them for the units. As with all my reviews, I'll go straight to the point.
I've been using Glove80 for several weeks now, so let's examine its pros and cons (nit: this is a lengthy review; get your coffee or tea before diving in)
What is Glove80?
If you have used a split keyboard in the past, you can skip this section.

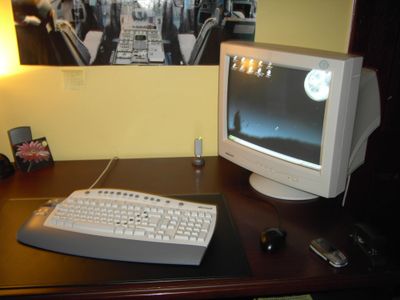
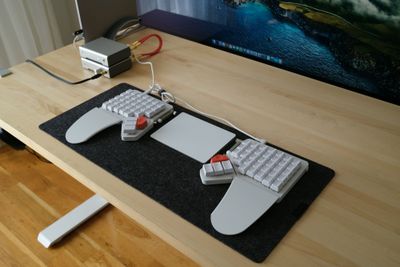
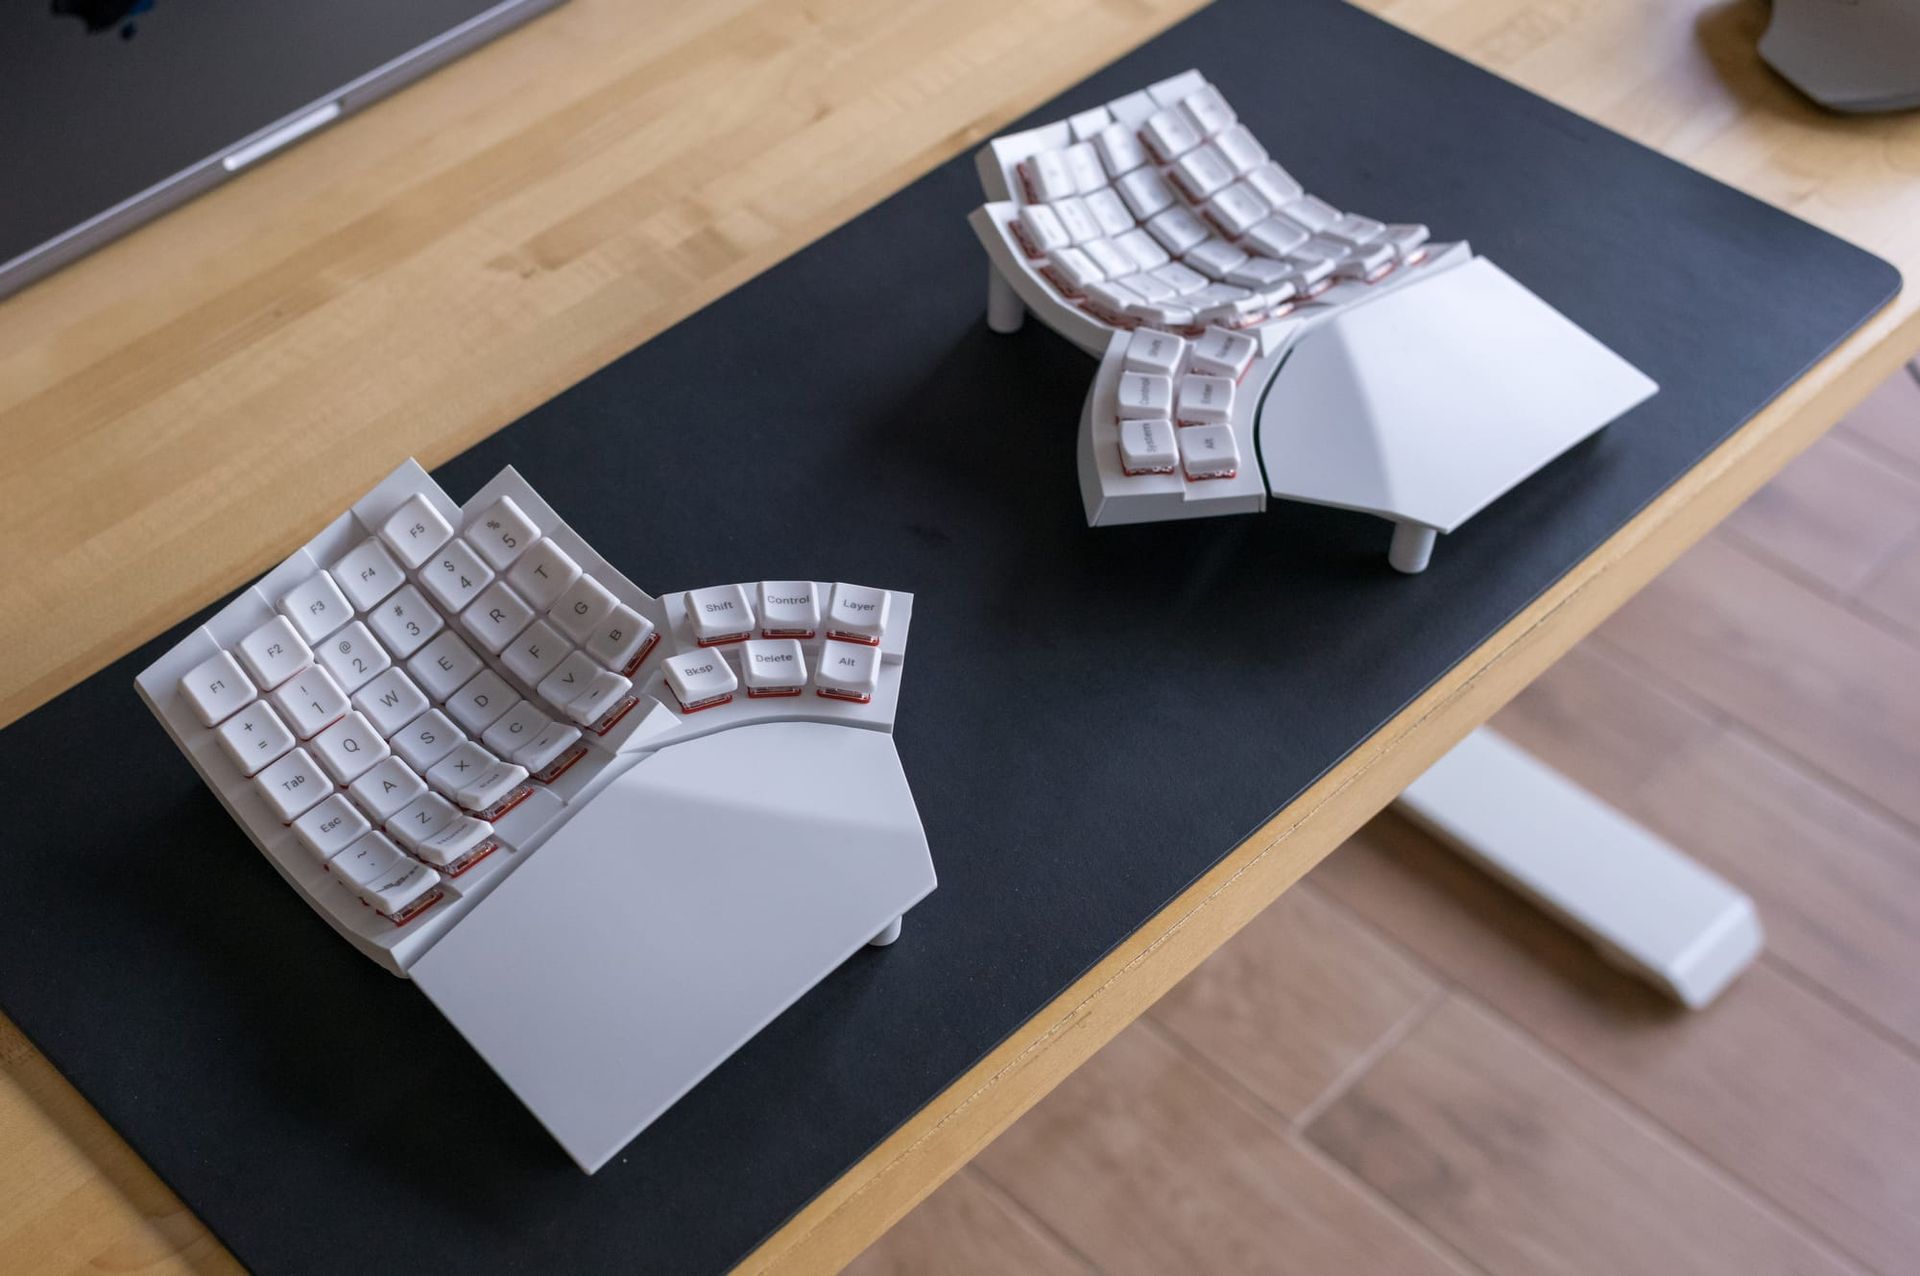
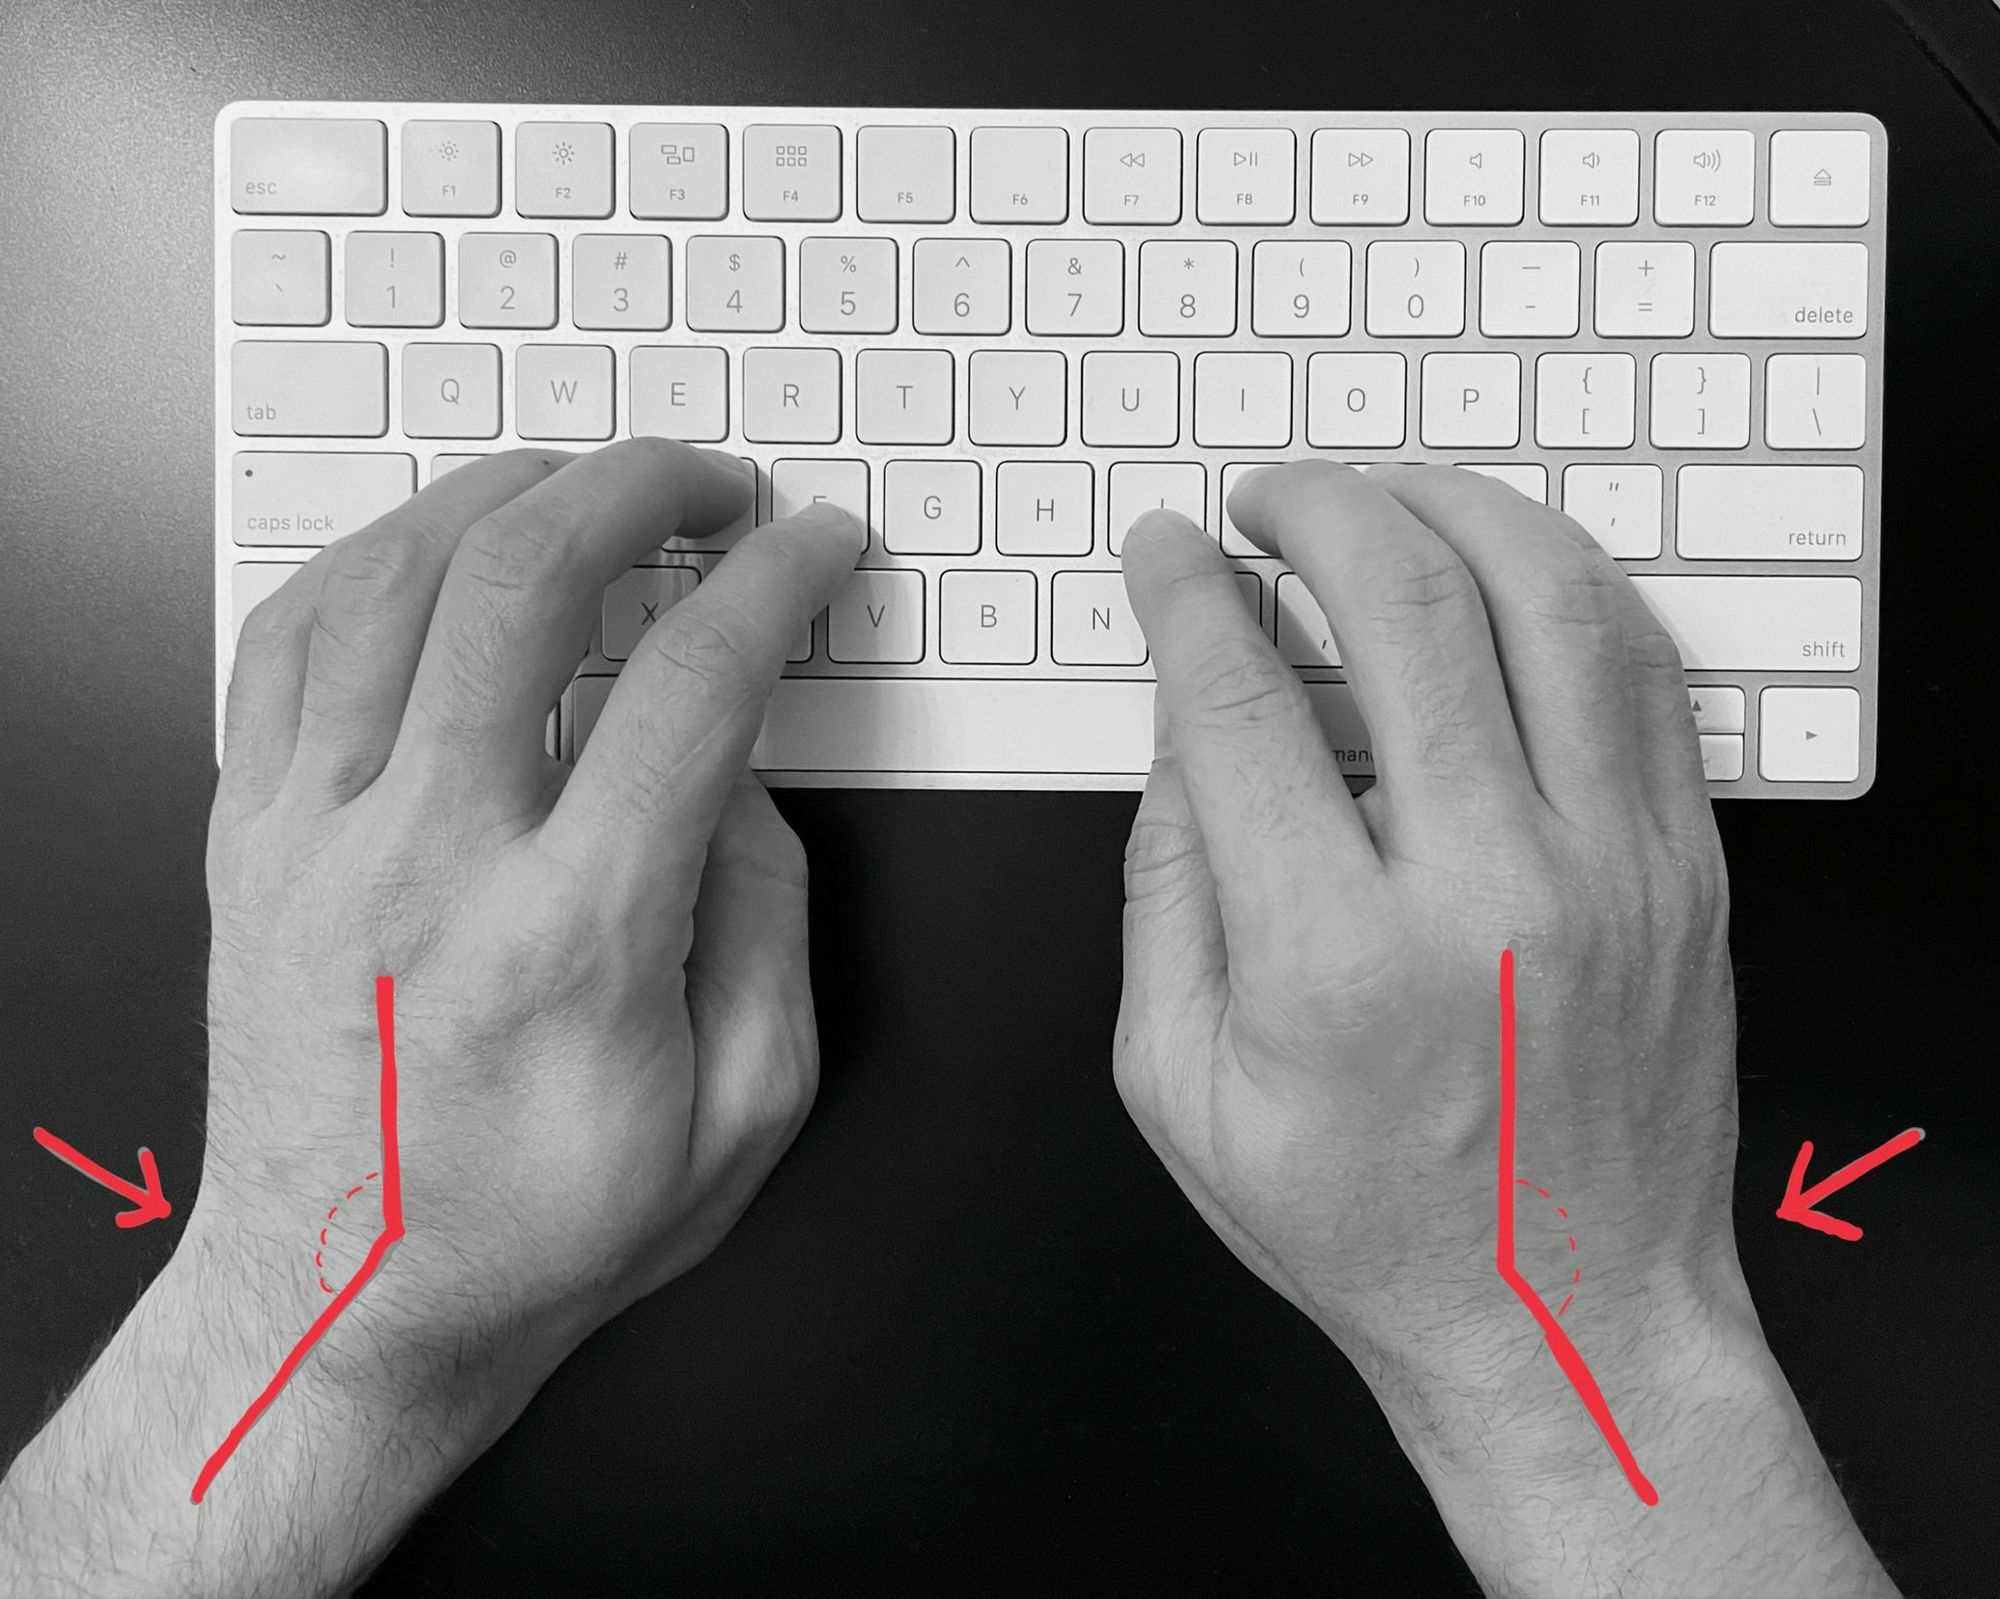
If you're new to mechanical keyboards, the Glove80 will look very different compared to other keyboards. First, the keyboard comes with two pieces instead of a single one, and the split allows you to reposition the halves to minimize ulnar deviation, which causes carpal tunnel. Here is a picture of using a standard keyboard. You can see how the wrists are bent.
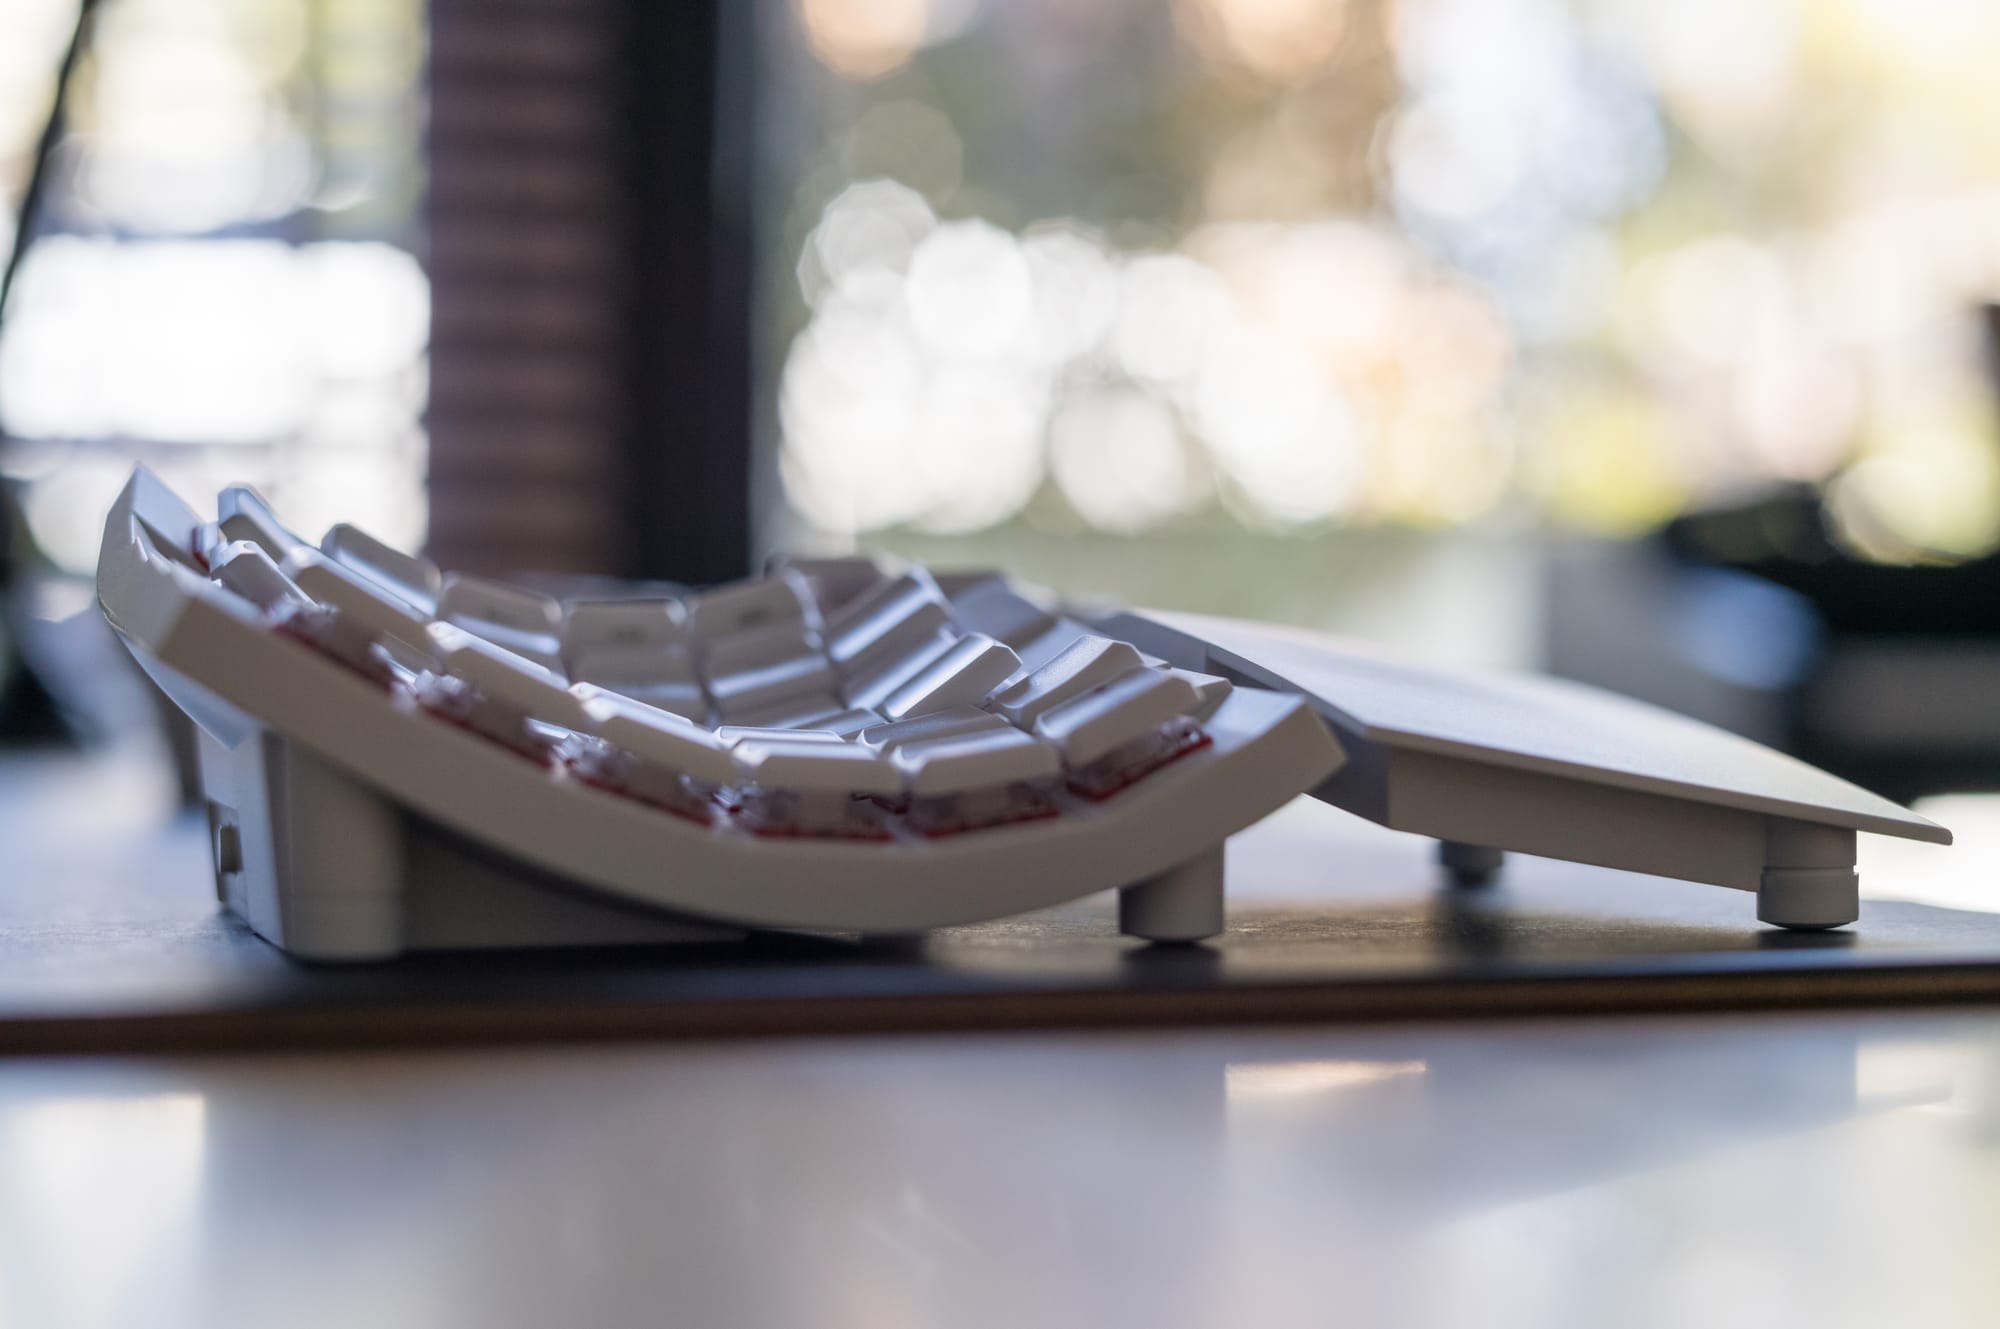
Second, unlike other keyboards, it has a concave key well and thumb cluster to comfortably reach all keys, reducing finger and thumb strain and stress. These ergonomic keyboards also have adjustable tenting mechanisms that further improve hand positions. Along with other features, the Glove80 is a low-profile, mechanical keyboard that provides an ergonomic position for your hands and allows you to type for a long time.
Now, let's dive into the various features of the Glove80. You'll see there is more to it.
Accessories & Case
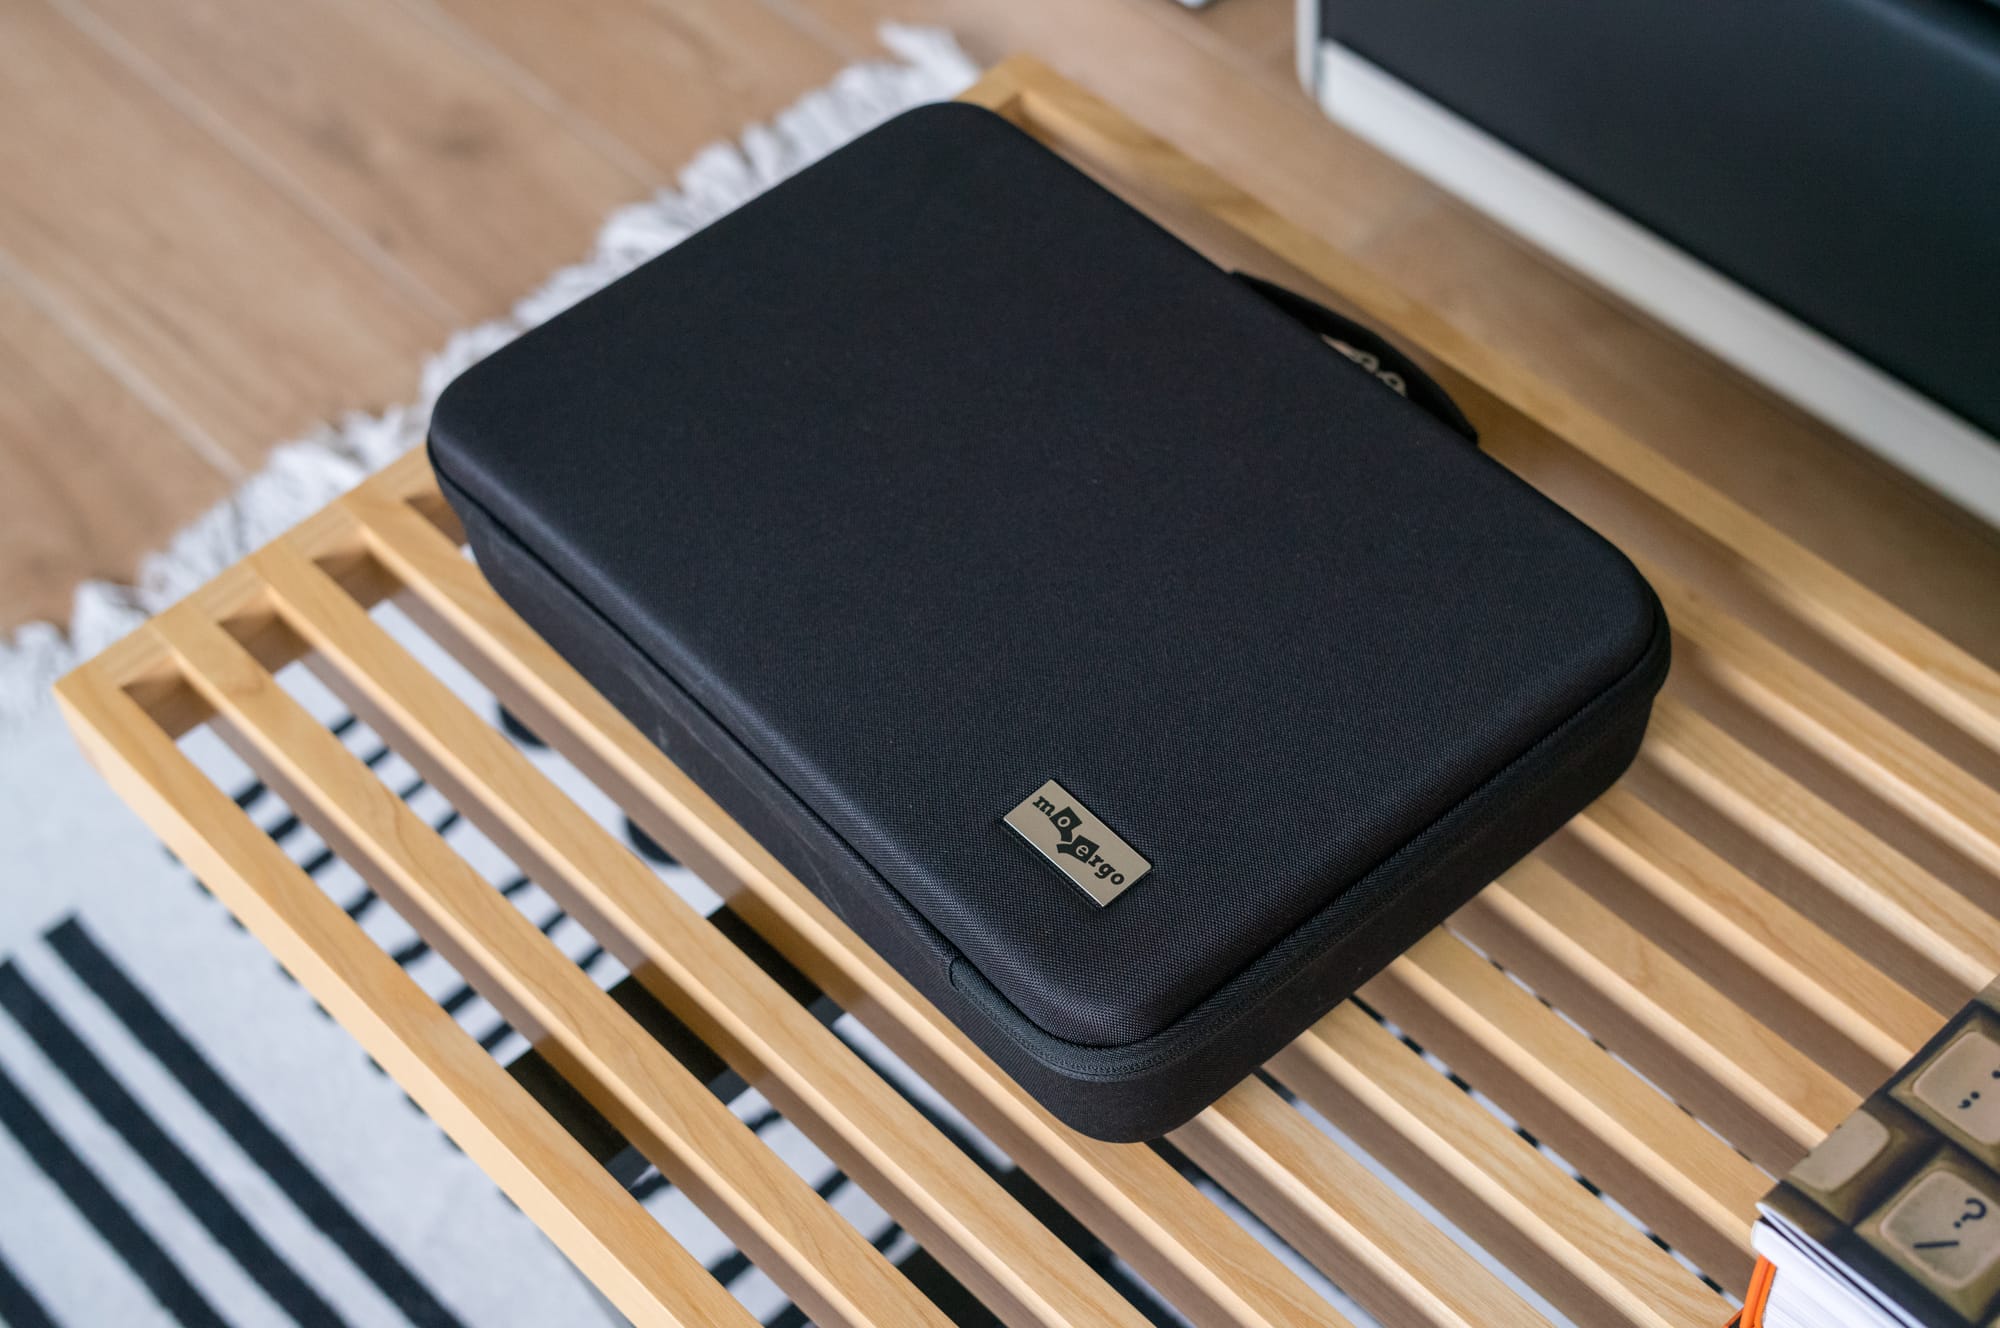
First of all, the Glove80 came with a large travel case. I was amazed by it because the case was superbly built and perfect for transporting your Keyboard from one place to another. It's very protective. However, I think the word "travel" doesn't fit the description properly because it's anything but travel-friendly. It's huge, almost like a 13-inch Laptop case. I tried If I could fit it into my backpack, and surprisingly, even though it looked huge, it could fit into my 21L backpack:
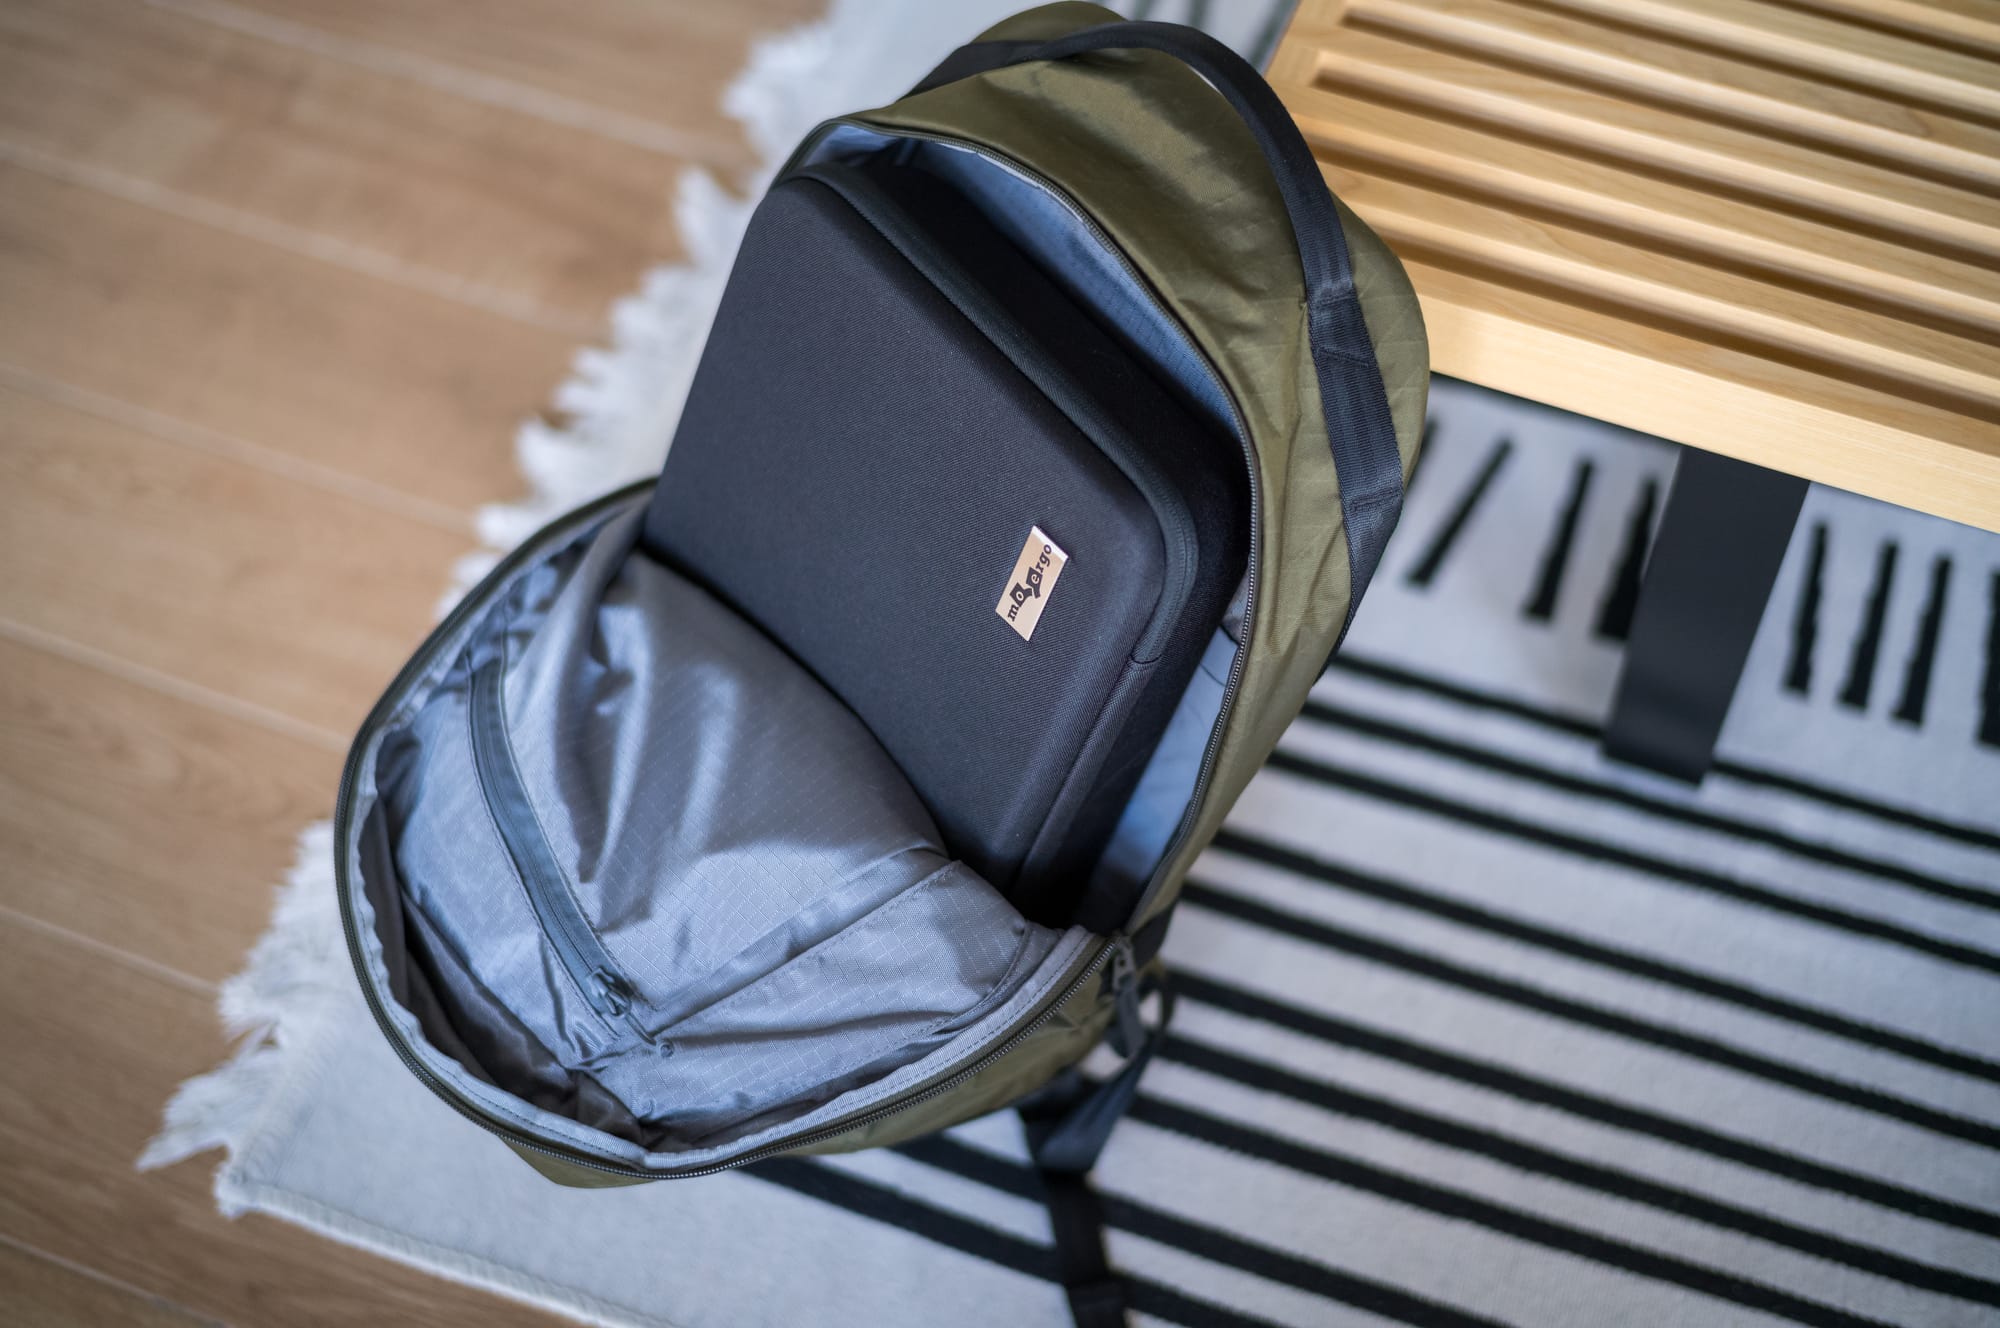
Would I use it when I go to a coffee shop? Probably yes, depending on if I feel like to travel with it. But it would definitely come with me if I traveled for several weeks and stayed in an Airbnb. I like the case, and the best part is that it's included with Glove80 upon purchase.
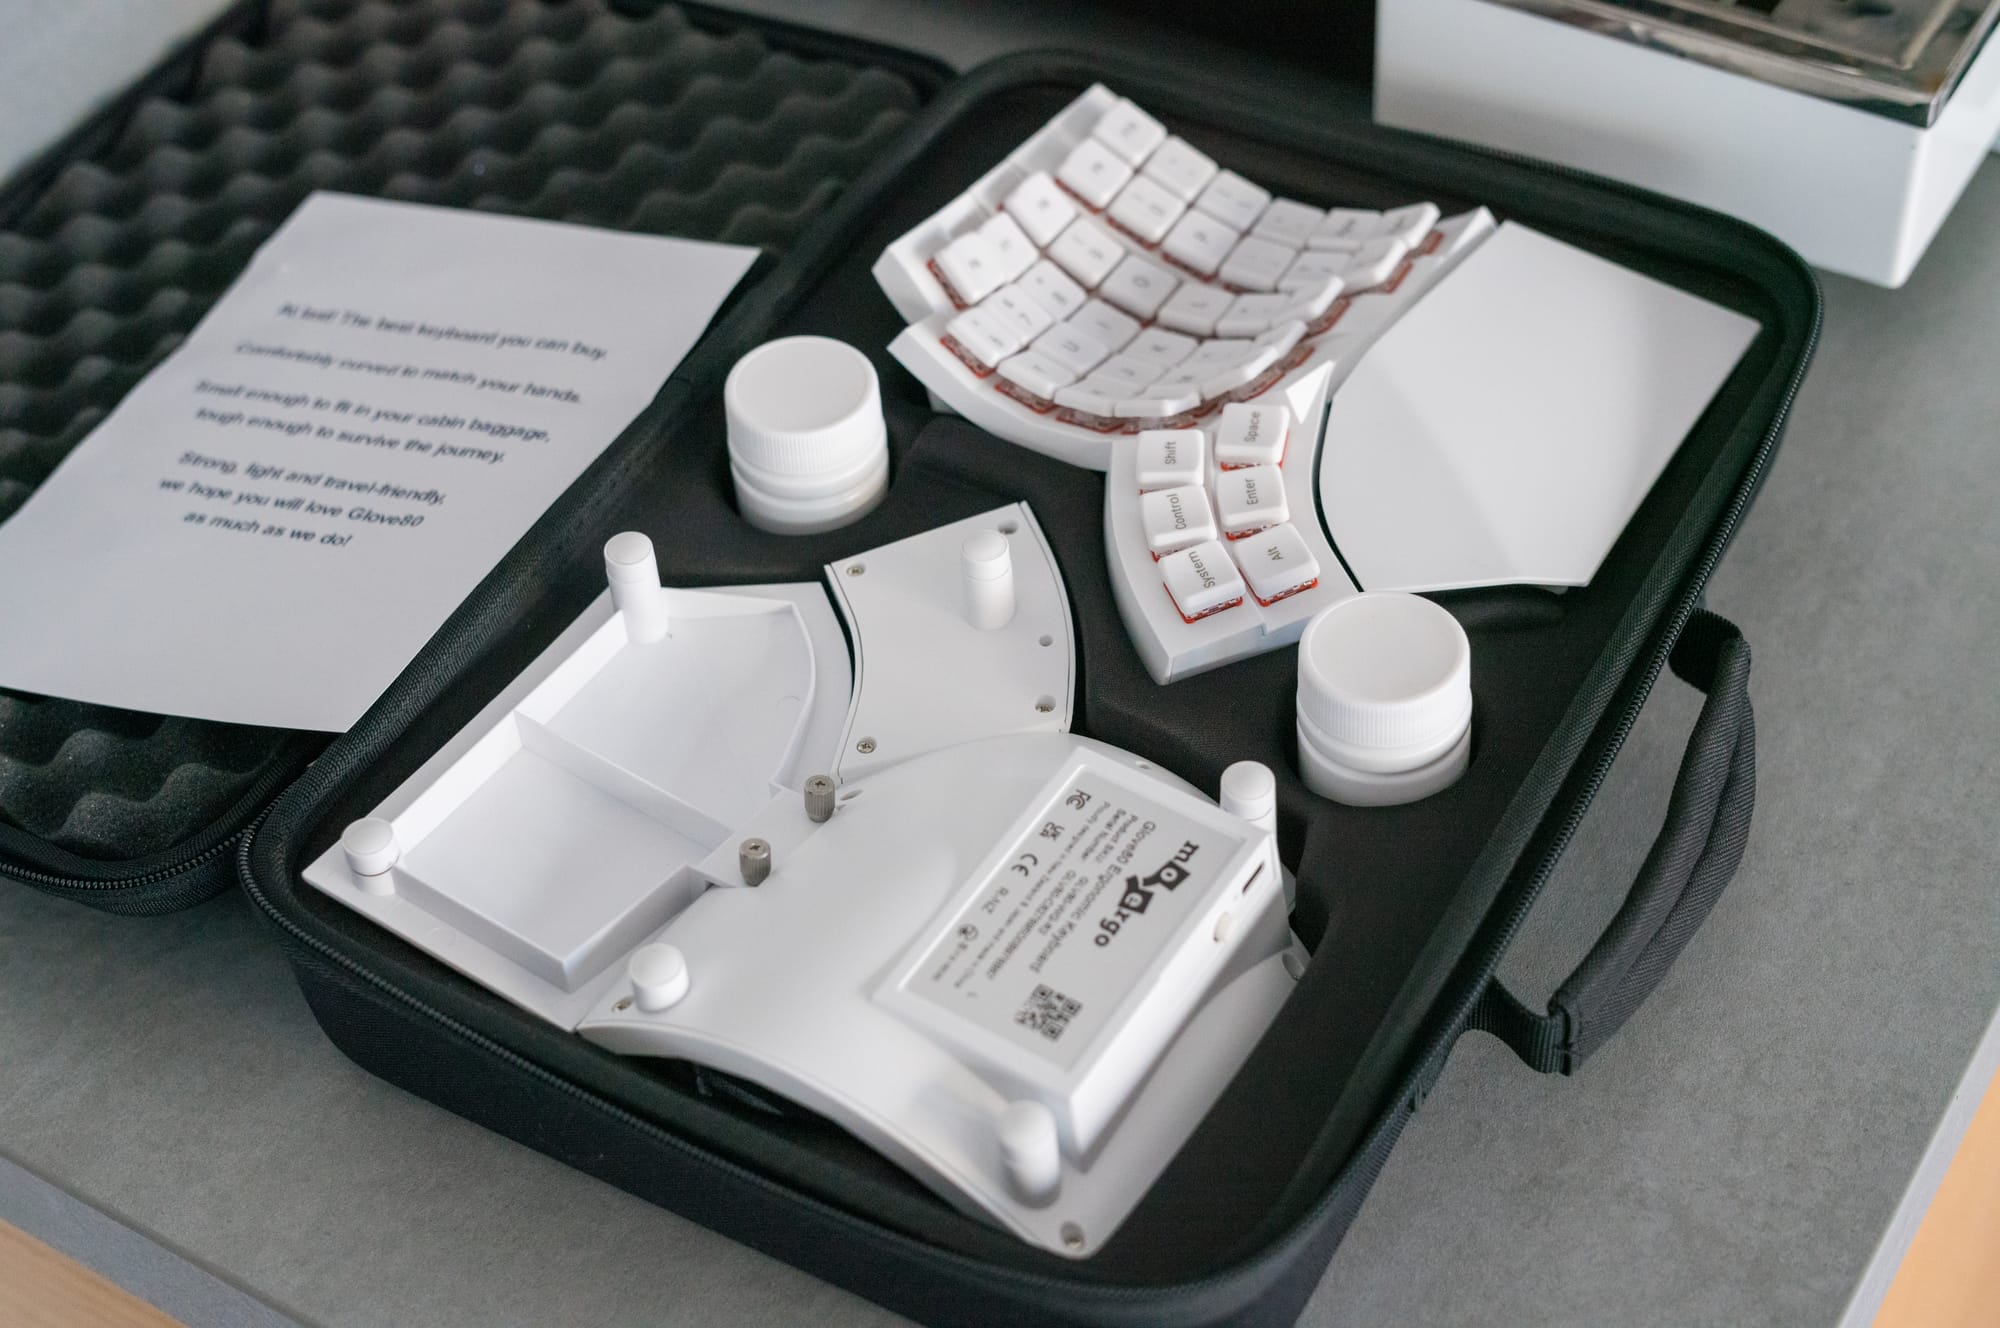
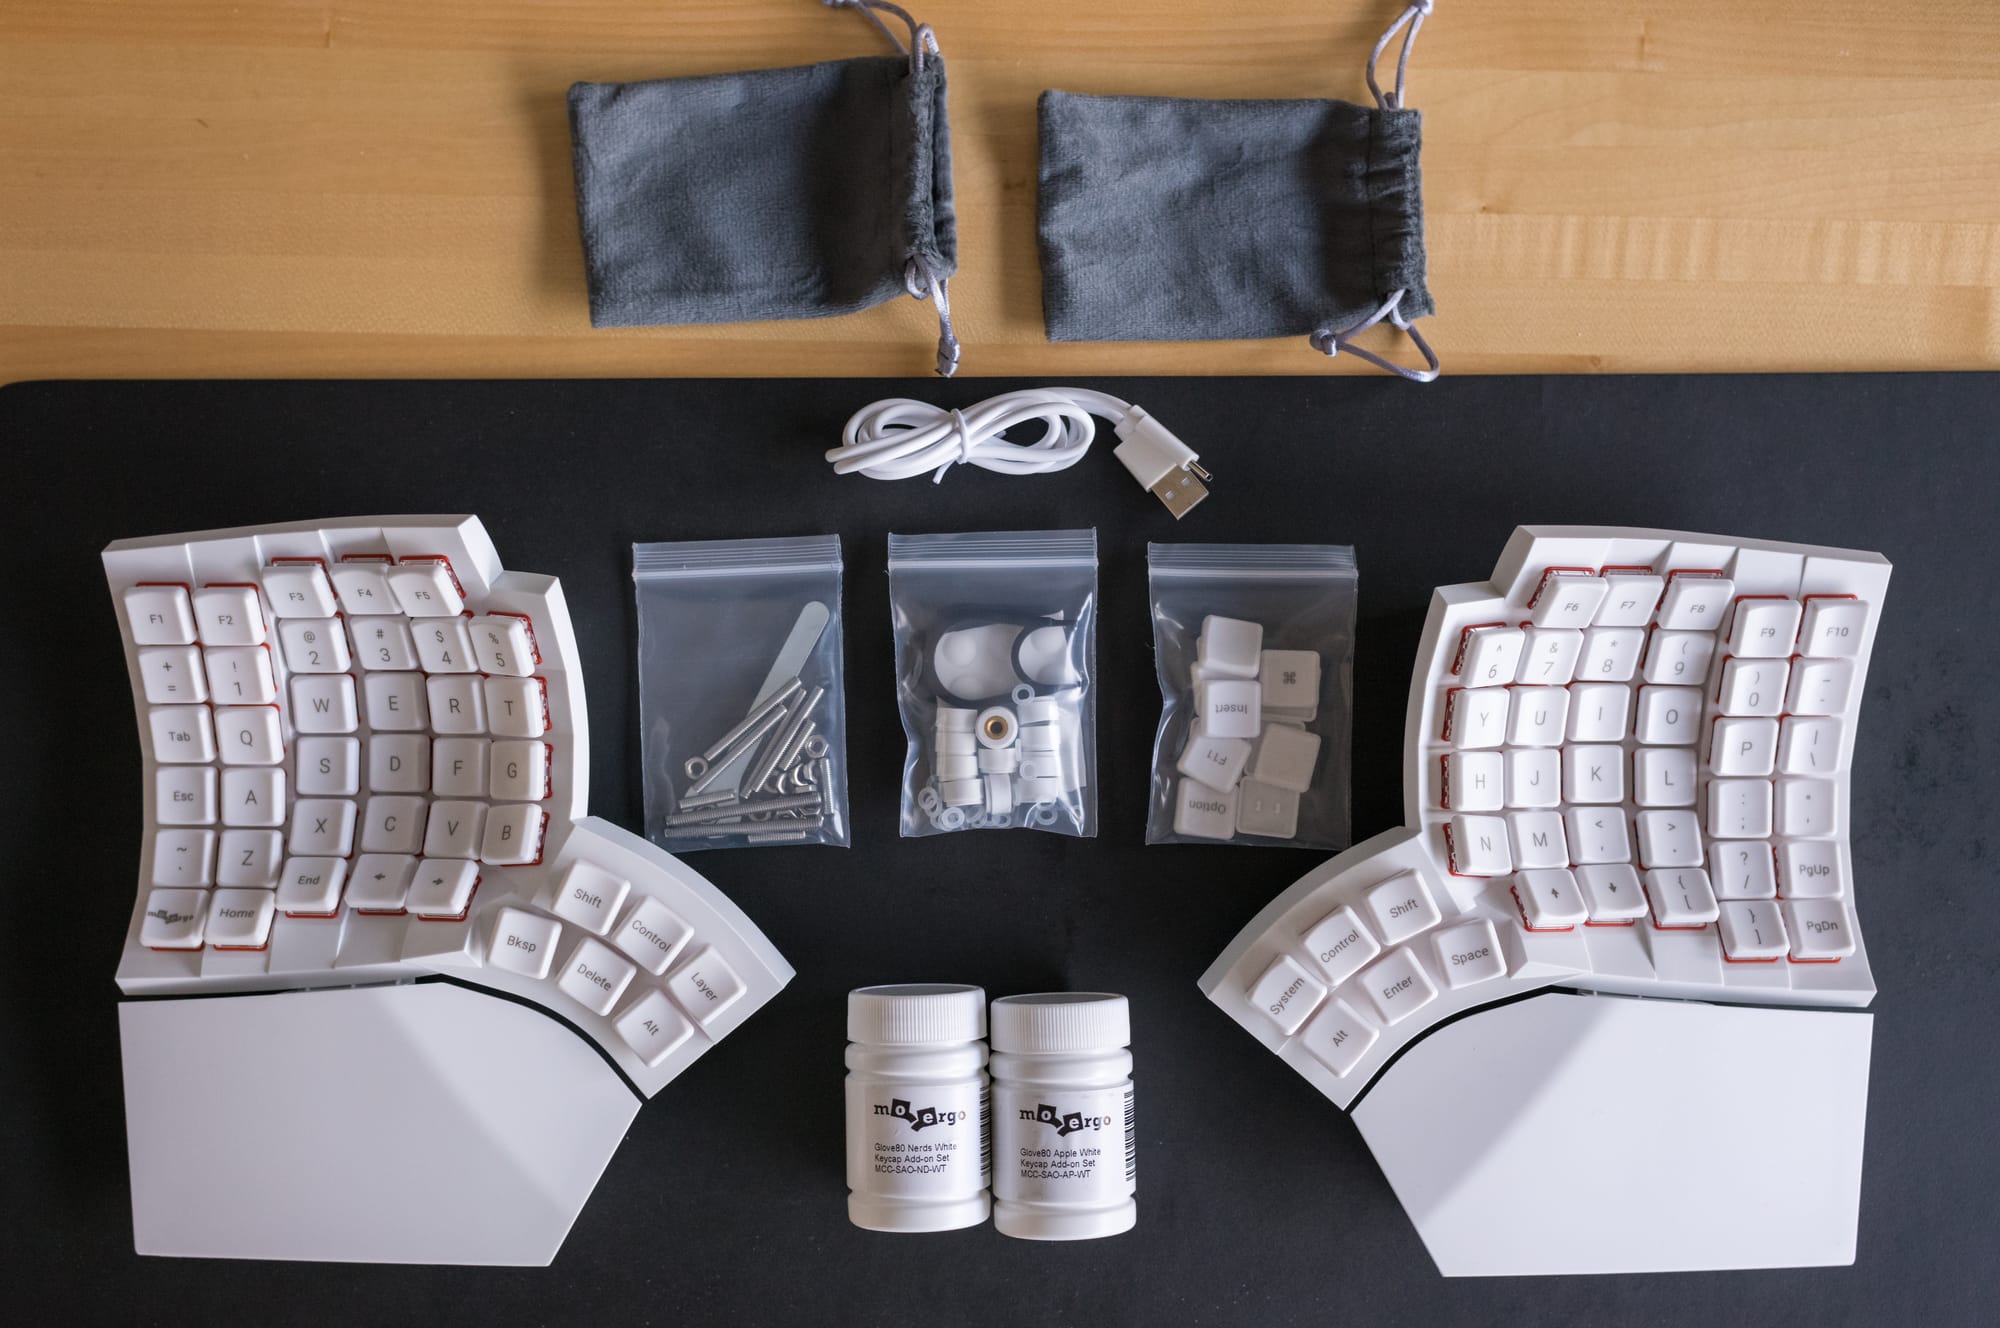
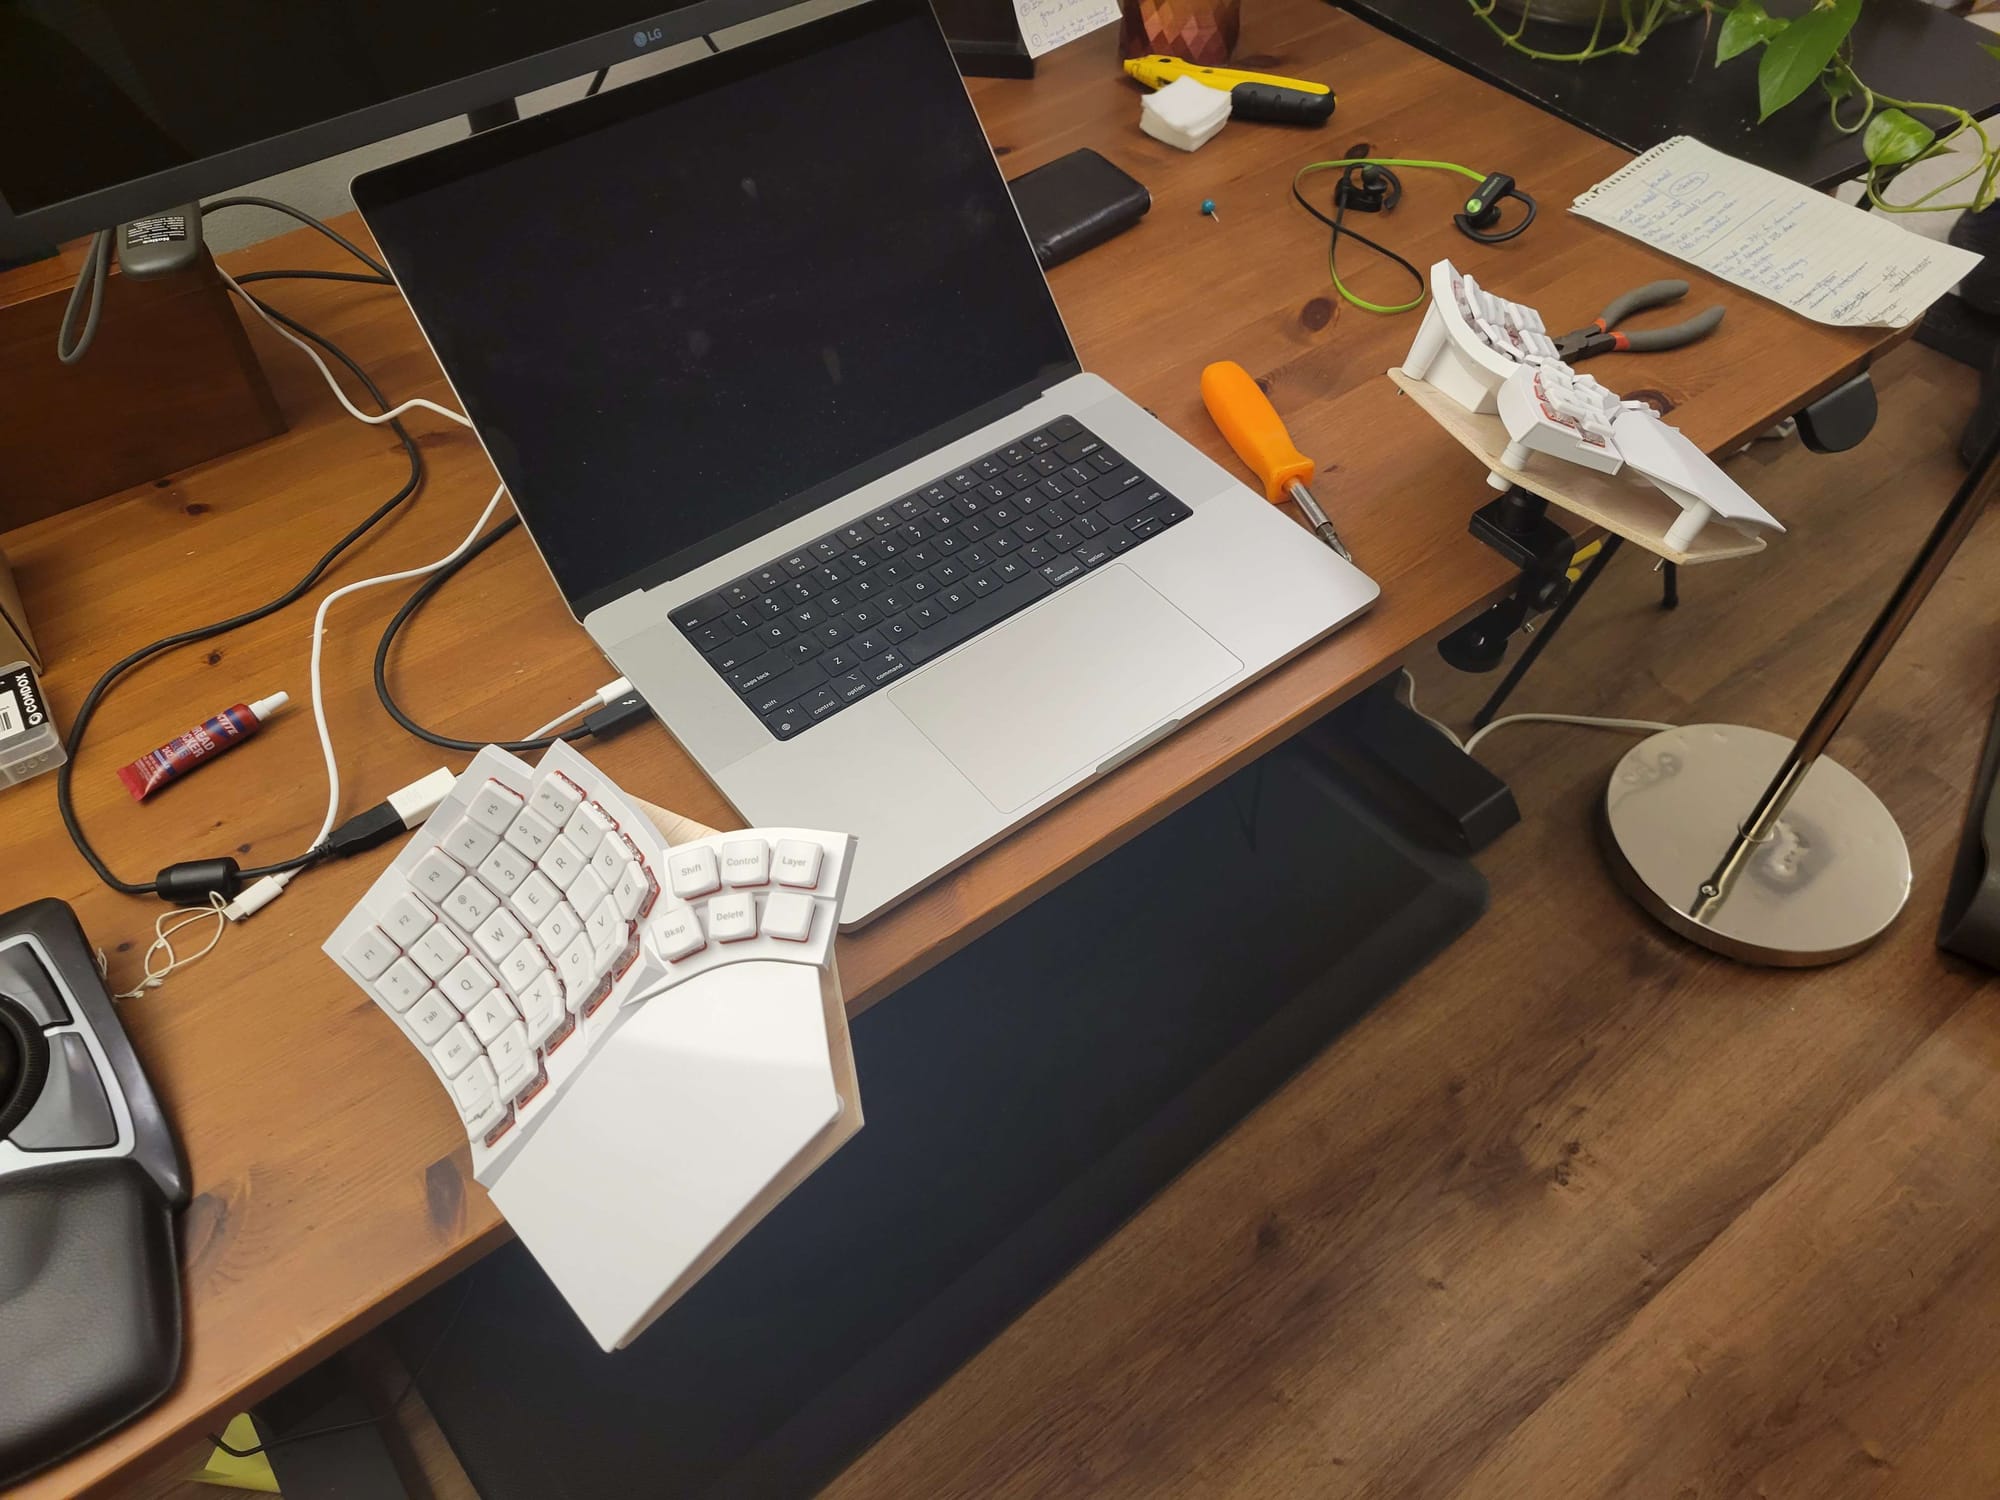
Within the case, you'll receive quite a bit of accessories: Some spare keycaps, plastic, o-rings (I'll explain those in a bit), a USB-C to USB-A cable, a keycap puller, rods, and a spanner for tenting (more on this later). Of course, the Glove80 comes as a ready-to-use keyboard; you don't have to solder or build anything yourself manually (this might be obvious for some, but in the Mechanical Keyboard world, keyboards are often sold as "kits", and you need tools, such as soldering iron to build your kit. Most of them don't come with keycaps either).
But if you want, you can also order a Glove80 as a kit to solder your favorite switches yourself. At least there is an option for that.
The legs of the Glove80 don't perfectly align with the desk, so you have several plastic o-rings that you can put in between the legs. That way you can achieve a perfectly leveled keyboard.
Configuration and Design
People who know me know that I'm into design, especially iconic furniture. I try to buy and use goods that blend into my work environment. When I visited the MoErgo website, there were four options in terms of color I could choose:
- White keycaps on a white or black body.
- Black keycaps on a white or black body.
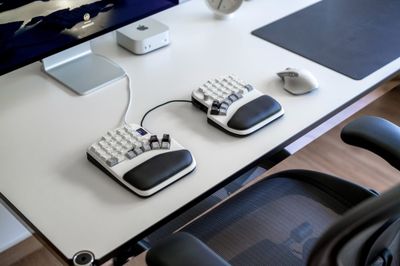
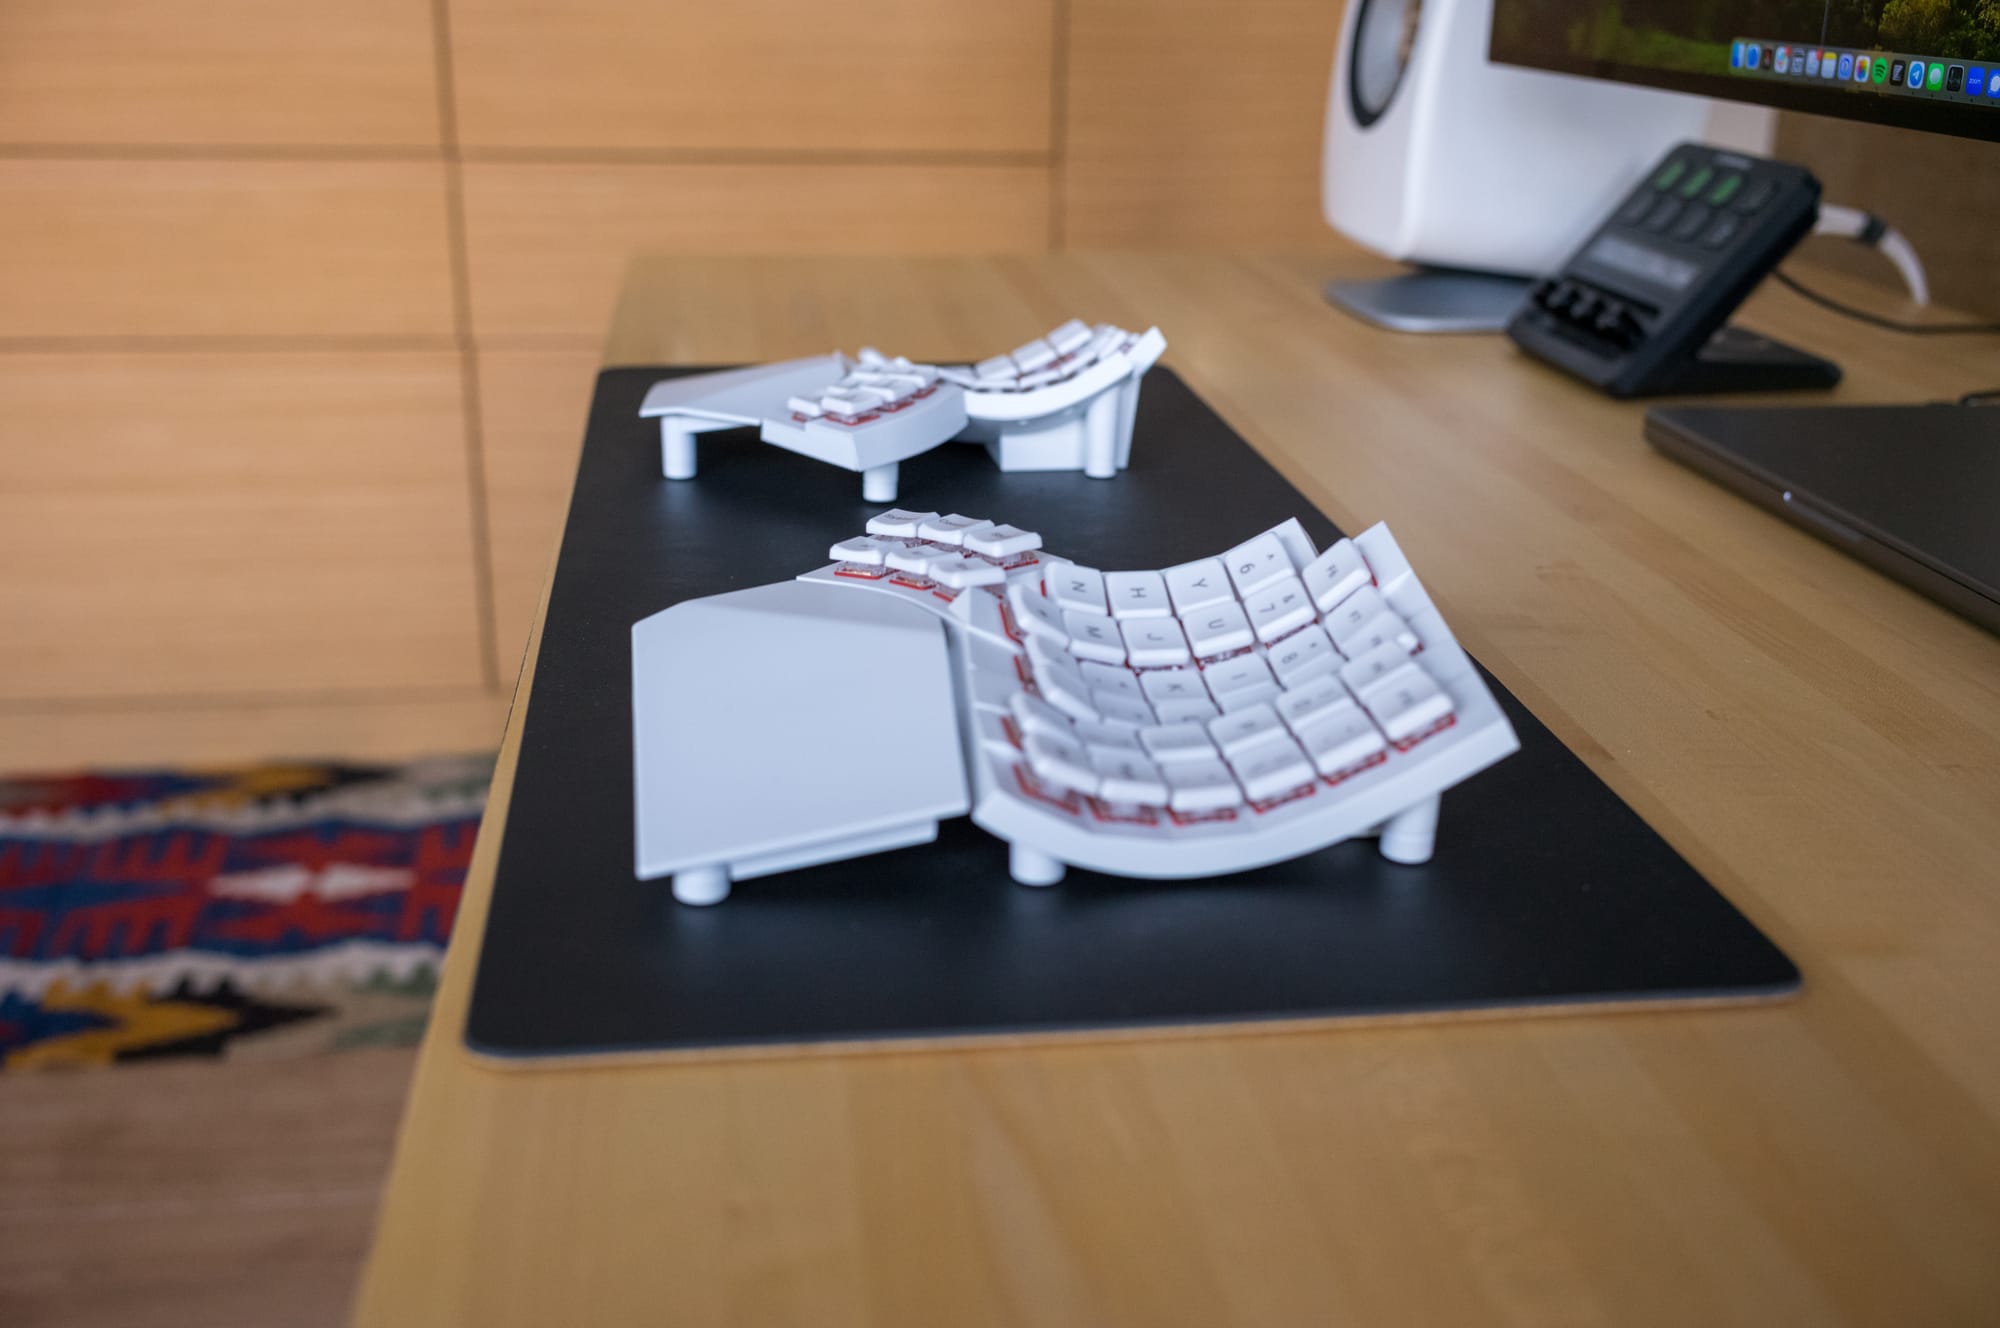
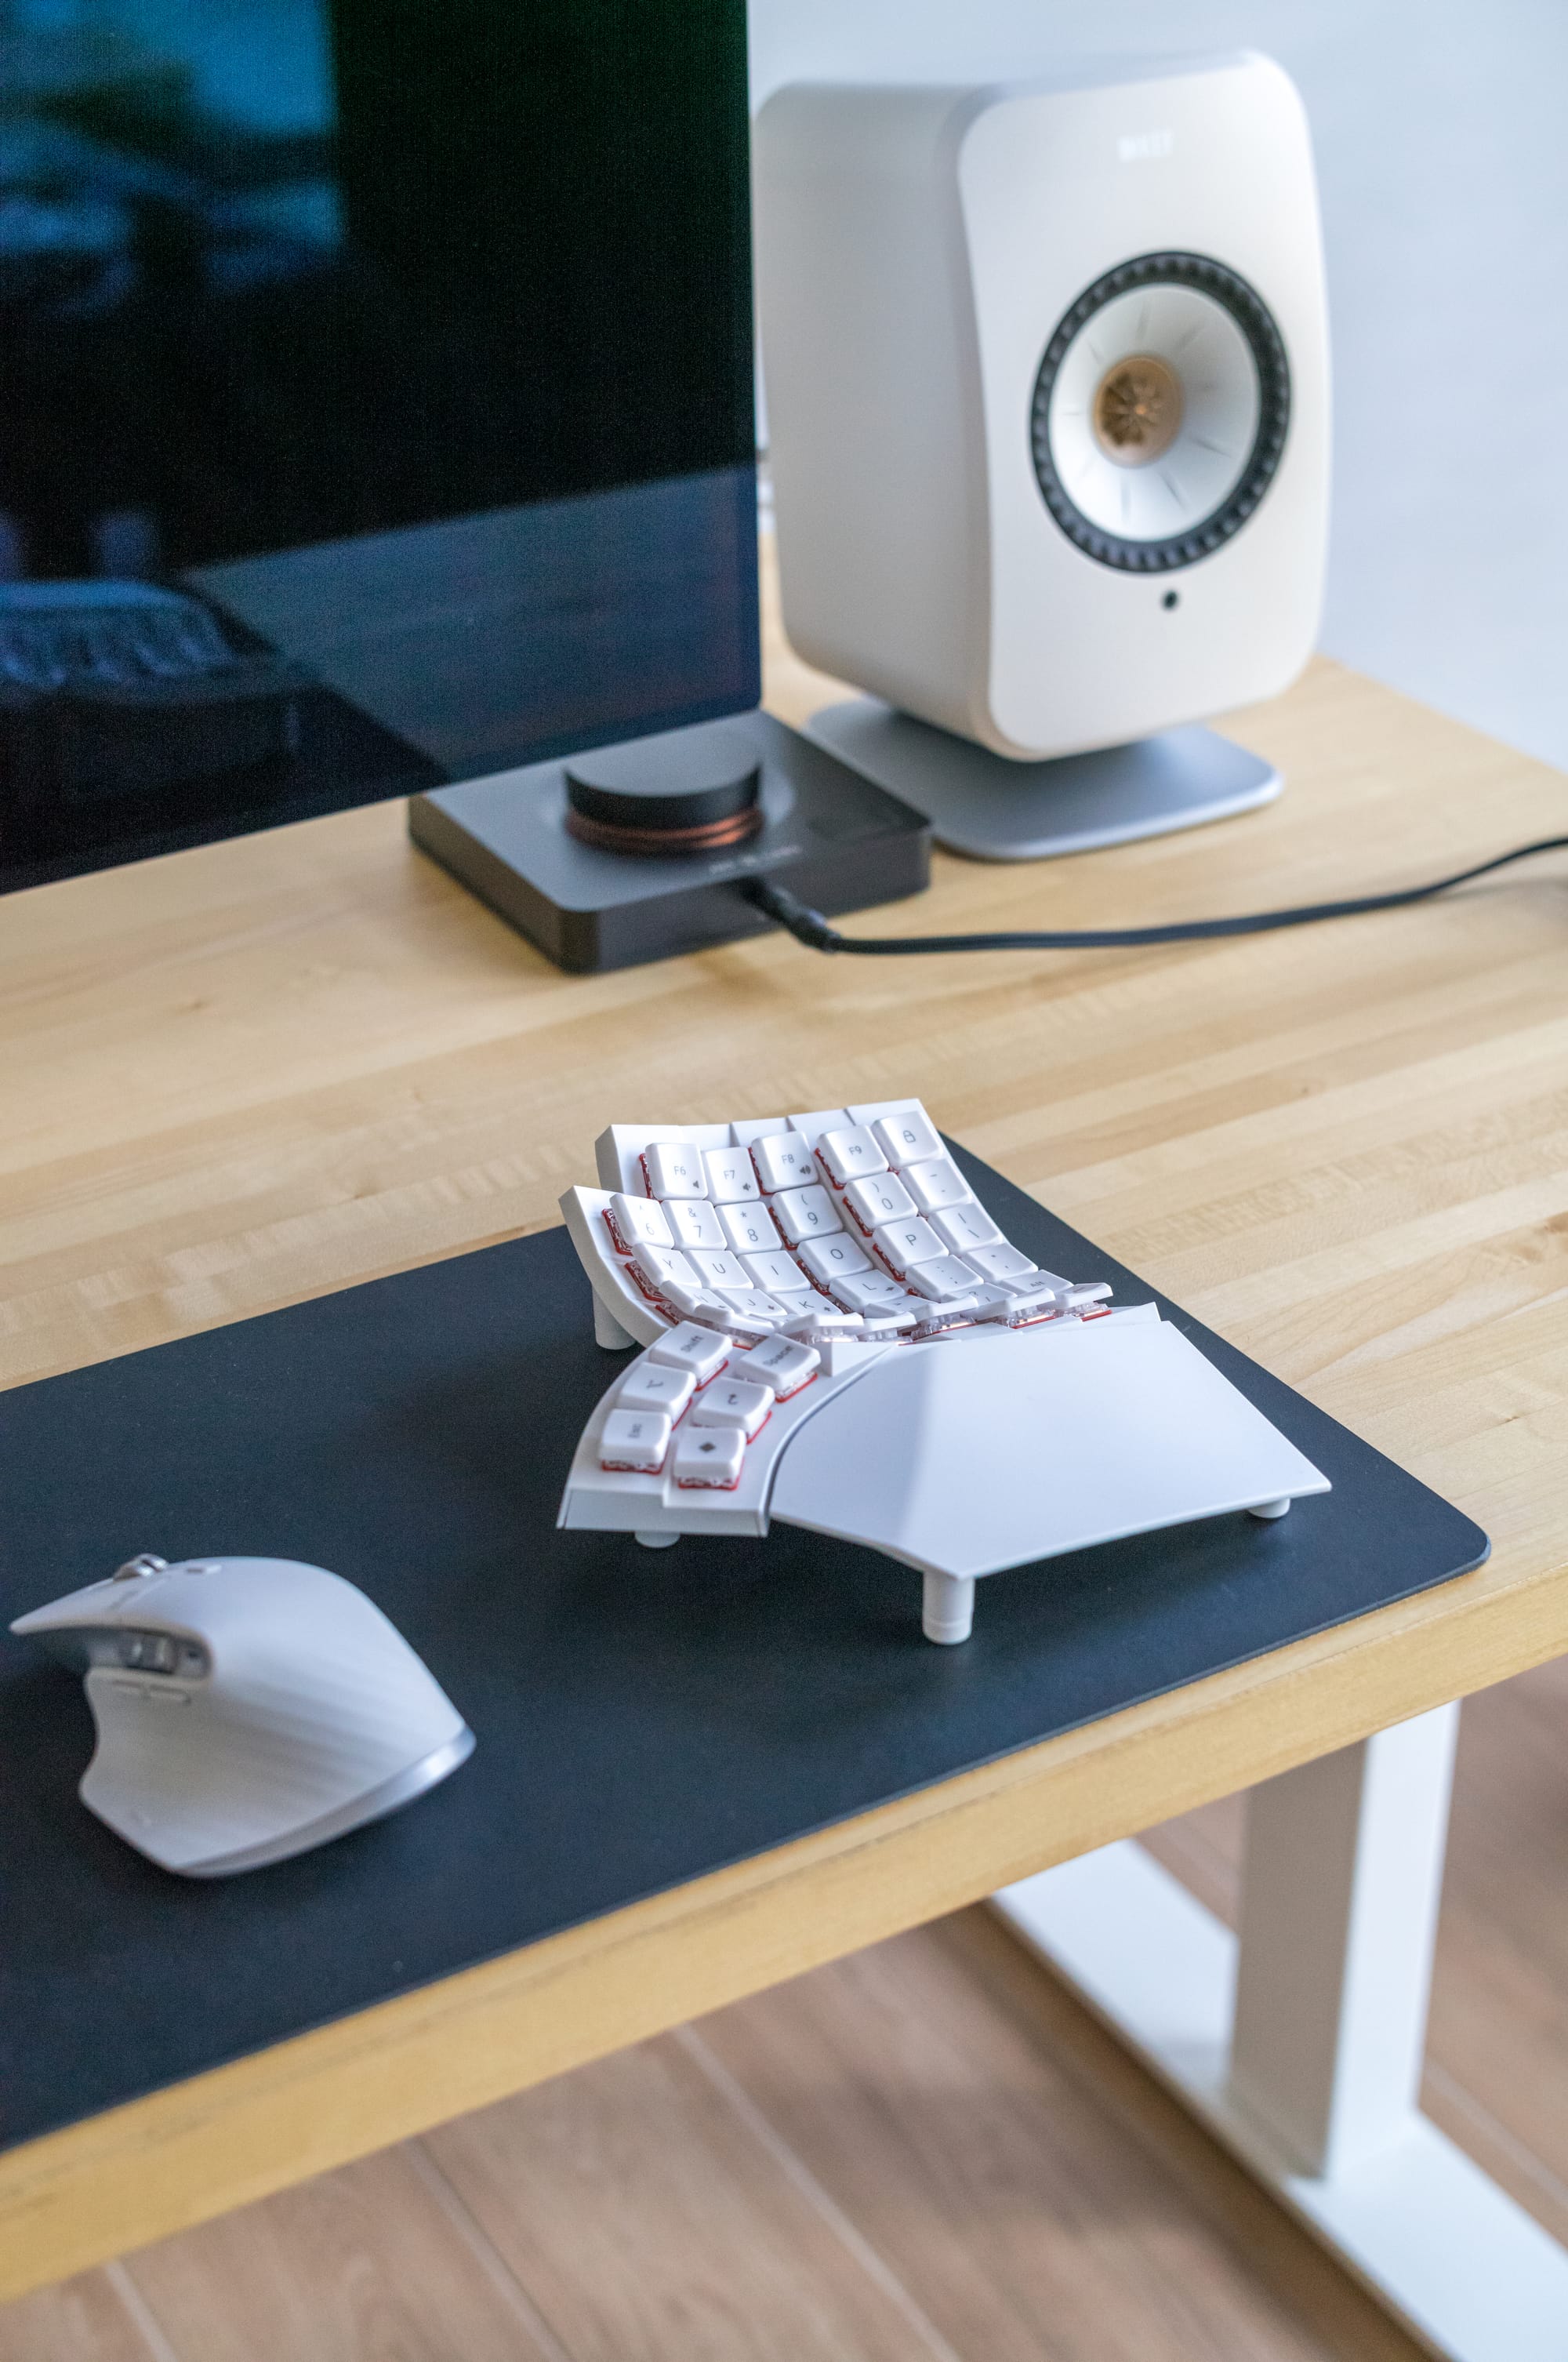
I got the white keycaps on the white body option, and as you can see from the photos, it looks nice. Before I explain my keycap choice, I want to share a few words about the design.
First, Glove80 needs to get rid of the sharp edges. It's the only electrical item on my desk with sharp edges. Here is a video that shows some of them.
Do they bother me? Not at all. You might think it looks good, but the design should not harm you. Initially, I had a few issues because my mouse was between the two halves, and I would always bump into these sharp edges.
Second, Glove80 is very lightweight. It feels sturdy but not as premium as the Moonlander or the Kinesis Adv360. You can feel a weight when you hold the keyboards, but not so much with the Glove80. I plan to fix it by designing a custom 3D base and filling it with sand (or any heavy material). I also discovered that people buy weights, such as https://www.amazon.com/Hyperwear-Booster-Hyper-Weighted-Vests/dp/B002O5JYVU/ and use double-sided tapes (i.e., 3m LS300).
It looks like a straightforward thing to do. I'll share more about this once I have something working.
However, I have been using the Glove80 for many weeks now, and this lightness isn't an issue. Yes, it would be nice if it stayed or had a more premium feeling, but it didn't bother me. I believe MoErgo will improve the case even further in the future.
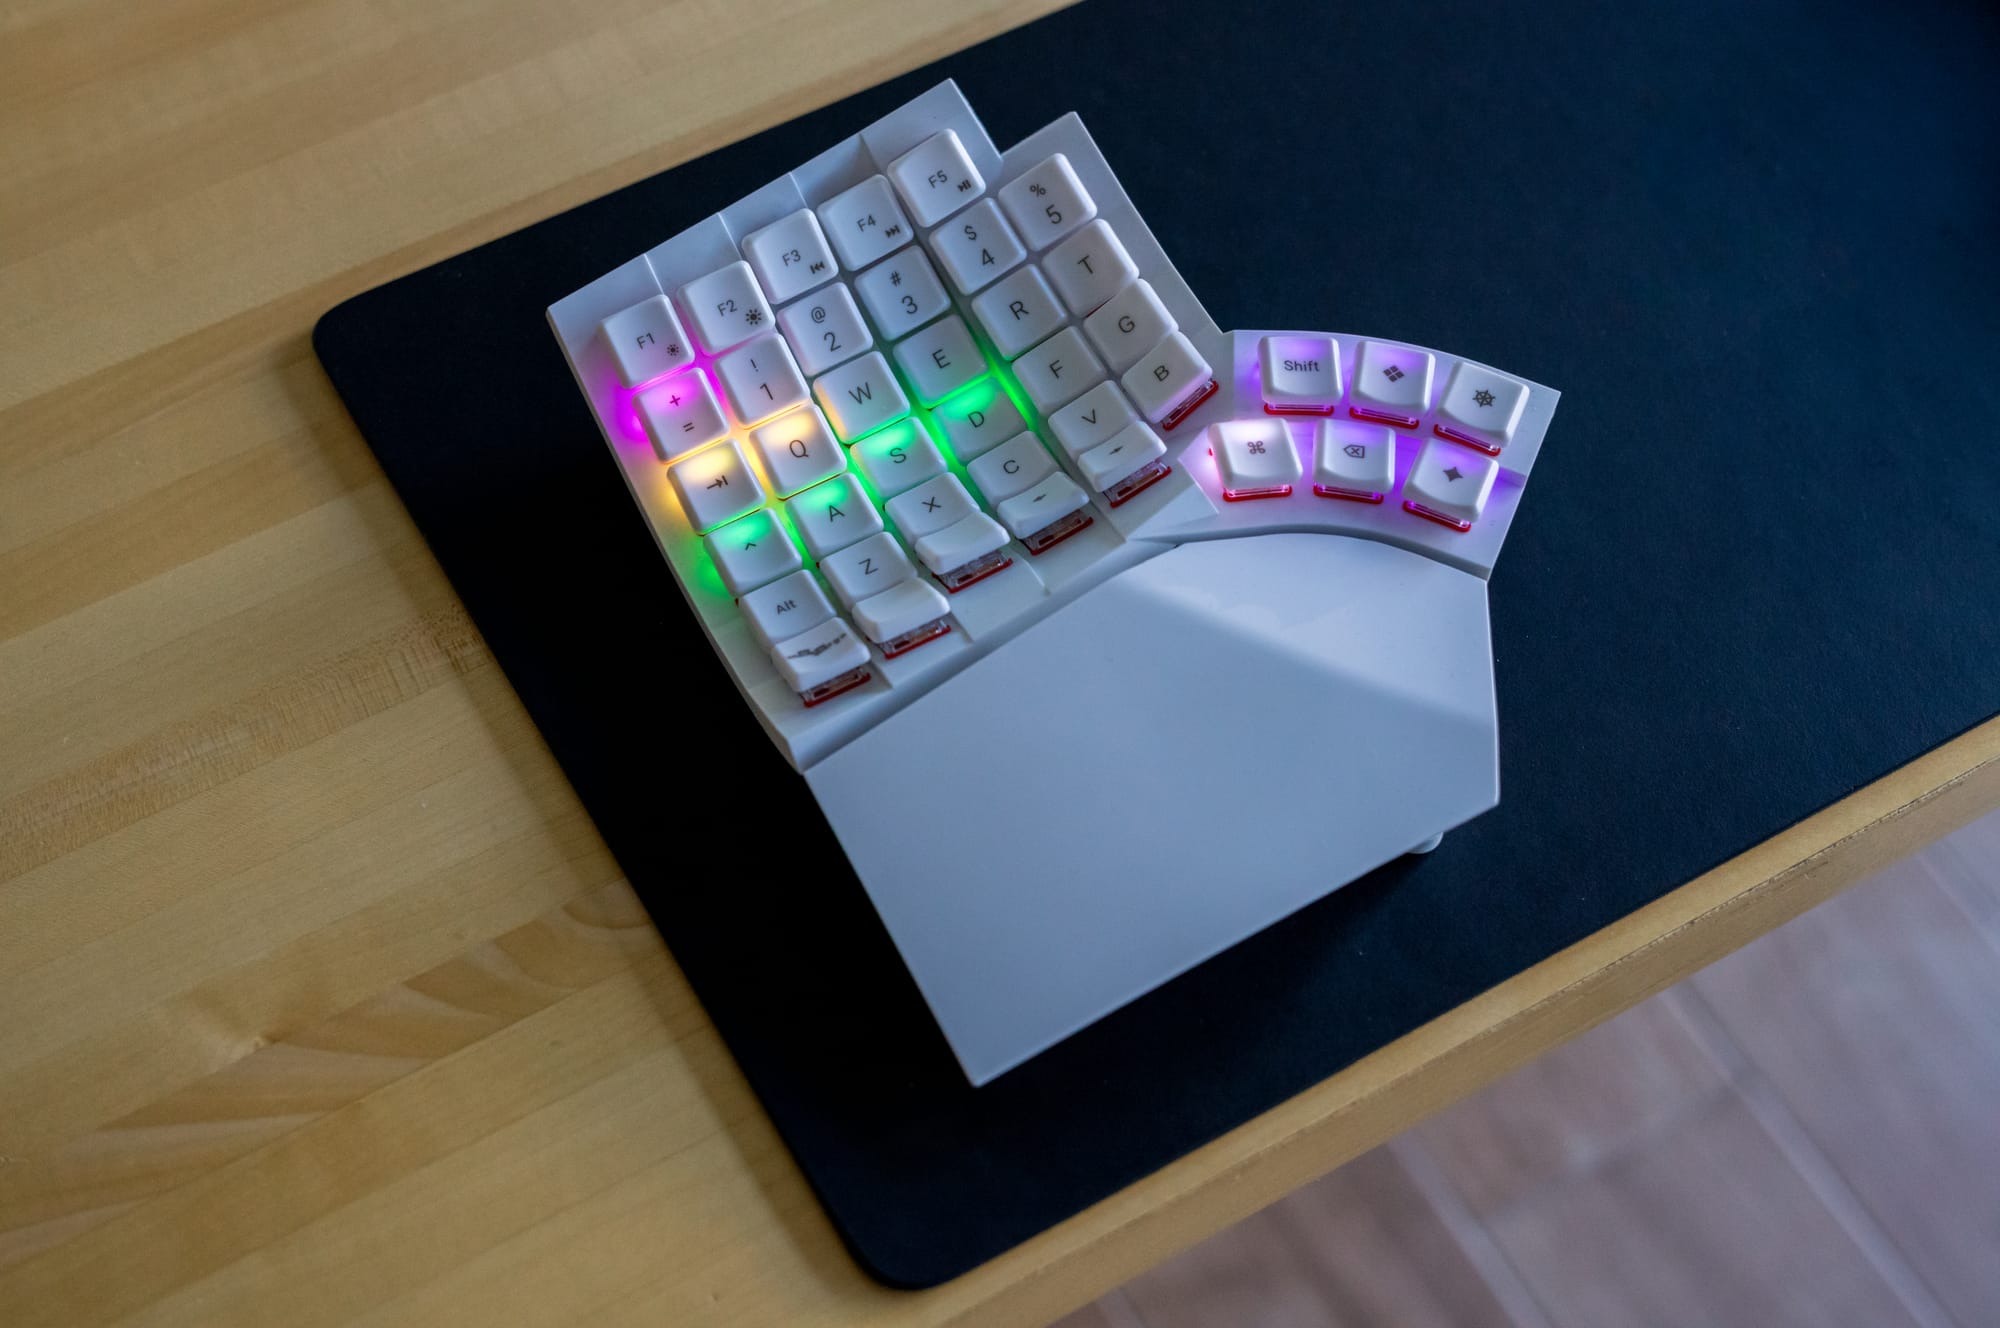
Keycap and switches
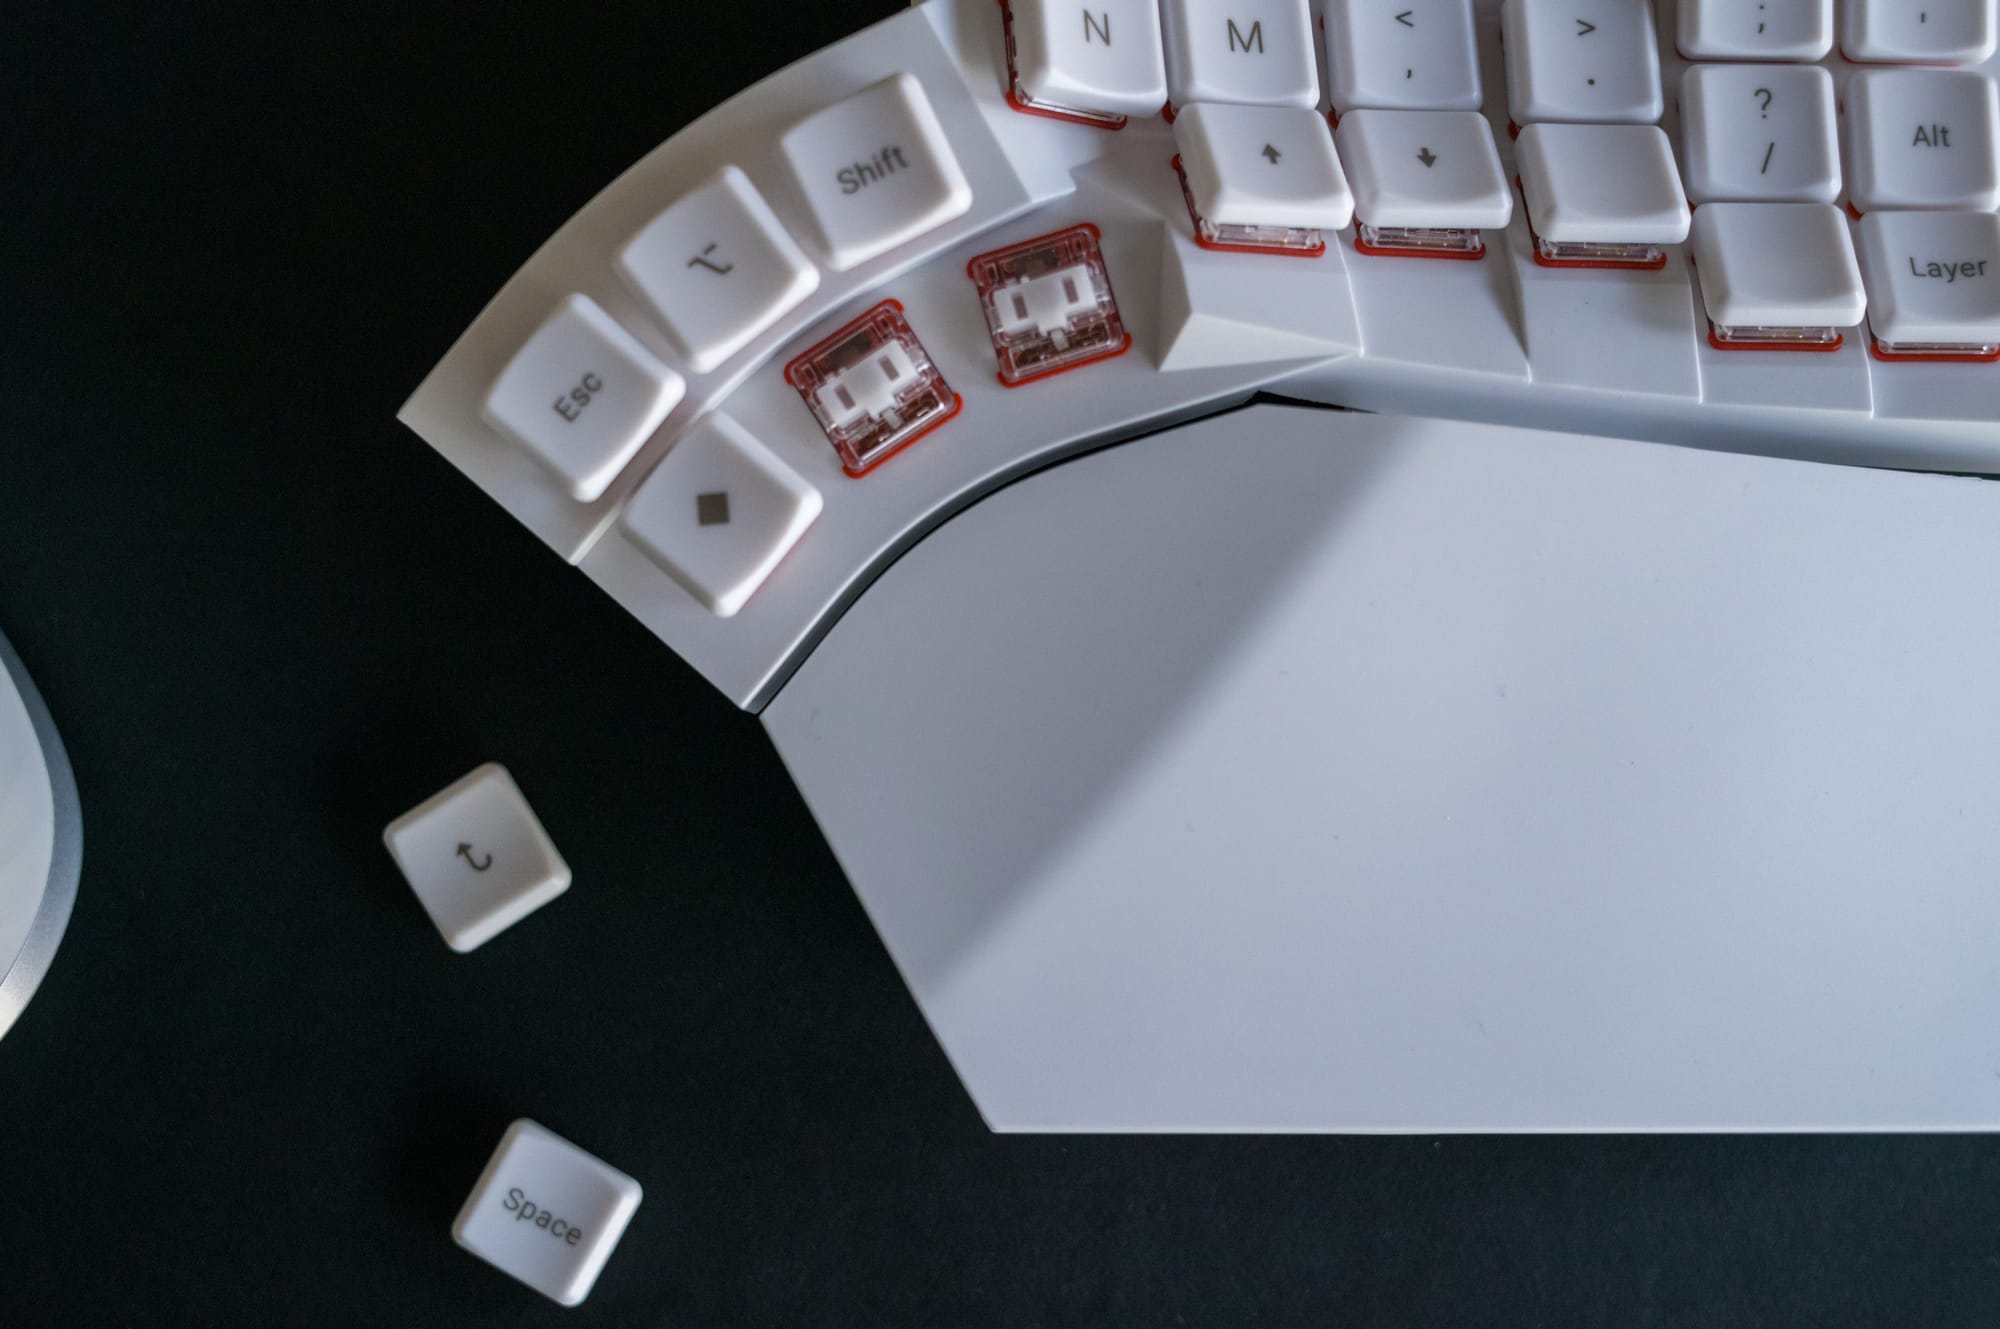
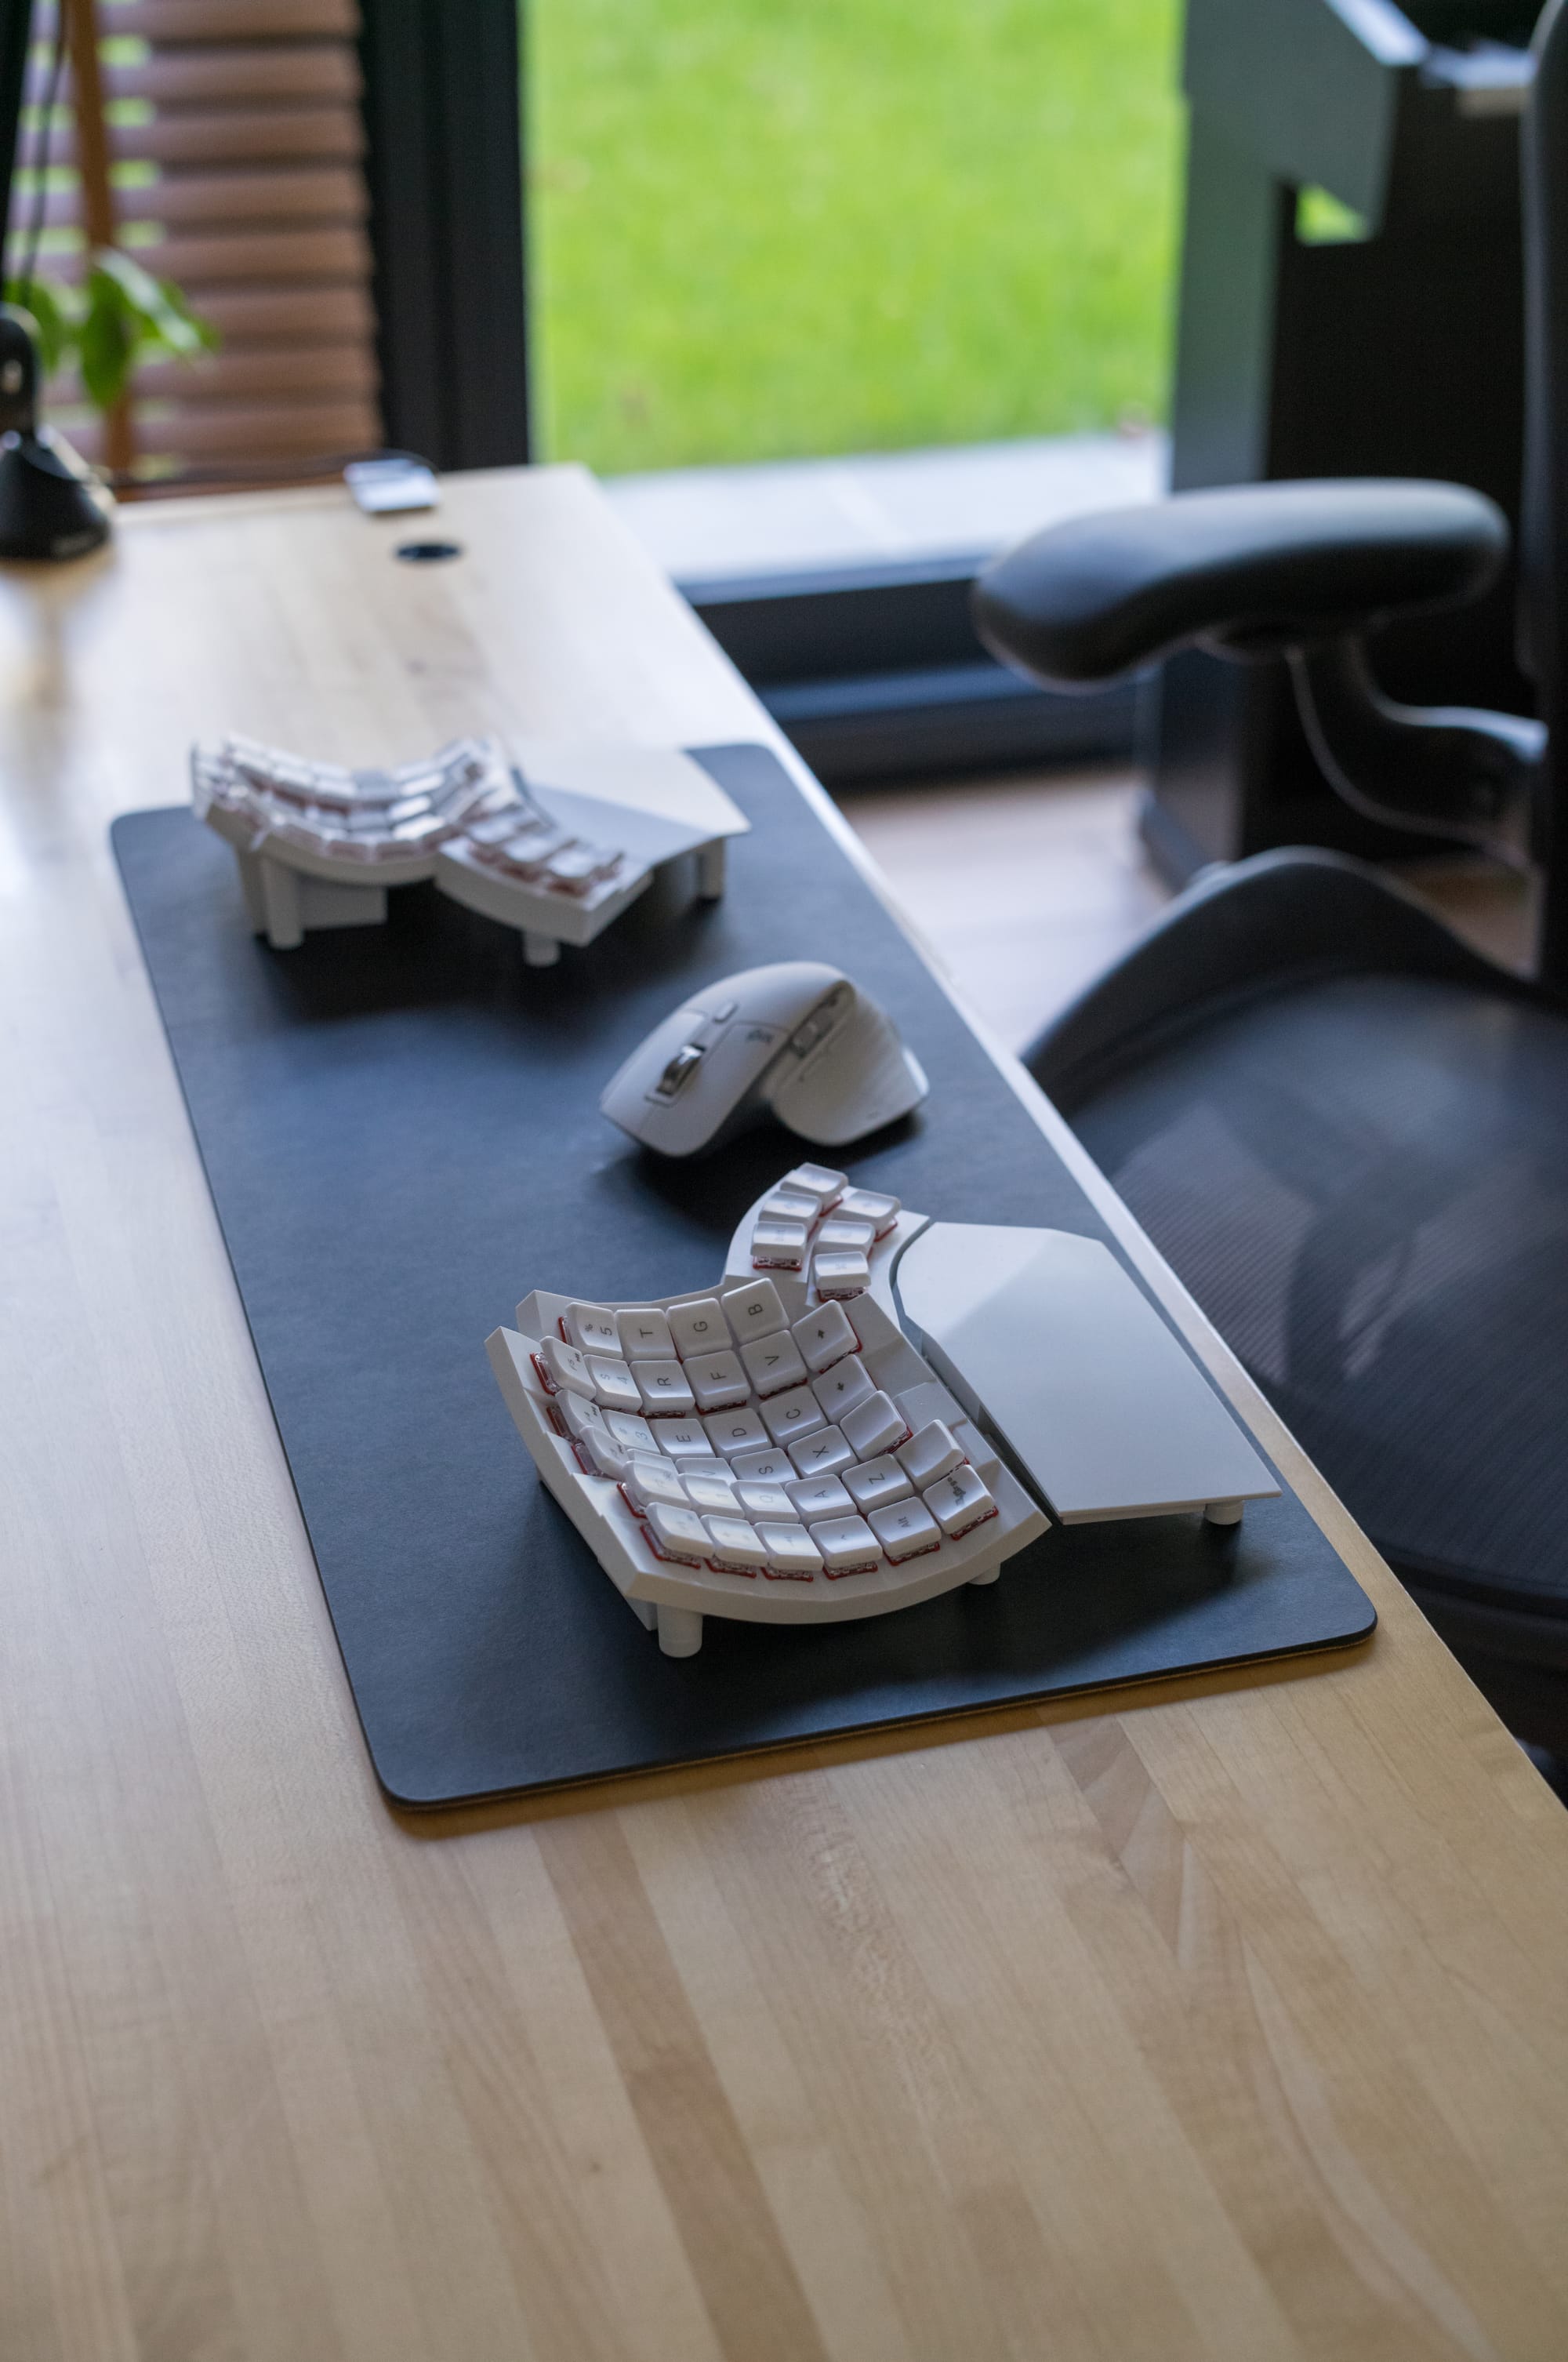
The Glove80 provides several switch configurations. For the record, I never used a Kailh Choch v1 switch. All my keyboards had MX switches, so I knew there would be a shorter distance. But my previous switch was a MX Brown, and before that, I used MX Red and MX Red silents. When I ordered the Glove80, I went with the Kailh Choc v1 Red Pro Linear switches.
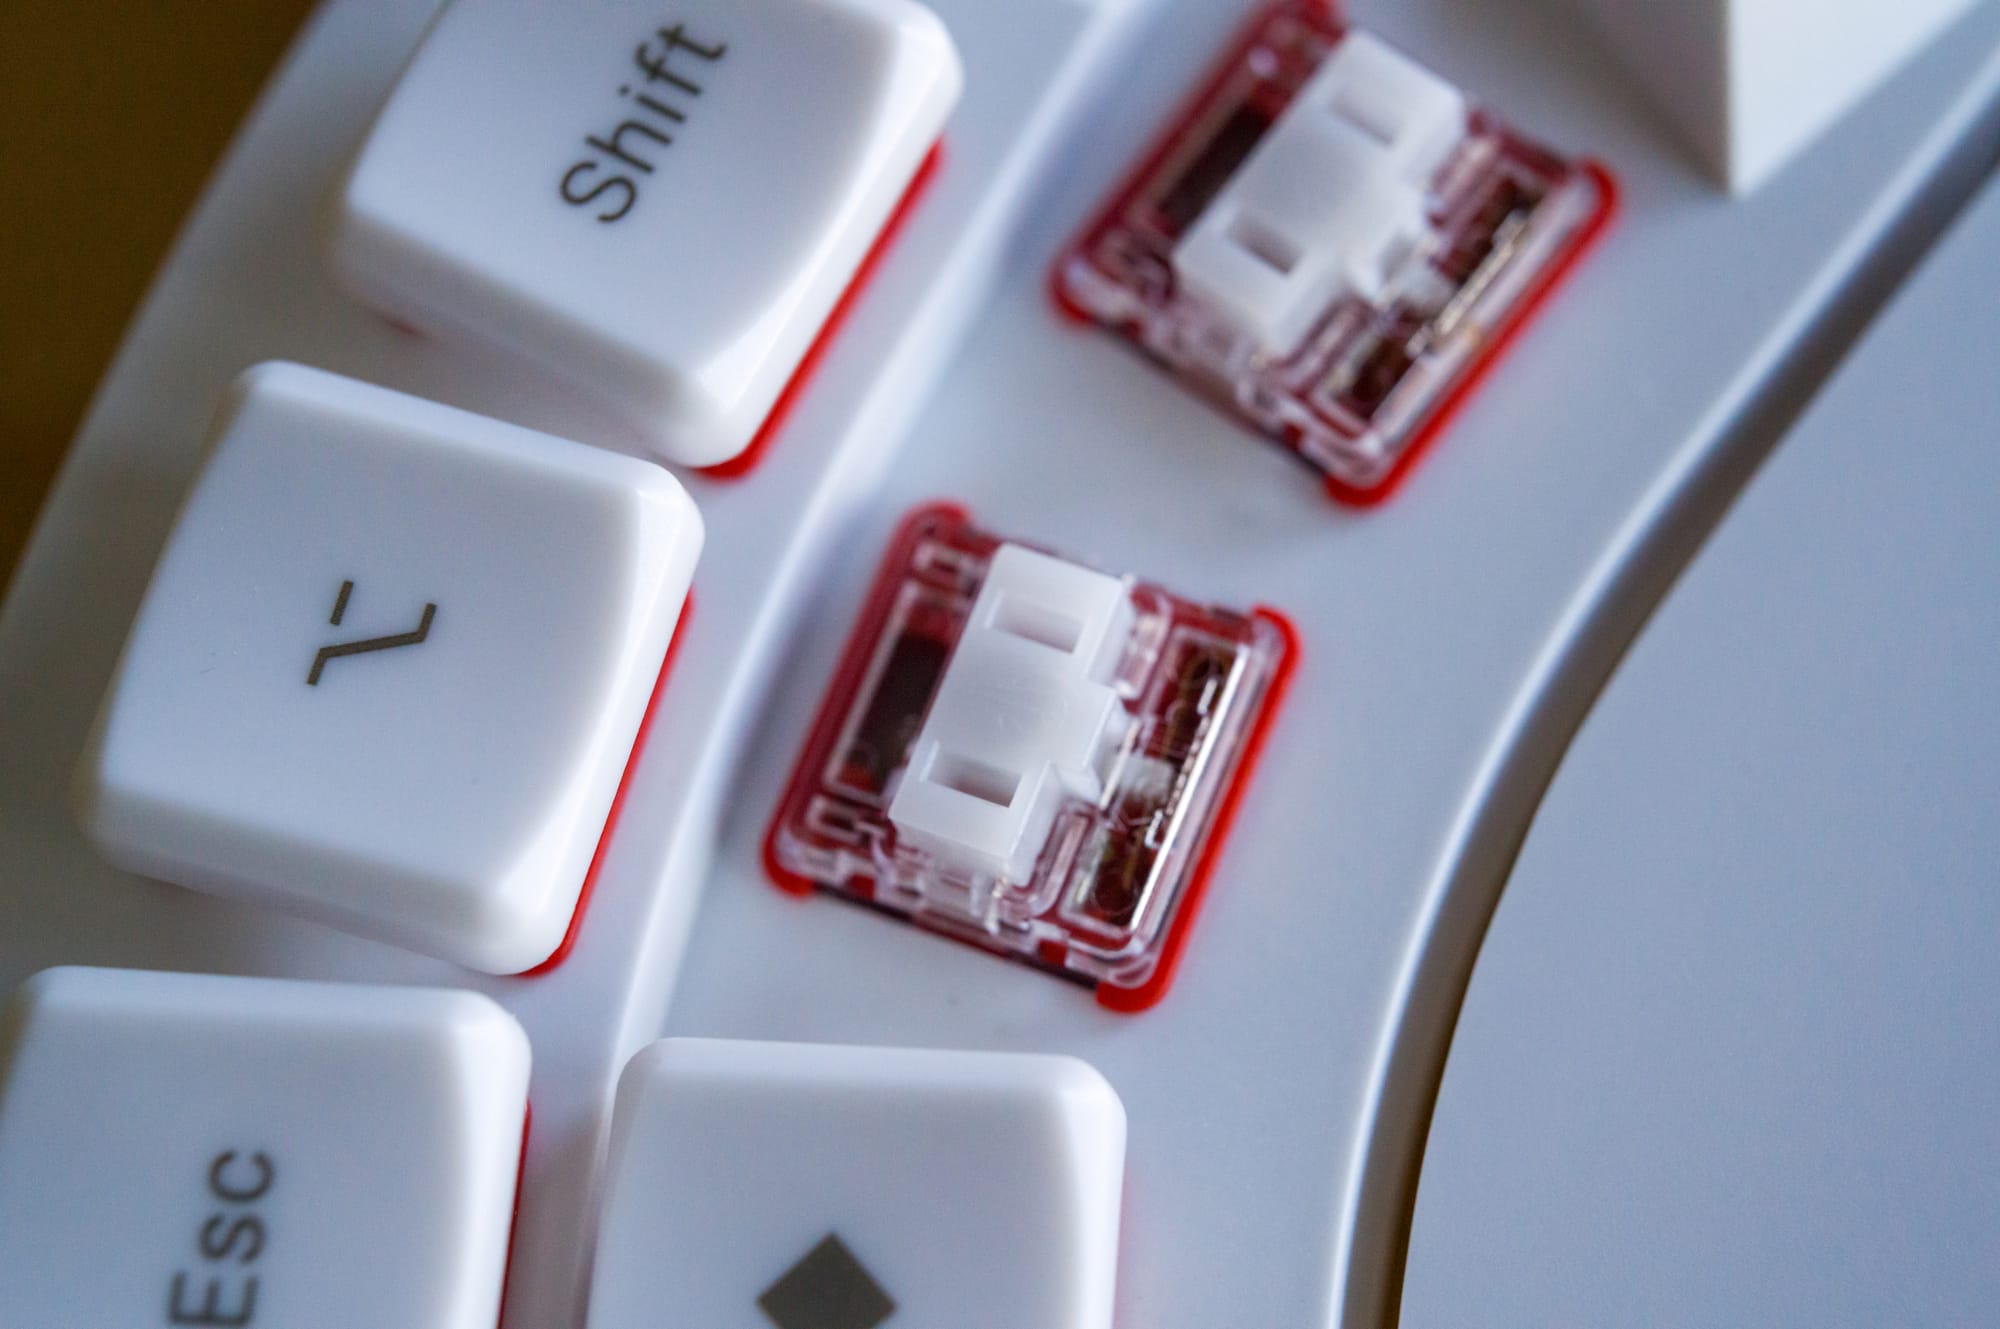
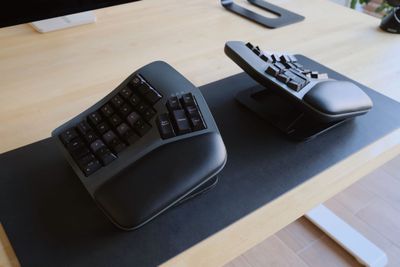
The Glove80 with the Kaih Choch v1 Red Pro switches.
The Glove80 has a great page describing all other options. The number one reason I picked up this switch is the low actuation force of 35 gf. I wanted very light switches (That's something I still miss from my Apple Magic Keyboard days). One thing I didn't like with the Browns was that my fingers were tired after a long session. Let me show a typing session:
So, how do they hold so far? I love them. When I first used them, I had multiple erroneous typings I would accidentally type, but things have improved in a few weeks. I can't complain. If I would order again, I will pick up the same switches.
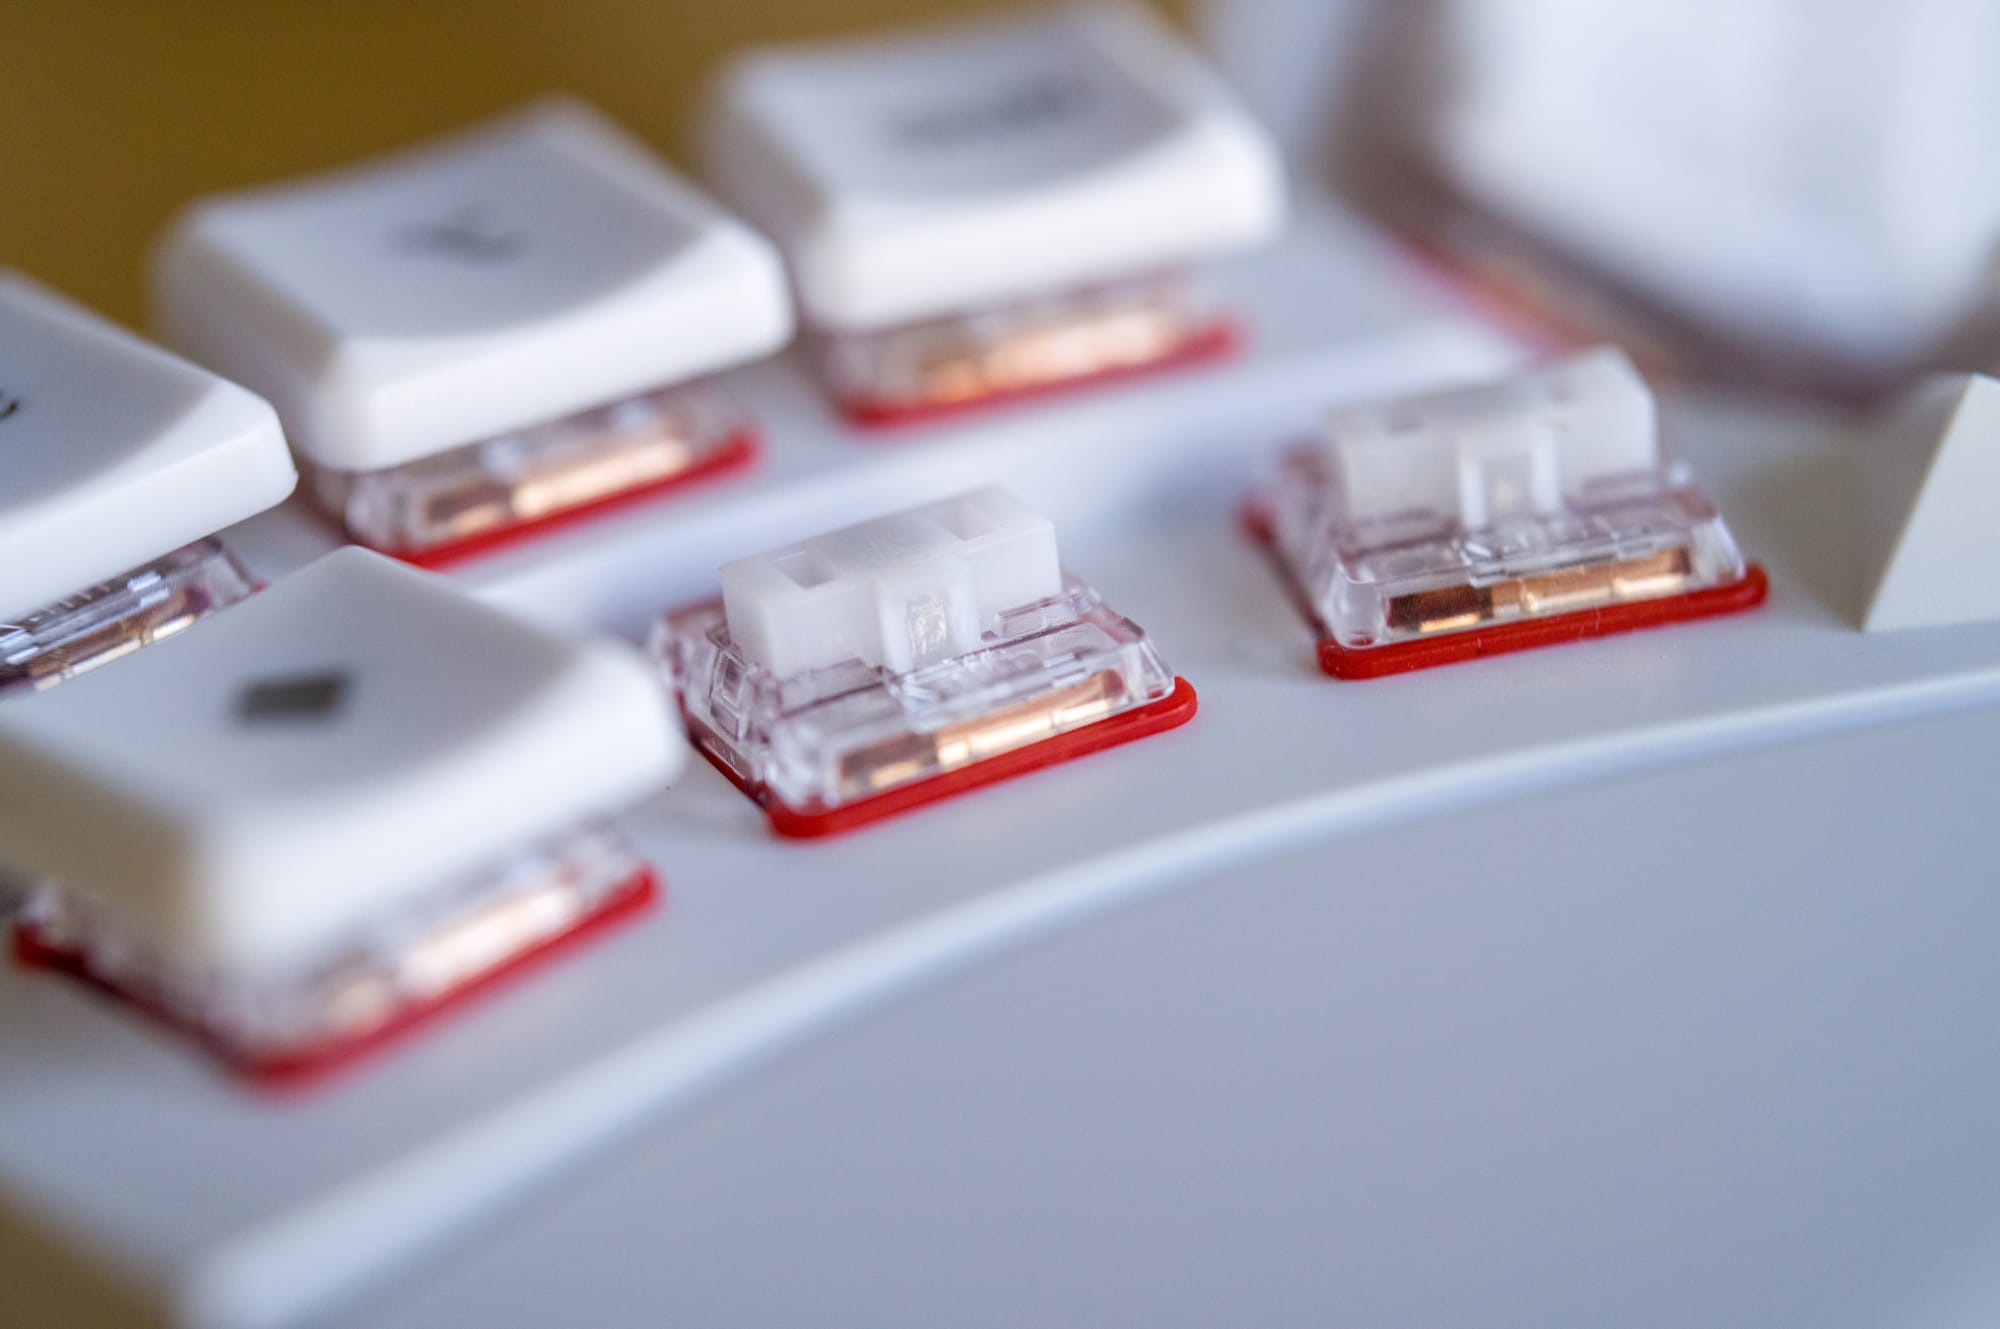
I also ordered additional multimedia and macOS keycaps for keycaps. The keycaps don't feel very premium, one reason is of course because of the Choch switches. However, using the keycaps for quite a bit and changing them, I discovered something I would never have thought to be an advantage:
I can use any keycap on any switch!
Due to the size and various key differences on the Kinesis Advantage 360Pro, swapping or changing keycaps wasn't possible. That's not the case with the Glove80. This is probably obvious for many, but I love the consistency.
Tenting and Palm rests
Glove80 supports tenting. Unlike other keyboards, it's highly customizable and continuously adjustable. What exactly means "continuously"? Unlike other keyboards with only a few settings, you can configure it to any distance. This is very important for personal customization, as it allows you to change the height of your keyboard to your liking.
However, with greater power comes also a great responsibility. What I mean is that the tenting mechanism is not very user-friendly. With Kinesis, for example, I could increase the height on the go with a press of a button, but it wasn't as flexible as the Glove80. But with Glove80, you need to unscrew the legs and use rods to change the length. But here is another question: Does someone constantly change the lengths of the legs during the day? I doubt it.
Hence, even though setting the legs is highly mechanical and needs time, it pays more long-term. Because unlike other keyboards, it allows you to set up your keyboard in any way you want. And I mean it. Here are some photos from the Glove80 user community that use their keyboards in very different setups:
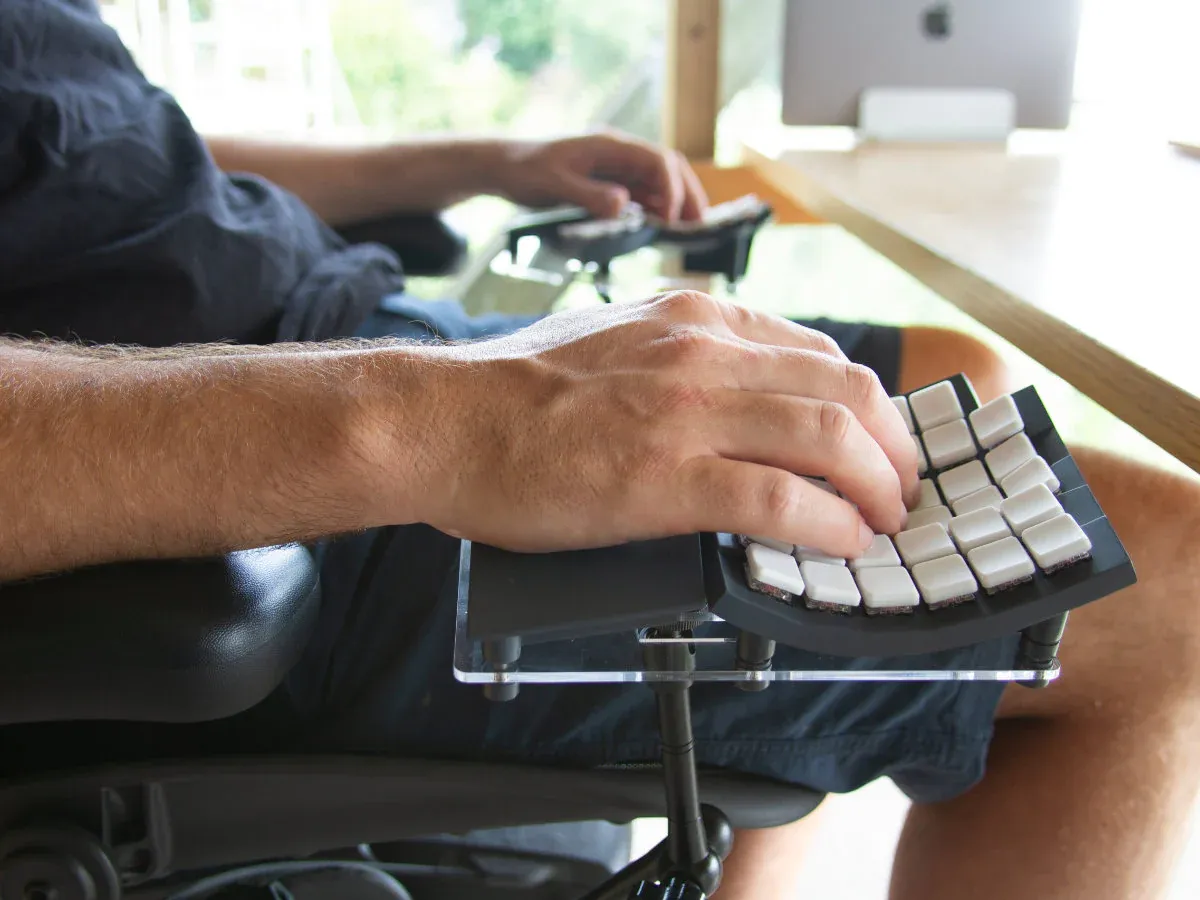
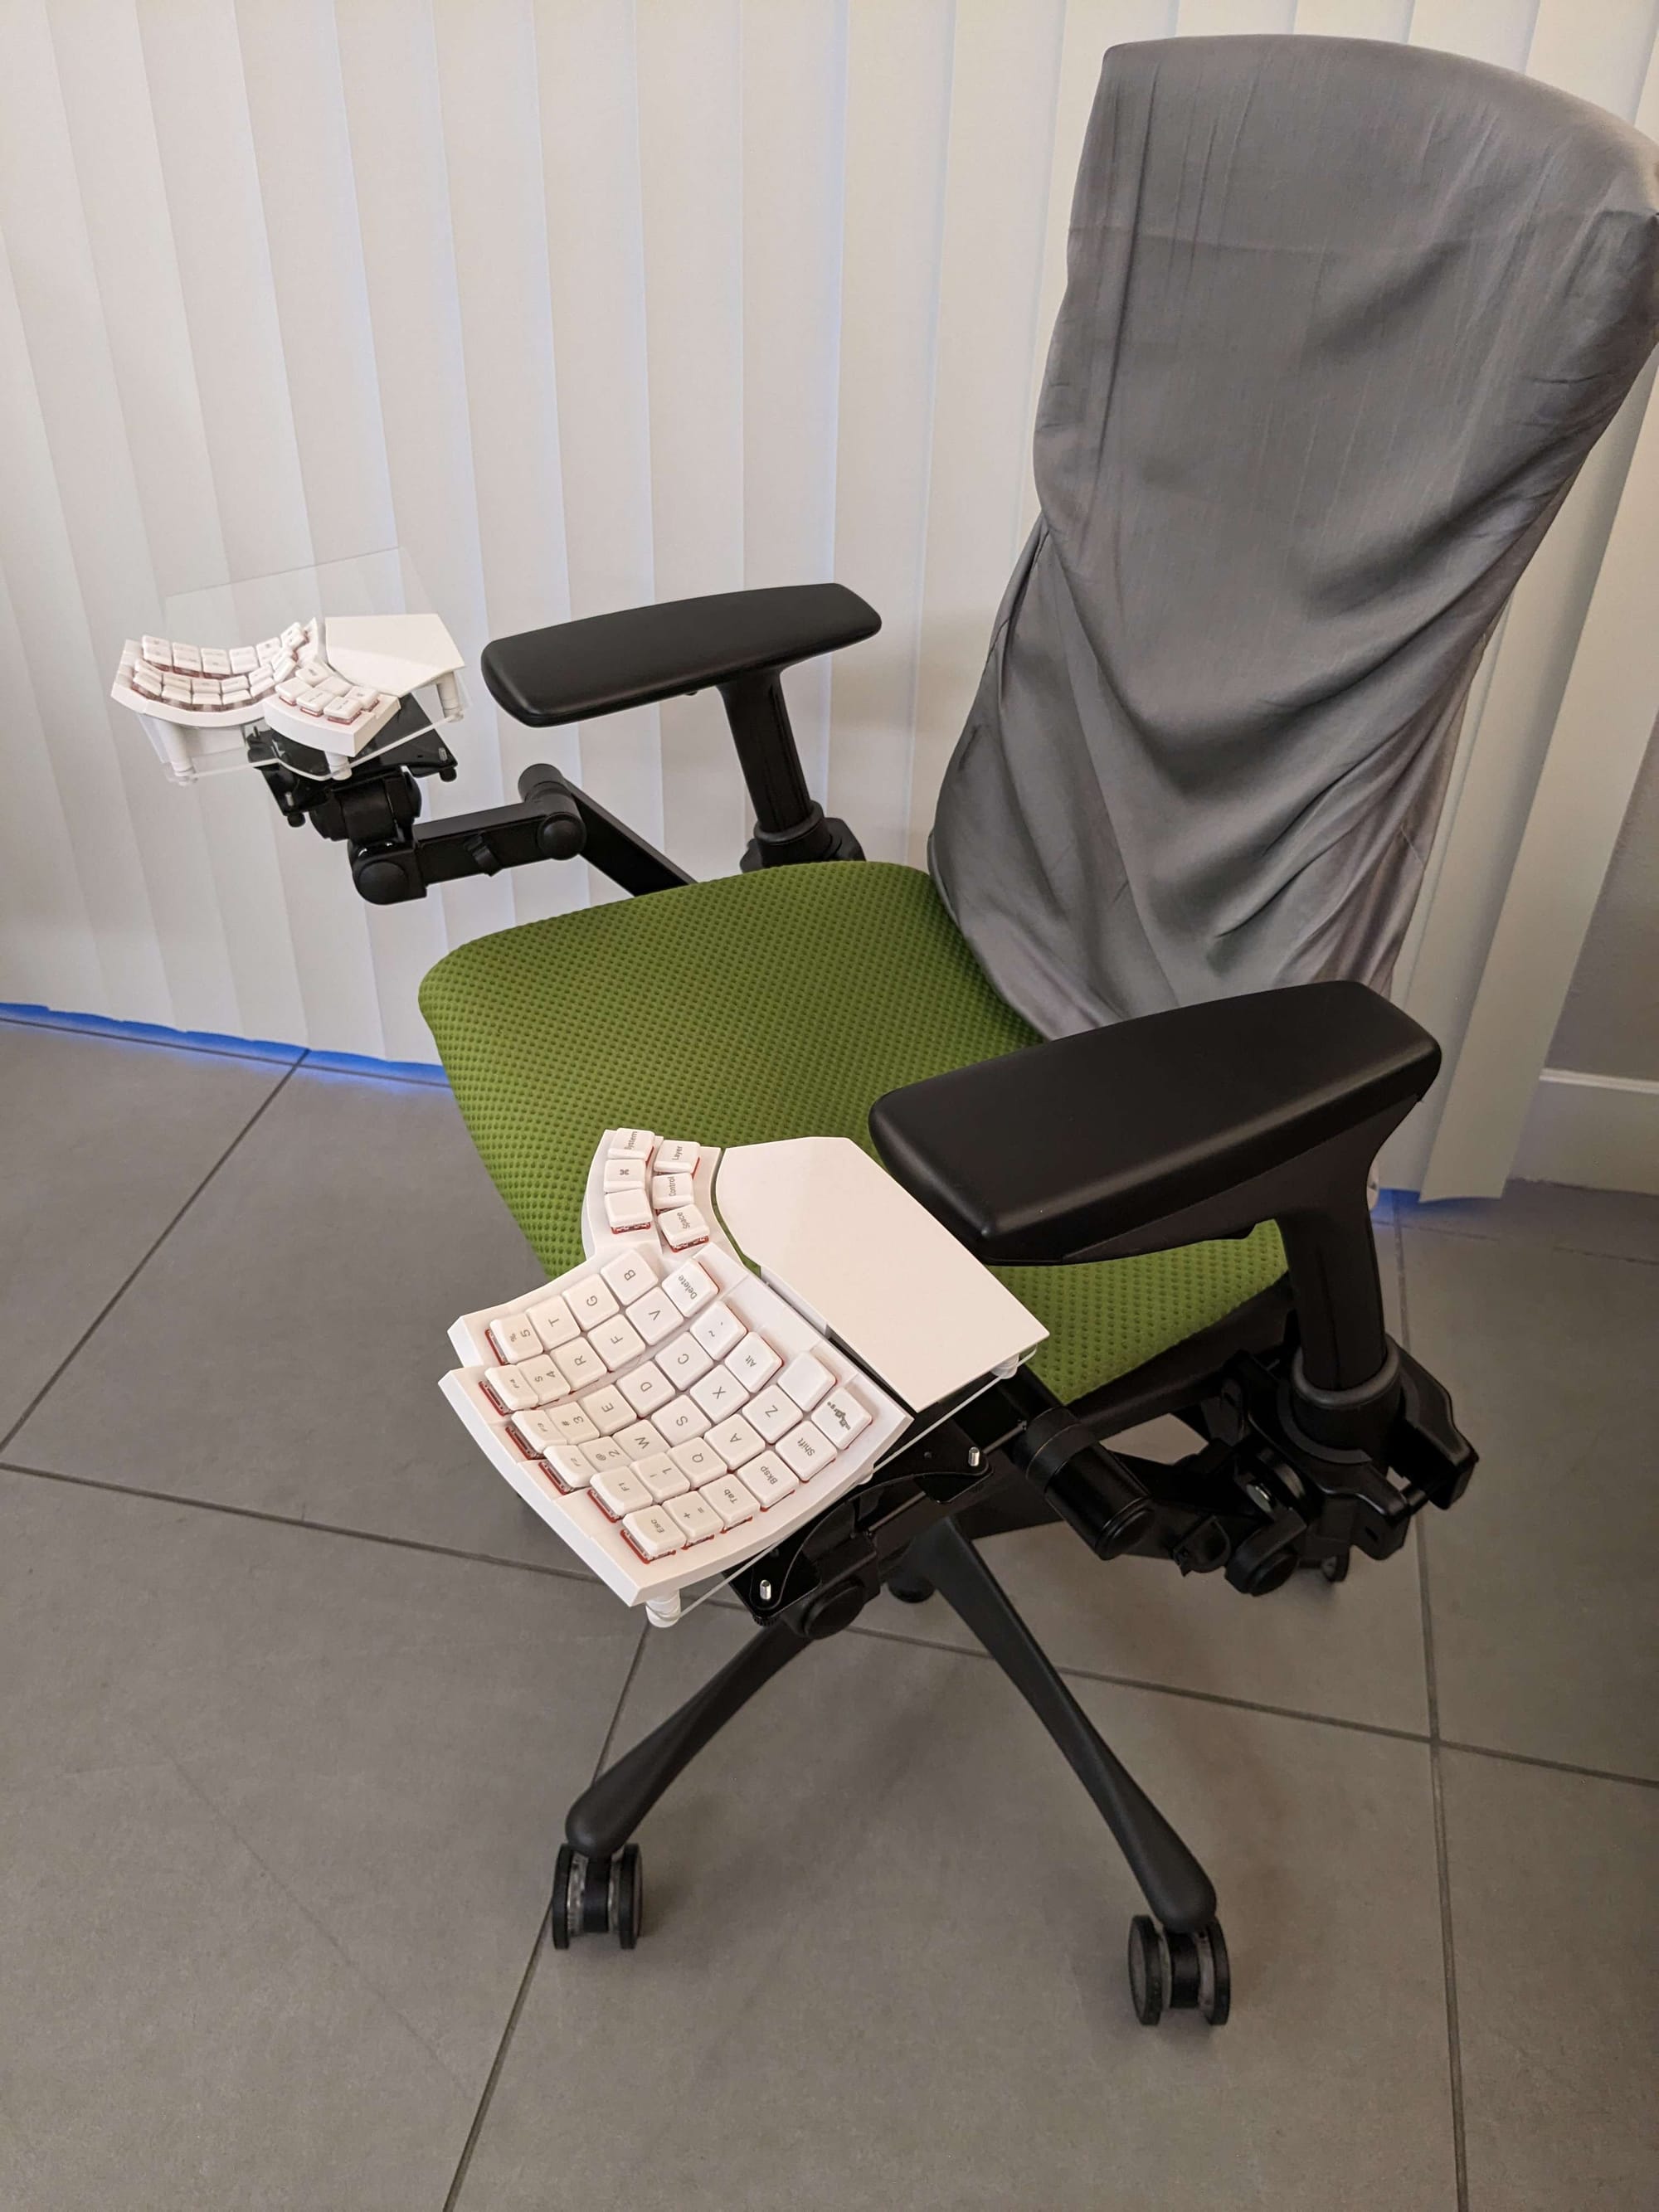
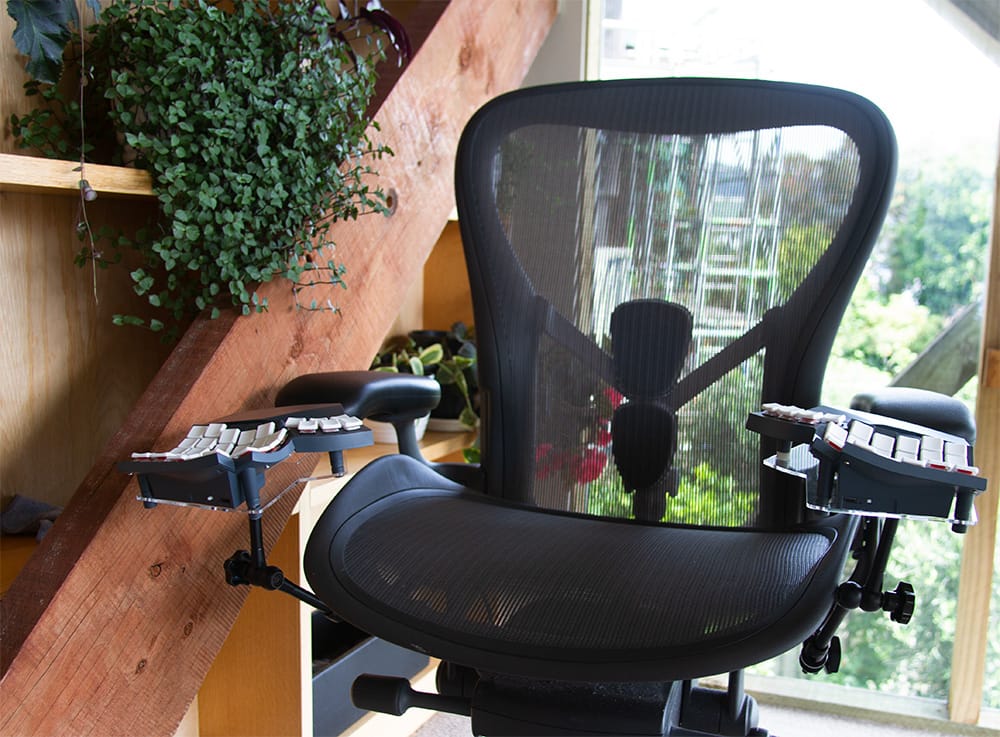
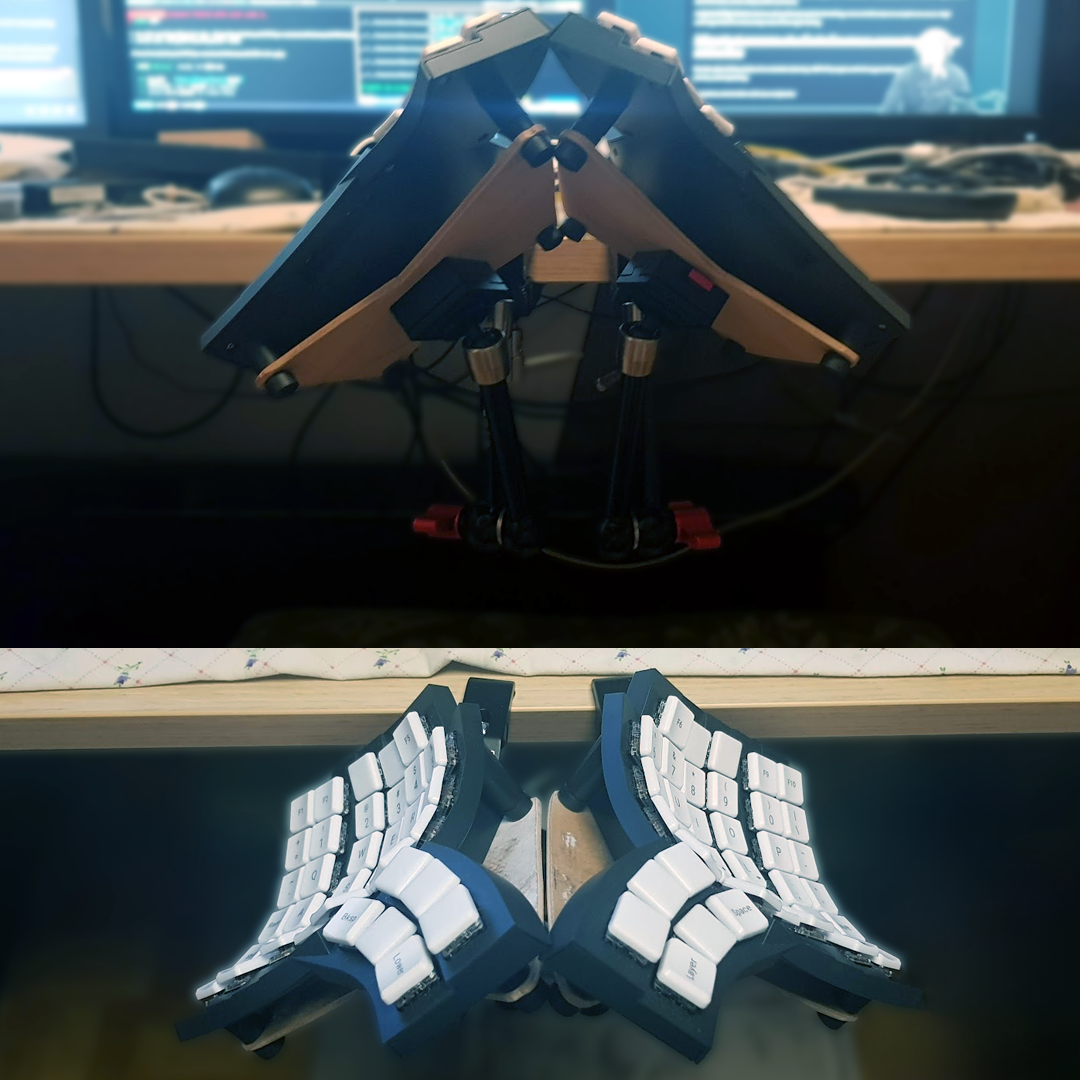
Various mounting setups of the Glove80 keyboard
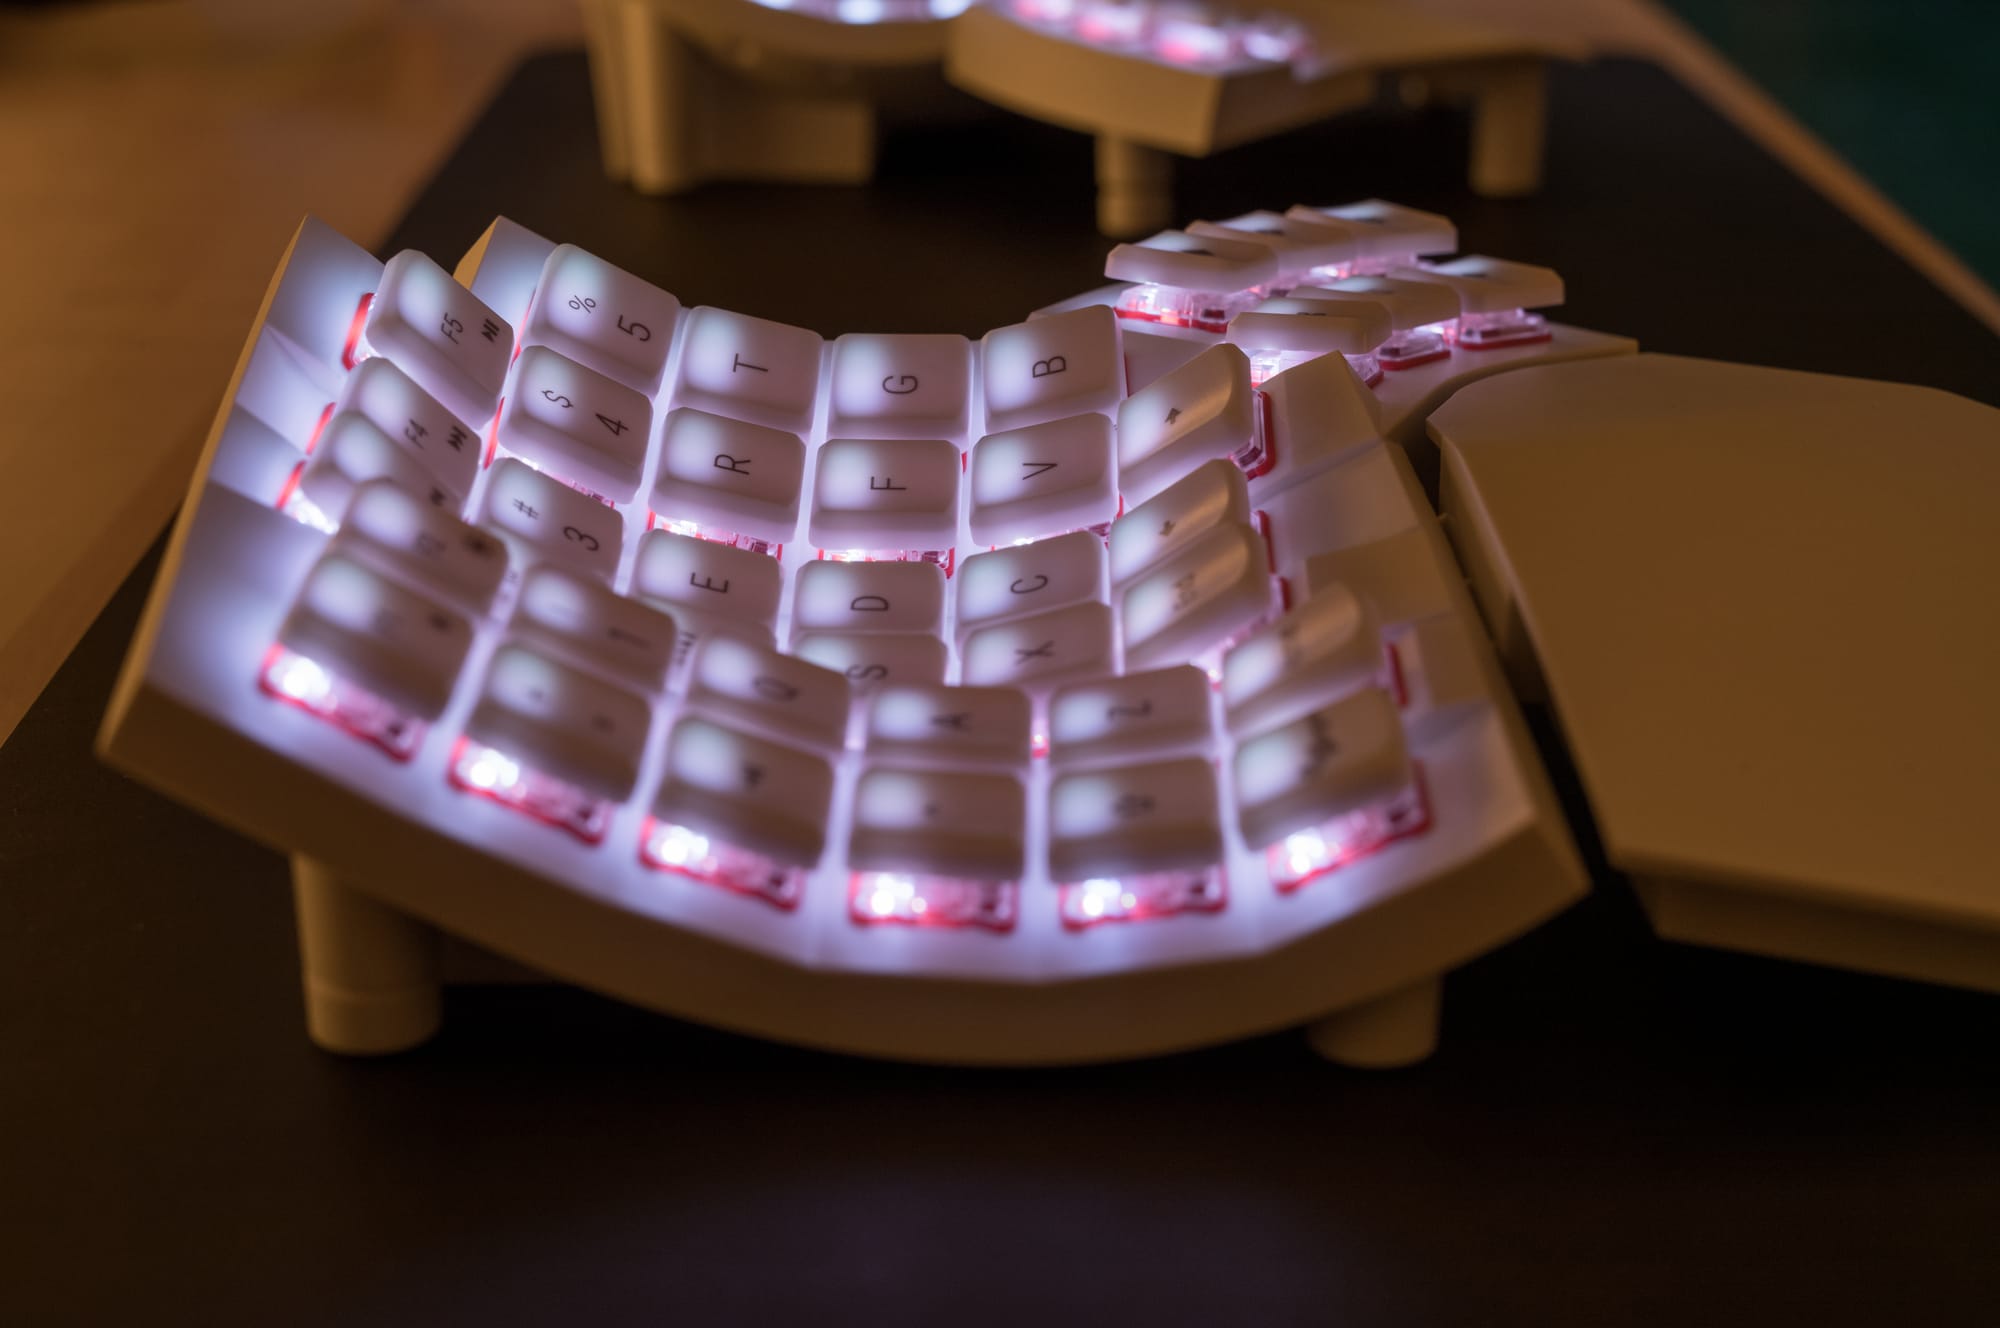
Battery Life and LEDs
The Glove80 is a wireless split keyboard, so you can use it without plugging it into your computer. When I received my Glove80, I charged it once, and since then, it's still working, and I haven't charged it yet. That's very cool. I don't use the LEDs, and the only time they are activated is when I switch to the magic layer (via the MoEergo key).
The magic key is great because you can immediately see the battery status of each pair. Here is a photo of it:
Green and orange LEDs show each half's battery capacity. The upper row is the left half, and the lower row represents the right row. Here, you can see that the left (also the primary half) has a lower battery capacity. That's expected because the lower half is the brain of the split keyboard and does more work.
As you see, the Glove80 has an RGB LED per key, which is a great feature. However, the ZMK firmware is limited, and you can't program individual LEDs per key. However, they are working on it, and I think we'll receive an update soon that enables us to do per-key RGB programming.
Firmware flashing
Firmware flashing is probably the best part about Glove80. It's way better than the Kinesis Advantage360 Pro in any way.
First, instead of two files, you get a single FW file. It doesn't matter which part you flash with this file because you drop it into each bootloader.
Second, you don't have to compile it manually on your MacBook or use GitHub Action (or any other build system) to build the firmware. Glove80 made an online build farm with a UI that allows you to save your ZMK layouts, build them, and download them. It's perfect.
The UI has many rough edges; I think it could be better. But these details can be improved with time. For example, it would be nice to copy/paste the parameters of a key and paste them into a different key; this is especially useful when you want to propagate specificthan similar keys to upper/lower layers.
My custom ZMK configuration
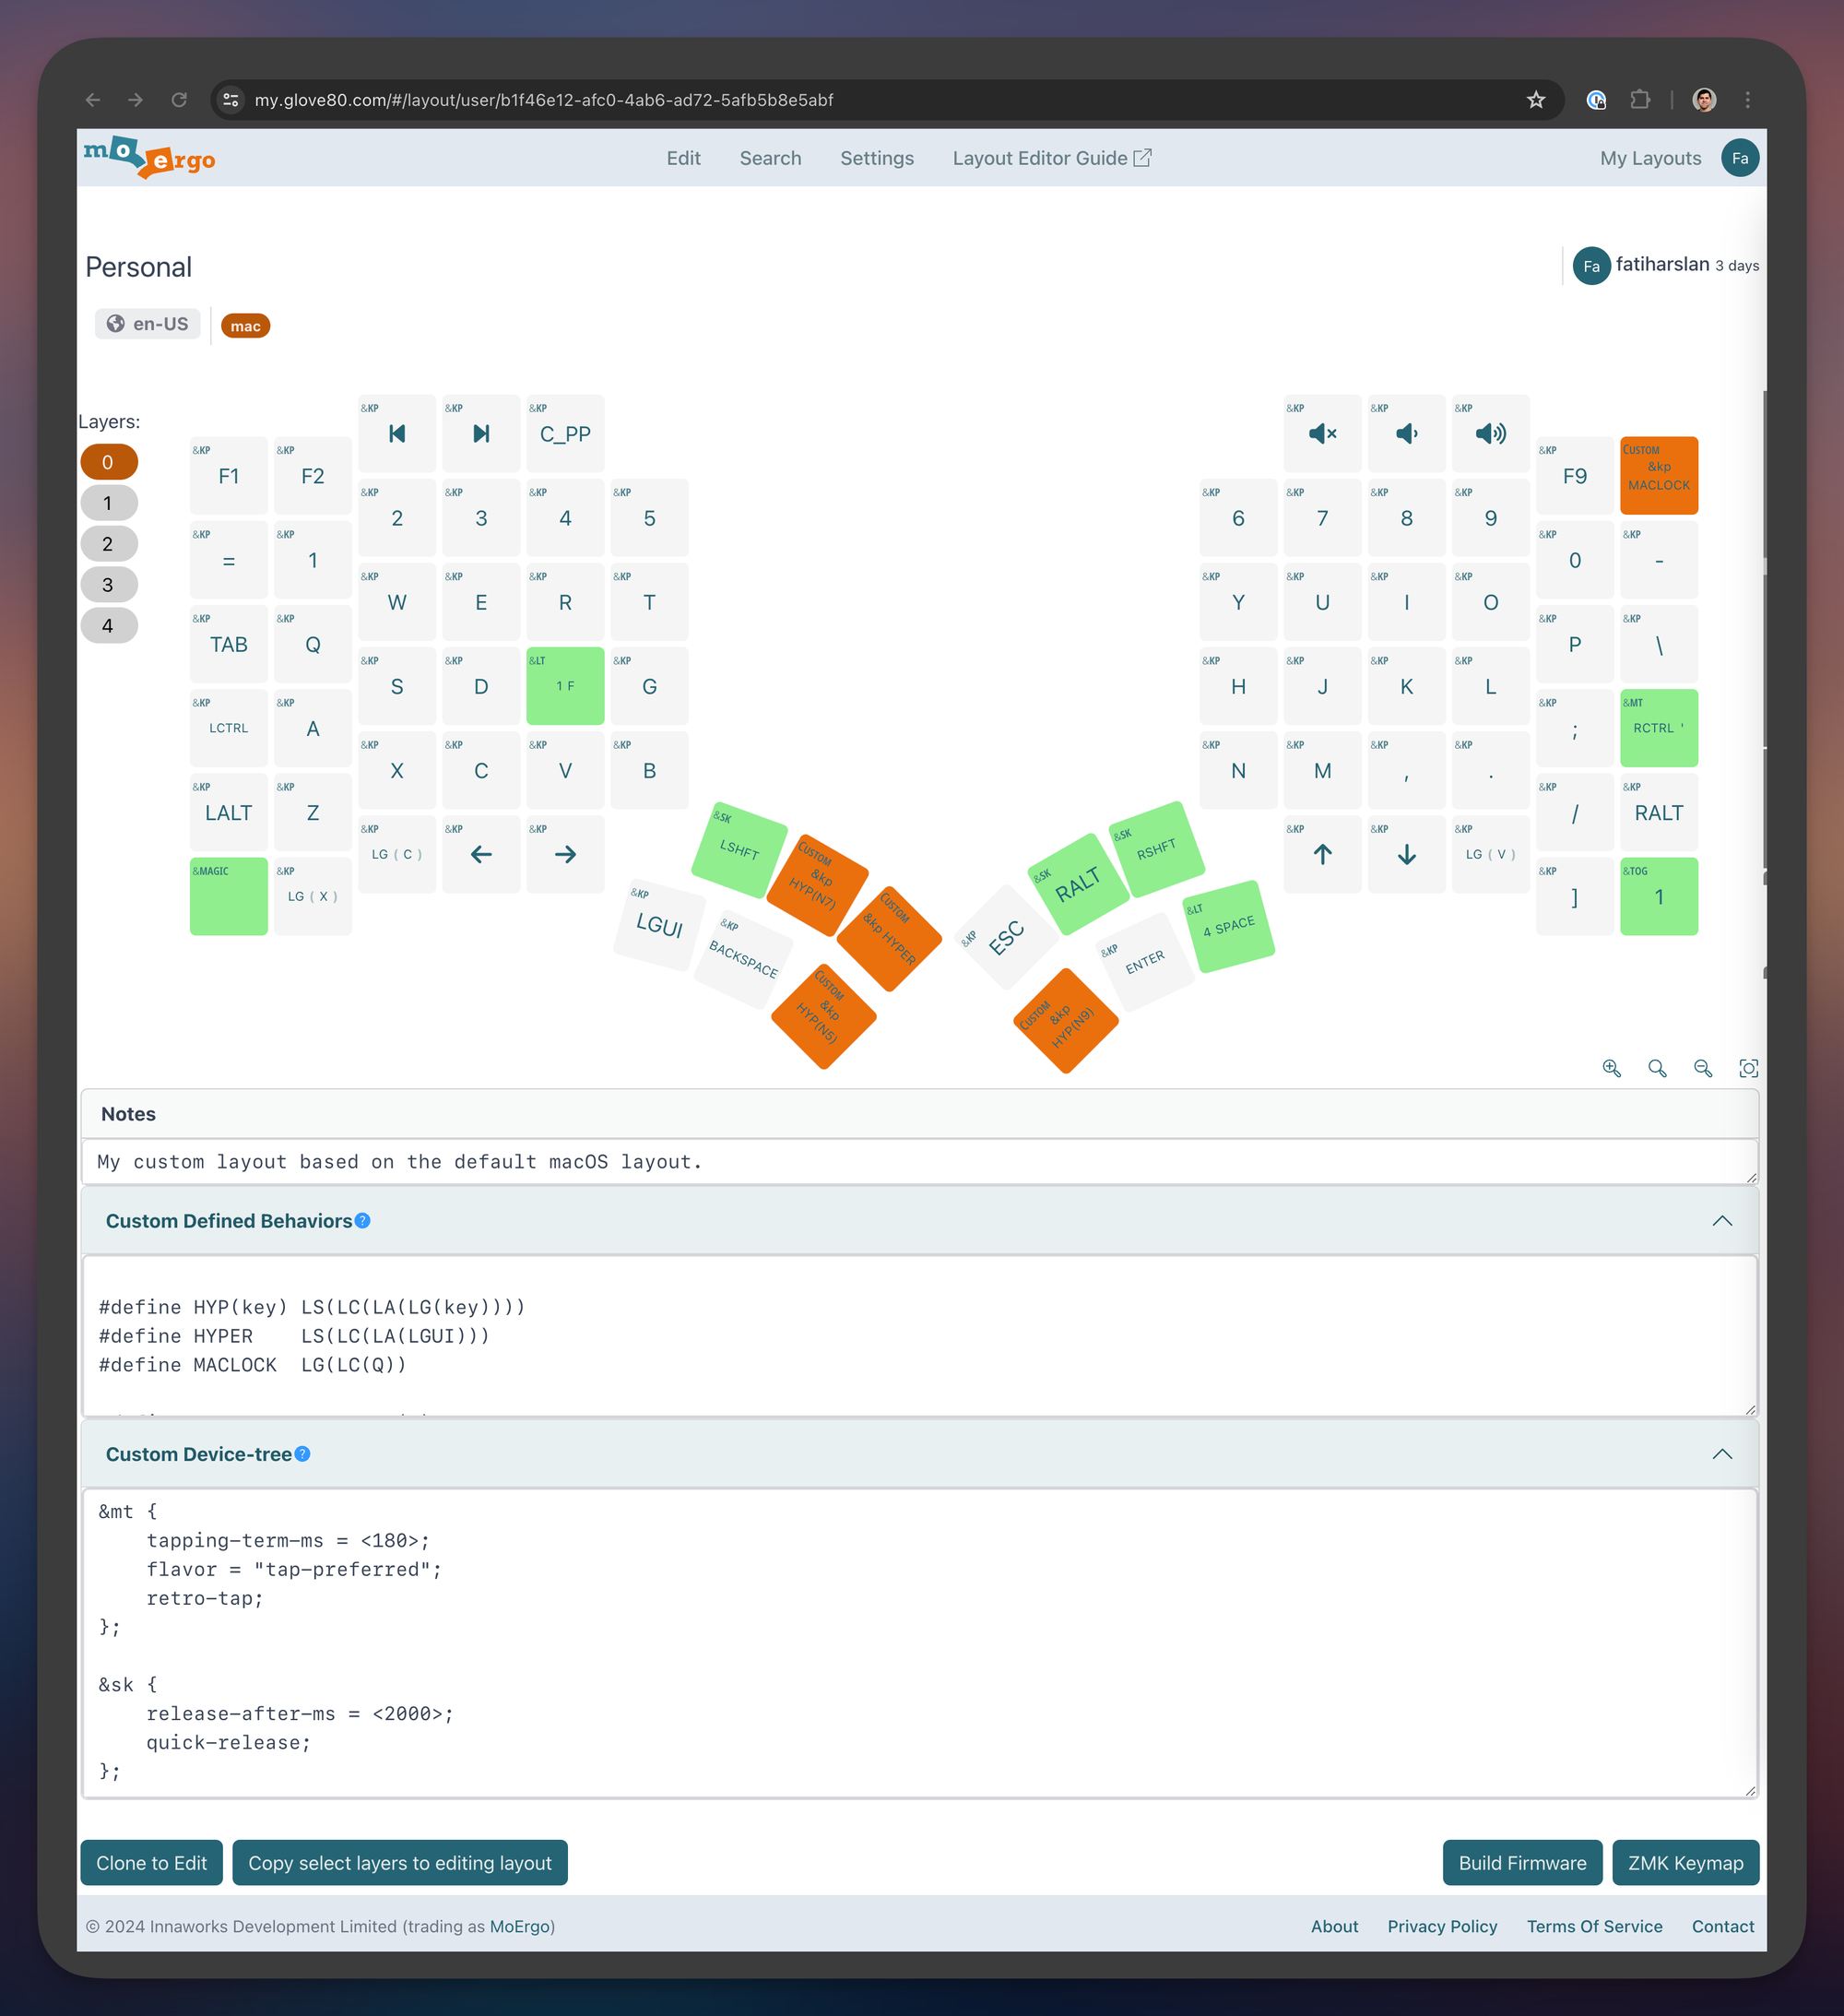
As with all modern split keyboards, the Glove80 has configurable firmware. Because it's a wireless split keyboard, it comes with ZMK. Luckily, I already used ZMK with the Kinesis, so I had a plan for configuring my layout. It's similar to the Kinesis but with a few key differentiations. I still have three layers. First of all, here is the factory default for macOS that my layout is based on: https://my.glove80.com/#/layout/glove80-macos and ou can find my custom layout here: https://my.glove80.com/#/layout/user/b1f46e12-afc0-4ab6-ad72-5afb5b8e5abf
Let's start with the specific layer:

- Backspace is mapped to Cmd ⌘ (see LGUI on the left thumb cluster), which I use frequently. Having it on my thumb cluster makes my everyday tasks more ergonomic.
- Delete is mapped to Backspace because it's more natural.
- Right Ctrl is mapped to Esc, the perfect place for the Esc key. Close to when you need it, but not so close that it hinders you.
- Now that I have function keys (F1, F2, etc.), I configured some of them as media control keys (prev, next and play/pause), and some for volume control. F1 and F2 control the brightness so that the whole row can be used to change the settings of my MacBook.
- I changed the Shifts to Sticky Shifts (via the
&skparameter). It's still a shift, but you don't have to hold it forever. Instead, you can press the shift and then jump and press another key. The shift will be applied to that character. This is very handy for characters far from the shift key. - The
“quote key above the RALT key is a mod-tap. It means holding it means Ctrl, but tapping outputs the'or"characters. I found it very ergonomic to have the Ctrl key on both sides of your keyboard, and depending on which Ctrl key combination I use, I use the opposite Ctrl key. So ctrl + p means I press the left ctrl key and the P key. Ctrl + a means I press and hold the right"key (which triggers the right ctrl when holding) and the A key. - The F key is a layer tap. Holding the F key switches to the Lower layer. More on this below.
- I have defined several constants,
HYP,HYPERandMACLOCK.
#define HYP(key) LS(LC(LA(LG(key))))
#define HYPER    LS(LC(LA(LGUI)))
#define MACLOCK LG(LC(Q))- Hyper is a combo key that simultaneously presses Cmd + Option + Alt + Shift. Pressing all four of these is uncomfortable, but the beauty of a Hyper key is that you can create custom global shortcuts to apps. Previously, I had to use some key combinations to avoid race conditions or duplications. The Left Ctrl, Left Alt, Home, and End keys on my left thumb clusters are all Hyper keys.
- HYP is just a shortcut to combine it with other keys. You can see I have 3 HYP mappings. These are used to take screenshots via CleanShotX. One opens RayCast, and one opens 1Password. Hyper + 8 opens 1Password for me, Hyper + 5 CleanshotX, and Hyper + 7 Raycast.
- Lastly, I use MACLOCK to lock my MacBook. I create these constants because they document my layout better.
- The F key is a layer tap and holding the F key switches to the Lower layer. That way, I can tap any output number by having the F key and pressing any of the keypad keys on my right keyboard.
- Sometimes I need free one of my hands (when I'm on the phone, for example). In this case, I use the dedicated "lower" key (via
&tog 1). That toggles to the lower key, and I can quickly write numpads.
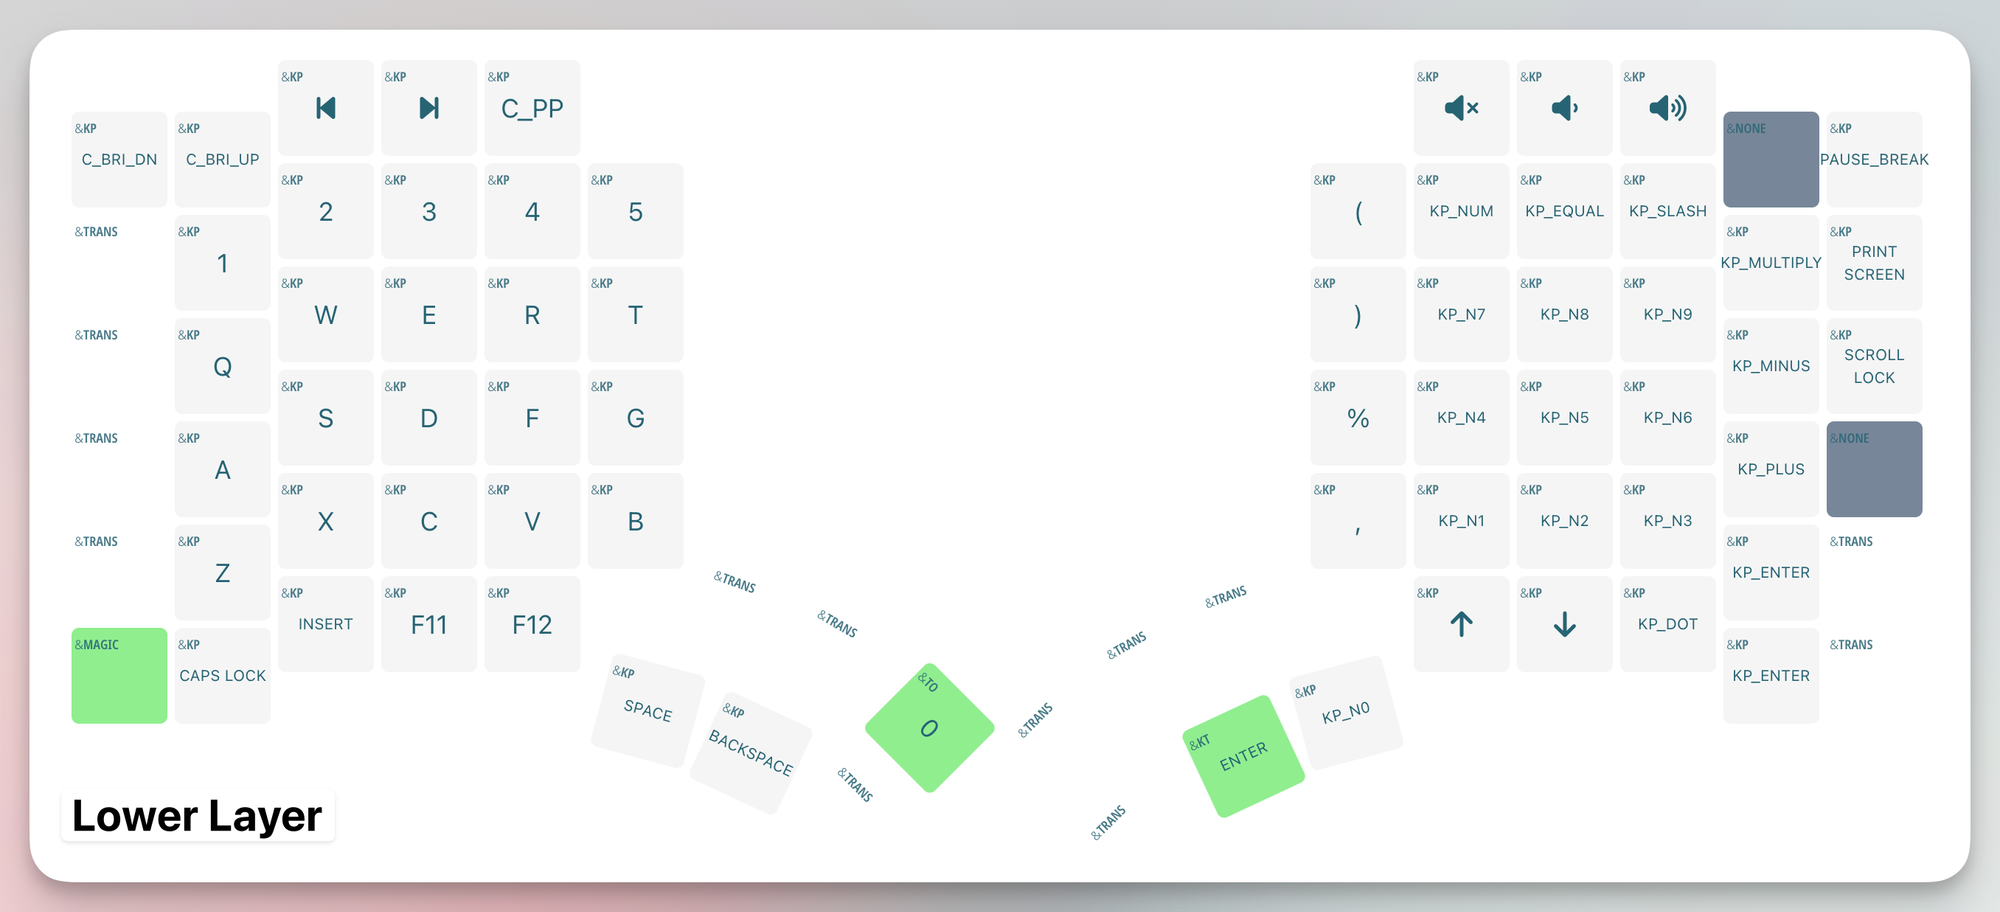
- As I said earlier, the Space is a layer tap, and holding it switches it to the Symbol layer.
- The whole symbol layer contains a set of all my highly used symbols. Holding Space and pressing a key on the left half of my keyboard prints symbols like
! @ # $ % ^ & ( ) { } [ ] | ~ `Once you get used to it, it's much faster than using Shift and numbers to print them. - On the right, I use VIM-like navigation arrows. Hence, I can easily navigate by pressing the holding space and using the HJKL keys.
- The symbol layer also has the entire F1-F9 row. Even though I don't use any of them, it's nice to have access to them in case there is a crucial combination looking for them.
As you see, my layout is not that crazy. But if you want, you can go crazy. A vast community builds custom layouts with a more sophisticated setup. One example is using home-row mods: https://precondition.github.io/home-row-mods
If you have seen my layers, I use the F key similar to a home row mods. But the home row mods are a far superior but complex layout. I'm thinking a lot about implementing it in the future.
Lastly, I changed some of the configurations for my &mt and &sk parameters:
&mt {
    tapping-term-ms = <180>;
    flavor = "tap-preferred";
    retro-tap;
};

&sk {
    release-after-ms = <2000>;
    quick-release;
};
These settings can be read from the ZMK documentation website and must be adjusted according to your typing speed. So read the documentation and tweak them (or remove them) to your liking.
Community
One fantastic aspect of Glove80 is the community aspect. Honestly, it wasn't something I evenl considered when I decided to get the keyboard. But it's impressive because you can connect with other Glove80 users and share your knowledge. People share their latest mods, keymaps, photos, etc.
If you're reading this, and you have questions unanswered in my review or want to say "Hi", join the Discord channel: https://www.moergo.com/discord The founder and CEO also hang around in the discord channel, and none of the questions go unanswered.
Comparison to Kinesis Advantage 360Pro
I immediately received this question when I said I ordered the Glove80. How does the Glove80 compare to the Kinesis?
I've got the questions because I've been a Kinesis user for almost two years. I used the Kinesis Advantage 2 (I modded it with the KinT controller and added QMK support) and the last released Kinesis Advantage360 Professional. Let's go straight into it:
- The Kinesis feels more premium and solid, with a heft to it. The Glove80 is shallow and very light. Coming from the Kinesis, you can immediately feel the difference.
- The Kinesis has different keycap sizes, and hence it's not possible to swap keycaps. The Glove80 uses the same 1U size everywhere, which means every single keycap is interchangeable. This is a massive advantage because it allows you to customize your keyboard.
- Both support tenting. Tenting via Kinesis is straightforward; no expertise is needed, and it just works out of the box. But it's not as flexible as Glove80. From user-friendliness, Kinesis wins, but flexibility-wise, Glove80 wins because it's more sophisticated and provides more options for the tent and mounting it the way you want.
- Flashing the firmware on the Kinesis is a chore and exhausting. It's also prone to errors because it uses two different files to flash the keyboard. Glove80 has a better online editor and streamlined the flashing experience. I loved it more, and it allowed me to make quick changes more often because of how quickly I could download and flash my keyboards.
- Glove80 has a better thumb cluster compared to the Kinesis. The kinesis was already my golden standard, but Glove80 made it even better. The most prominent change is that the thumb cluster is nearer and more tidy. You can reach all 6 keys on the Glove80, but I can't say the same about the Kinesis. Having said that, I sometimes miss the large, 2u-sized keys of the Kinesis thumb cluster. But the more I use the Glove80, the more I get used to it, and it wasn't an issue as I thought.
- The concave key well is the main feature of both keyboards. The Glove80 also has an advantage because it moved the pinky finger row even higher than the Kinesis. If you have a small hand, the Glove80 feels much better. Combined with the Kailh Red Pro switches, extended typing sessions are no longer tiring. I feel more relaxed and fast.
- Customer support is excellent for both companies. Both companies provide great documentation, albeit I think Glove80 has better documentation. It's more detailed. Second Glove80 has the Discord community, which is a huge advantage. It's just nice to have someone you can talk to.
- They both use ZMK, so there is no difference here, but something is worth mentioning. You can easily port your changes because they use both ZMK. Imagine you start typing; here is a picture of a test via Monkeytype that I took just after two days of using a Glove80:
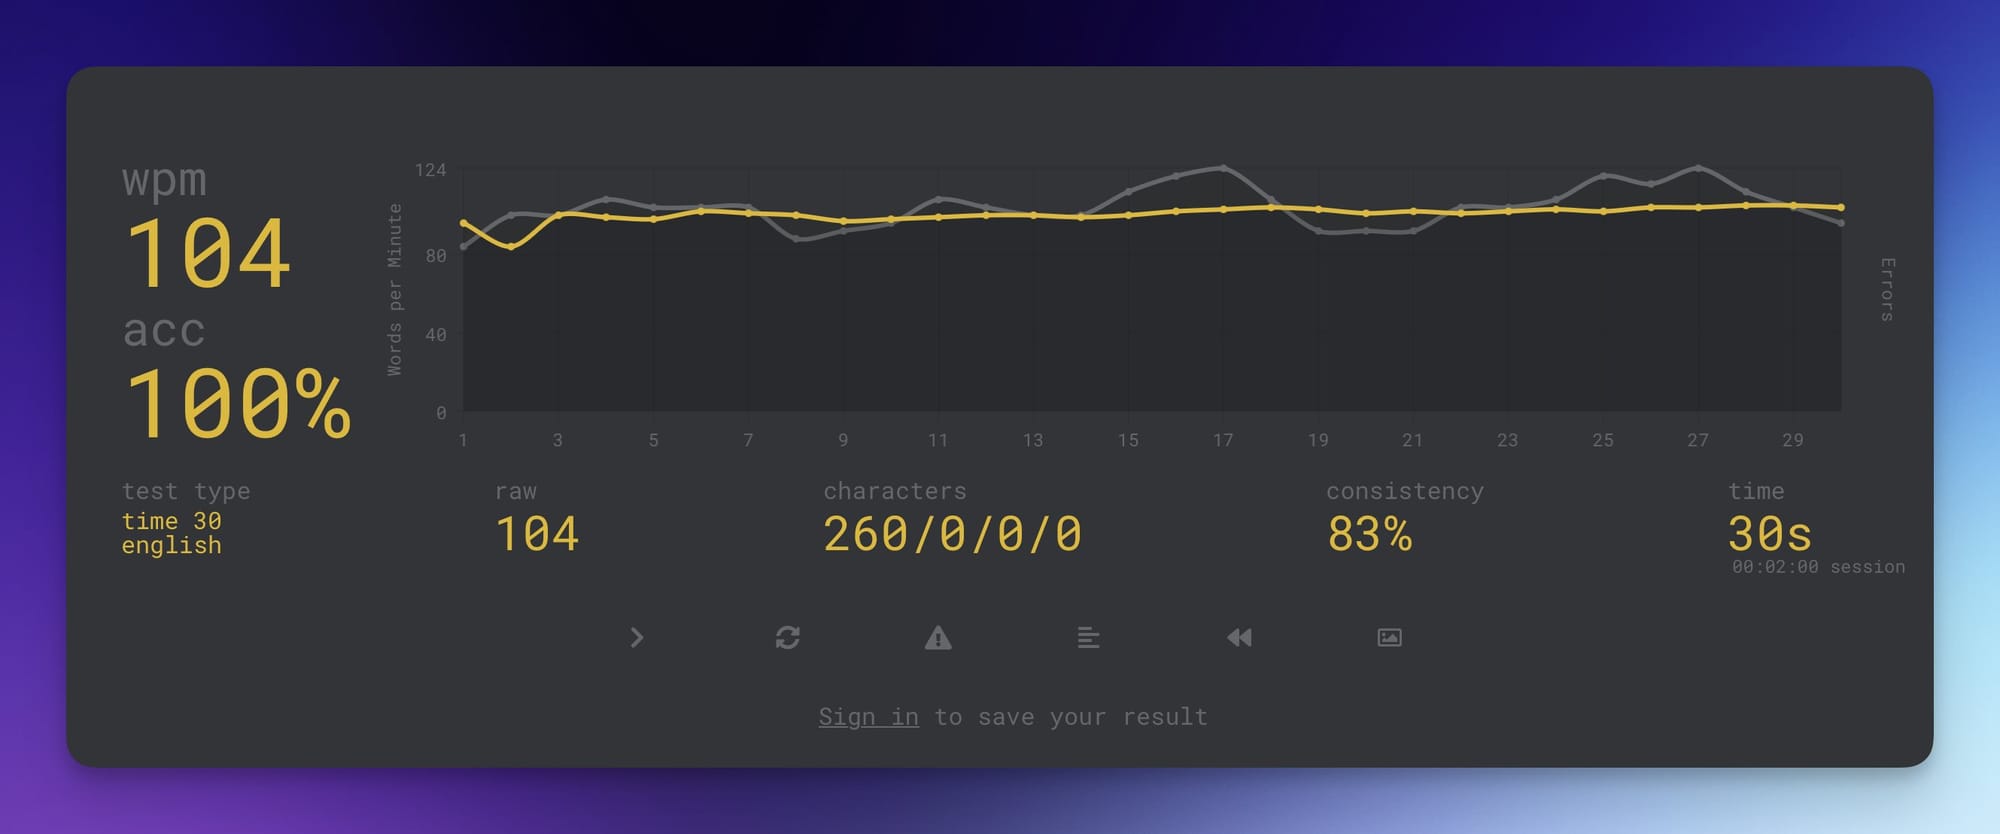
- Why am I sharing this picture? It's because the transition is almost seamless. This is another aspect I didn't think of but is worth mentioning. The Glove80 is the only keyboard on the market that seamlessly transitions from one keyboard to another. Don't sleep on this.
- The Kinesis costs $459, and the Glove80 costs $399. They are similar in price, but the Glove80 is cheaper. However, Glove80 is also more affordable in Europe because the import taxes are lower than the Kinesis. However, I think there is not much of a difference. Building a custom keywell, ergonomic keyboard is expensive, as reflected here.
- Lastly, Bluetooth connection. After using the Glove80 for almost a month, I can now say that Glove80 is way better regarding connection stability. With the Kinesis, I occasionally had drops and disconnections. I wasn't sure why that would happen so often, but since I use the Glove80, both the latency and the stability are flawless. It's still not 100% perfect, and I had to unpair/pair my Glove80 once, but even that is very easy with the Magic key.
So which one to choose? Except for the design, premium build, and heft, I think the Glove80 excels in every area. If you're using a Kinesis, it might be worth checking out the Glove80, and you'll not regret it.
Kinesis should release a new keyboard that covers all these pain points. They know how to quality keyboards, but I can say that Glove80 stole the show. As it should be. Combined with the Discord community, with the CEO listening to customers and being on top of all issues, I think the Glove80 deserves high praise here.
Verdict
MoErgo, the company behind Glove80, researched this area well. They looked at other keyboards, checked what was missing, and improved on several sides. They created an ergonomic, wireless, easy-to-use split keyboard that rivals other keyboards in this area. If you're looking to get one, look no further.
Thanks for reading so far. If you like my reviews and the blog content, please subscribe (for free) to be notified of my upcoming articles.