Hyper Case: Designing my own keyboard case

The Hyper case is my latest design project. It's a custom-made case for the Halcyon Elora Split keyboard made by the company splitkb.com. I already published it on my website under the "Design & Works" page. But subscribers don't get a notification of those additions, so I thought I’d share a few things about it.

People following my website know that I've used many split keyboards in the past, you can see some of the reviews such as:
I’m still on the hunt for the ideal keyboard. Recently, I’ve also experimented with a few barebones split keyboards. These offer greater customization options, allowing you to select a hotswappable board and utilize any switch you desire. Moreover, they come in a wide array of layouts and sizes.
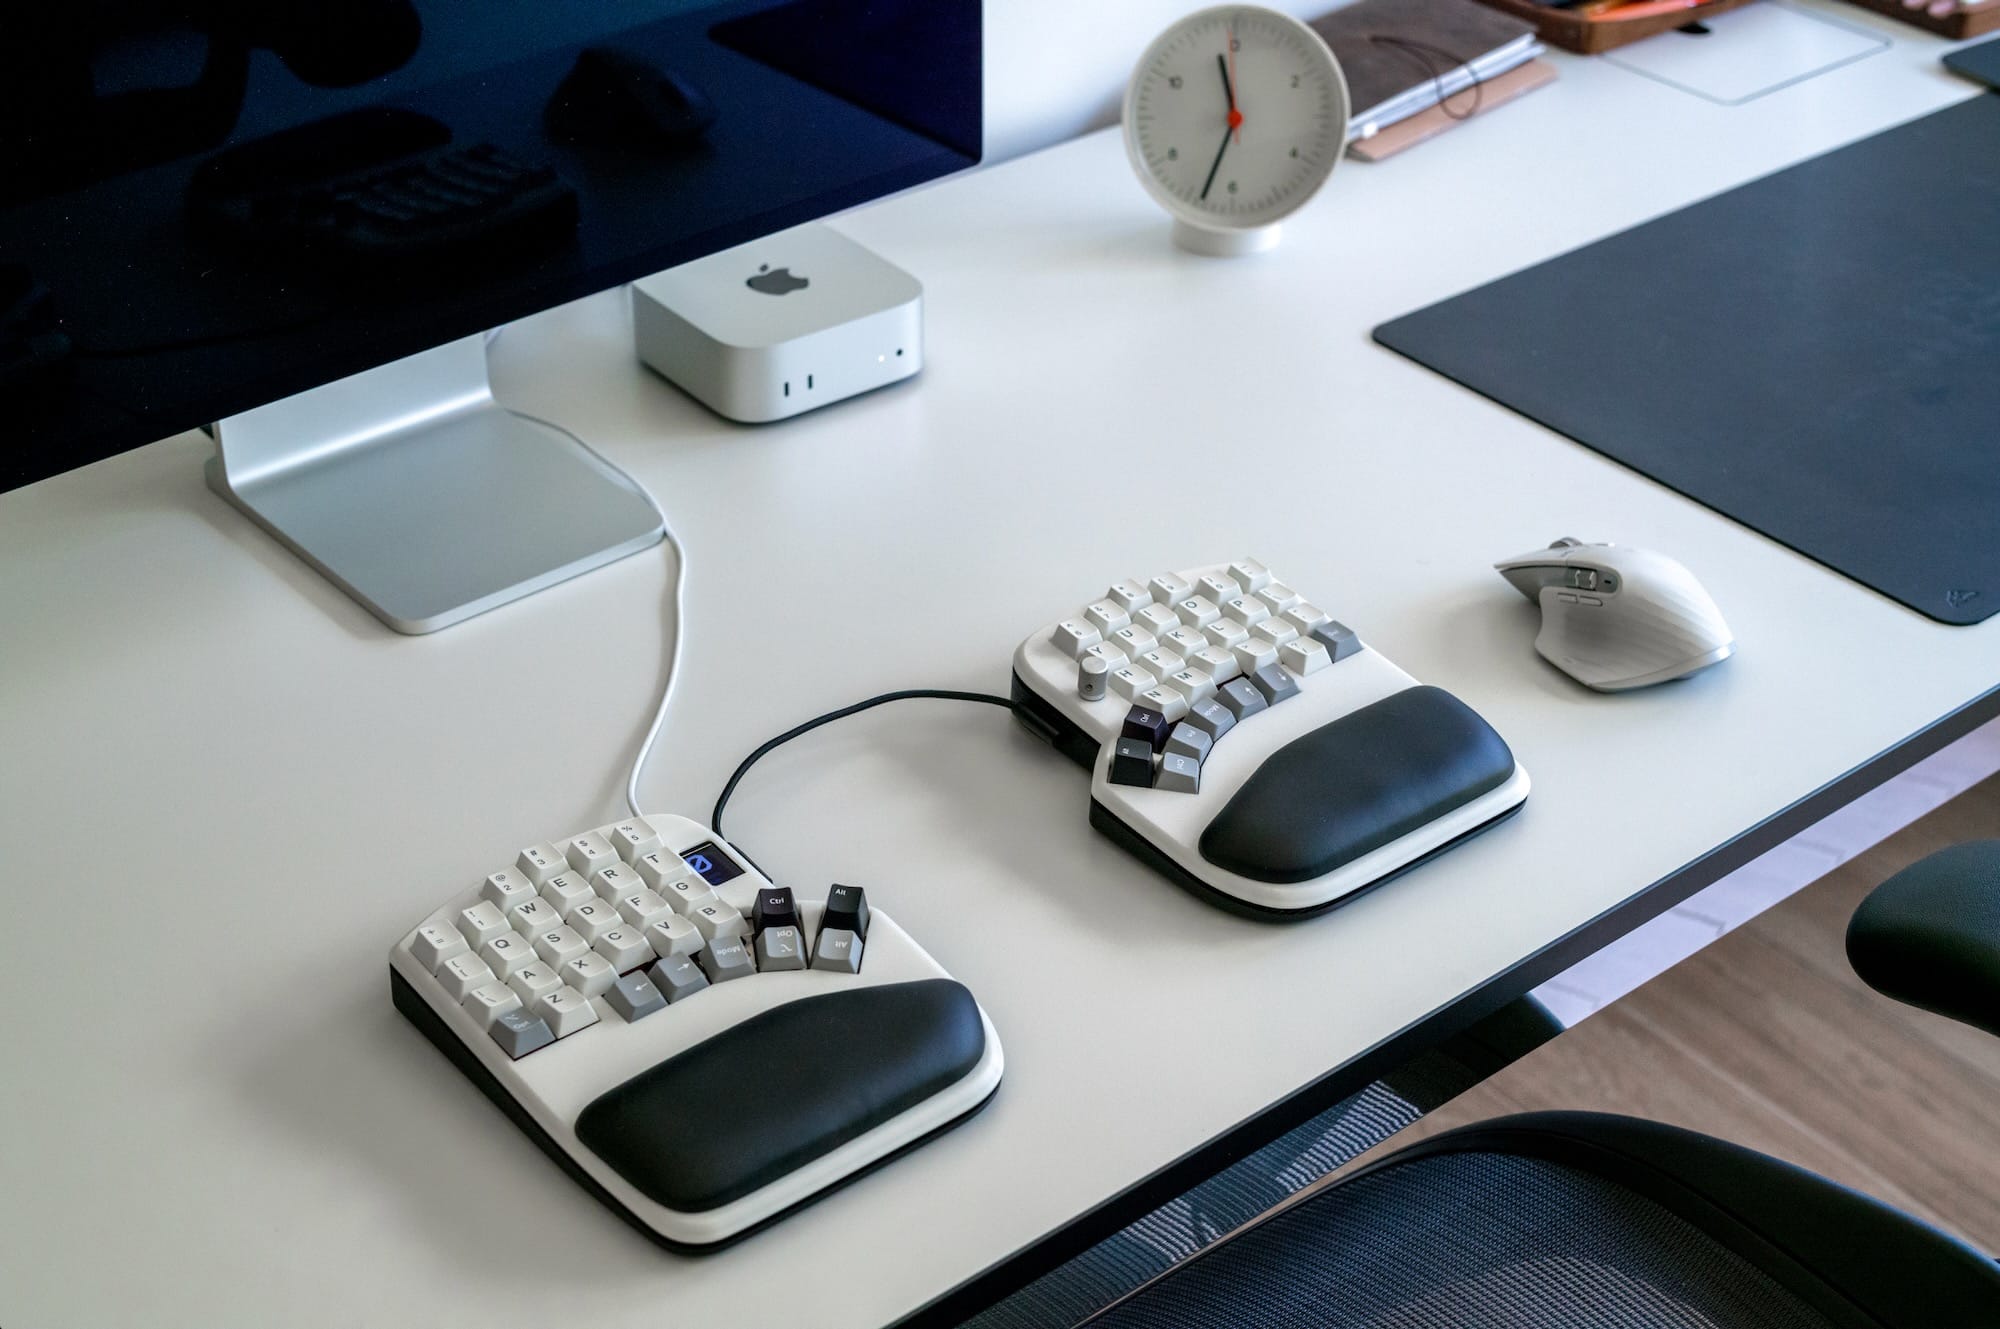
I initially got the Kyria model, which didn't had any number row. But later on I realized that I really like to have a number row (I use cmd+1, cmd+2, etc.. very often), so I discovered Elora, which is the Kyria, but has a number row.
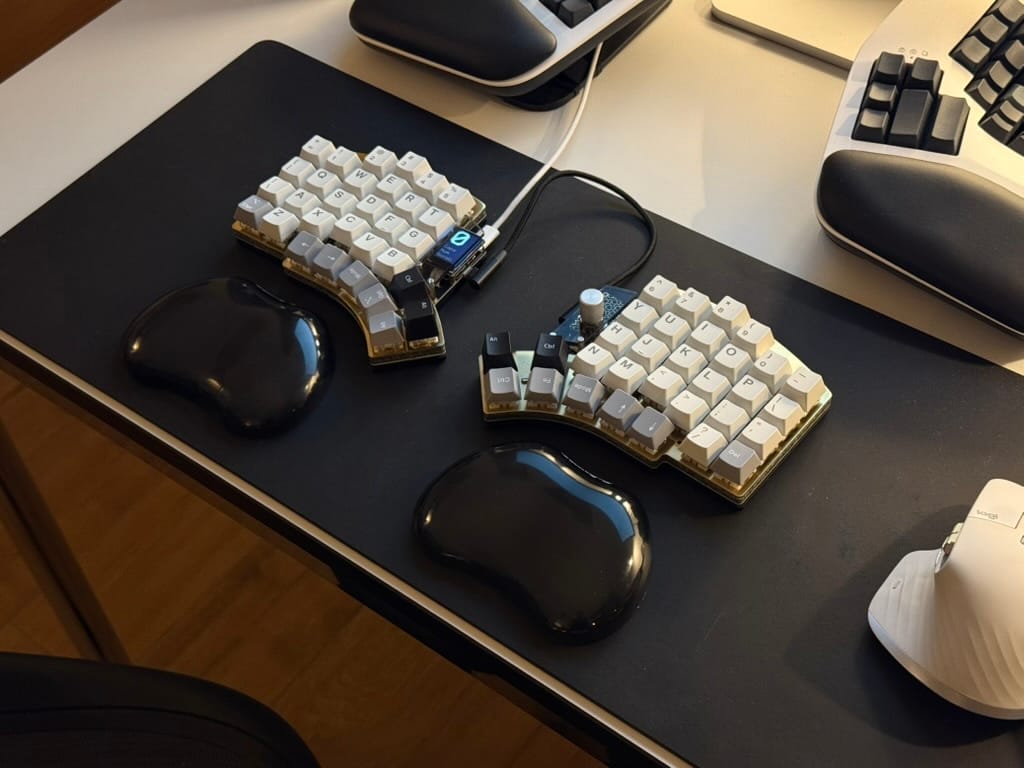
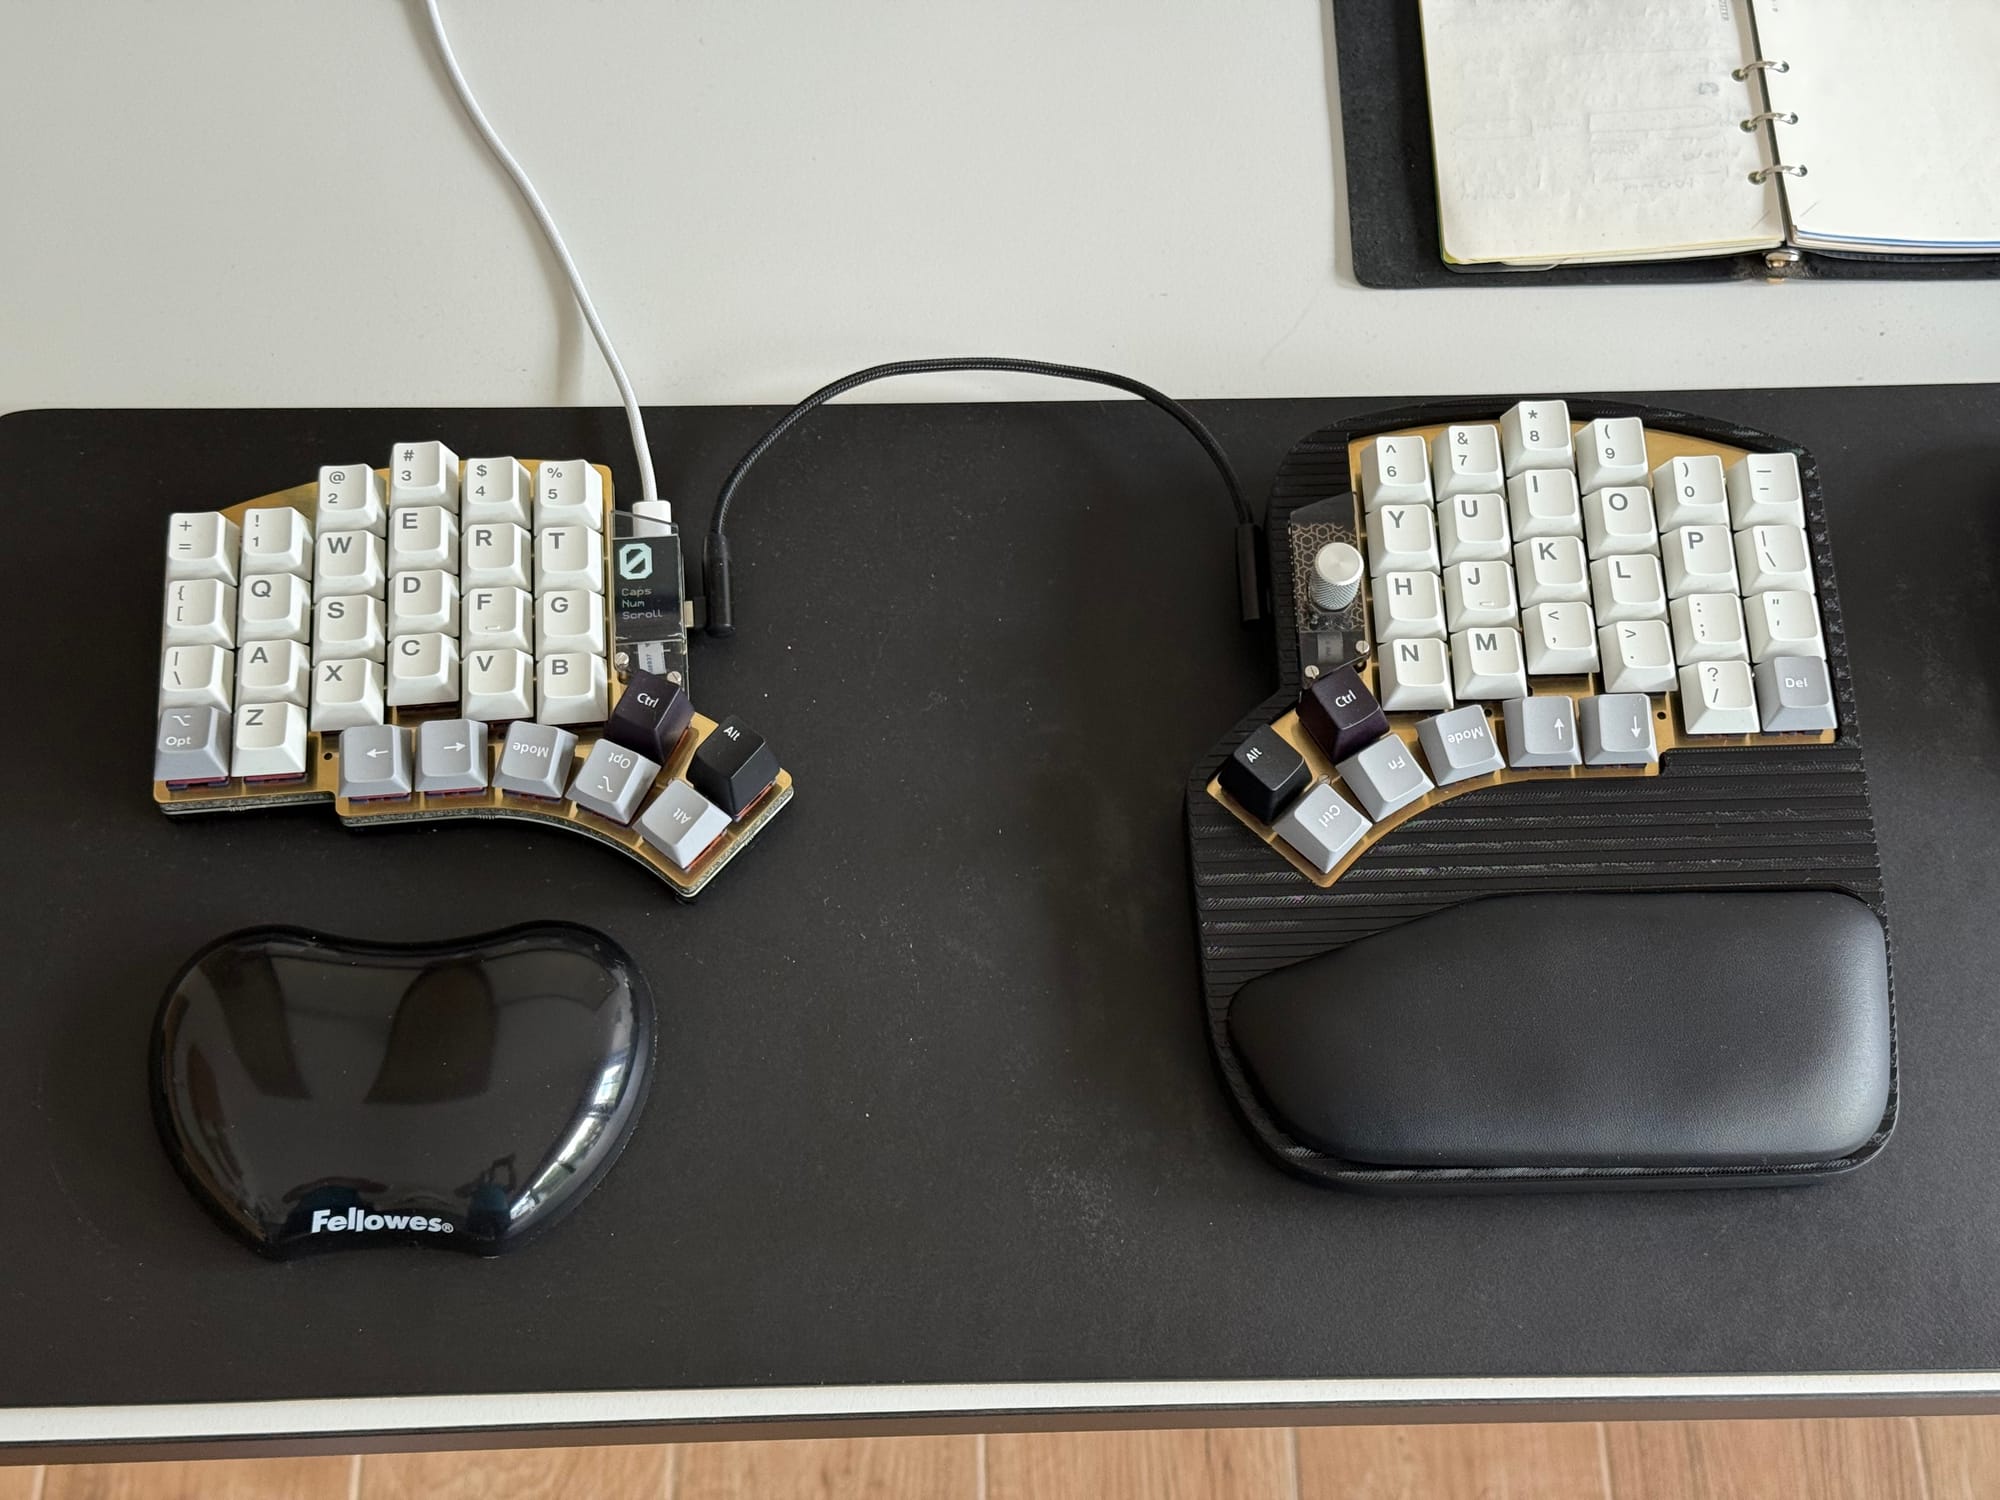
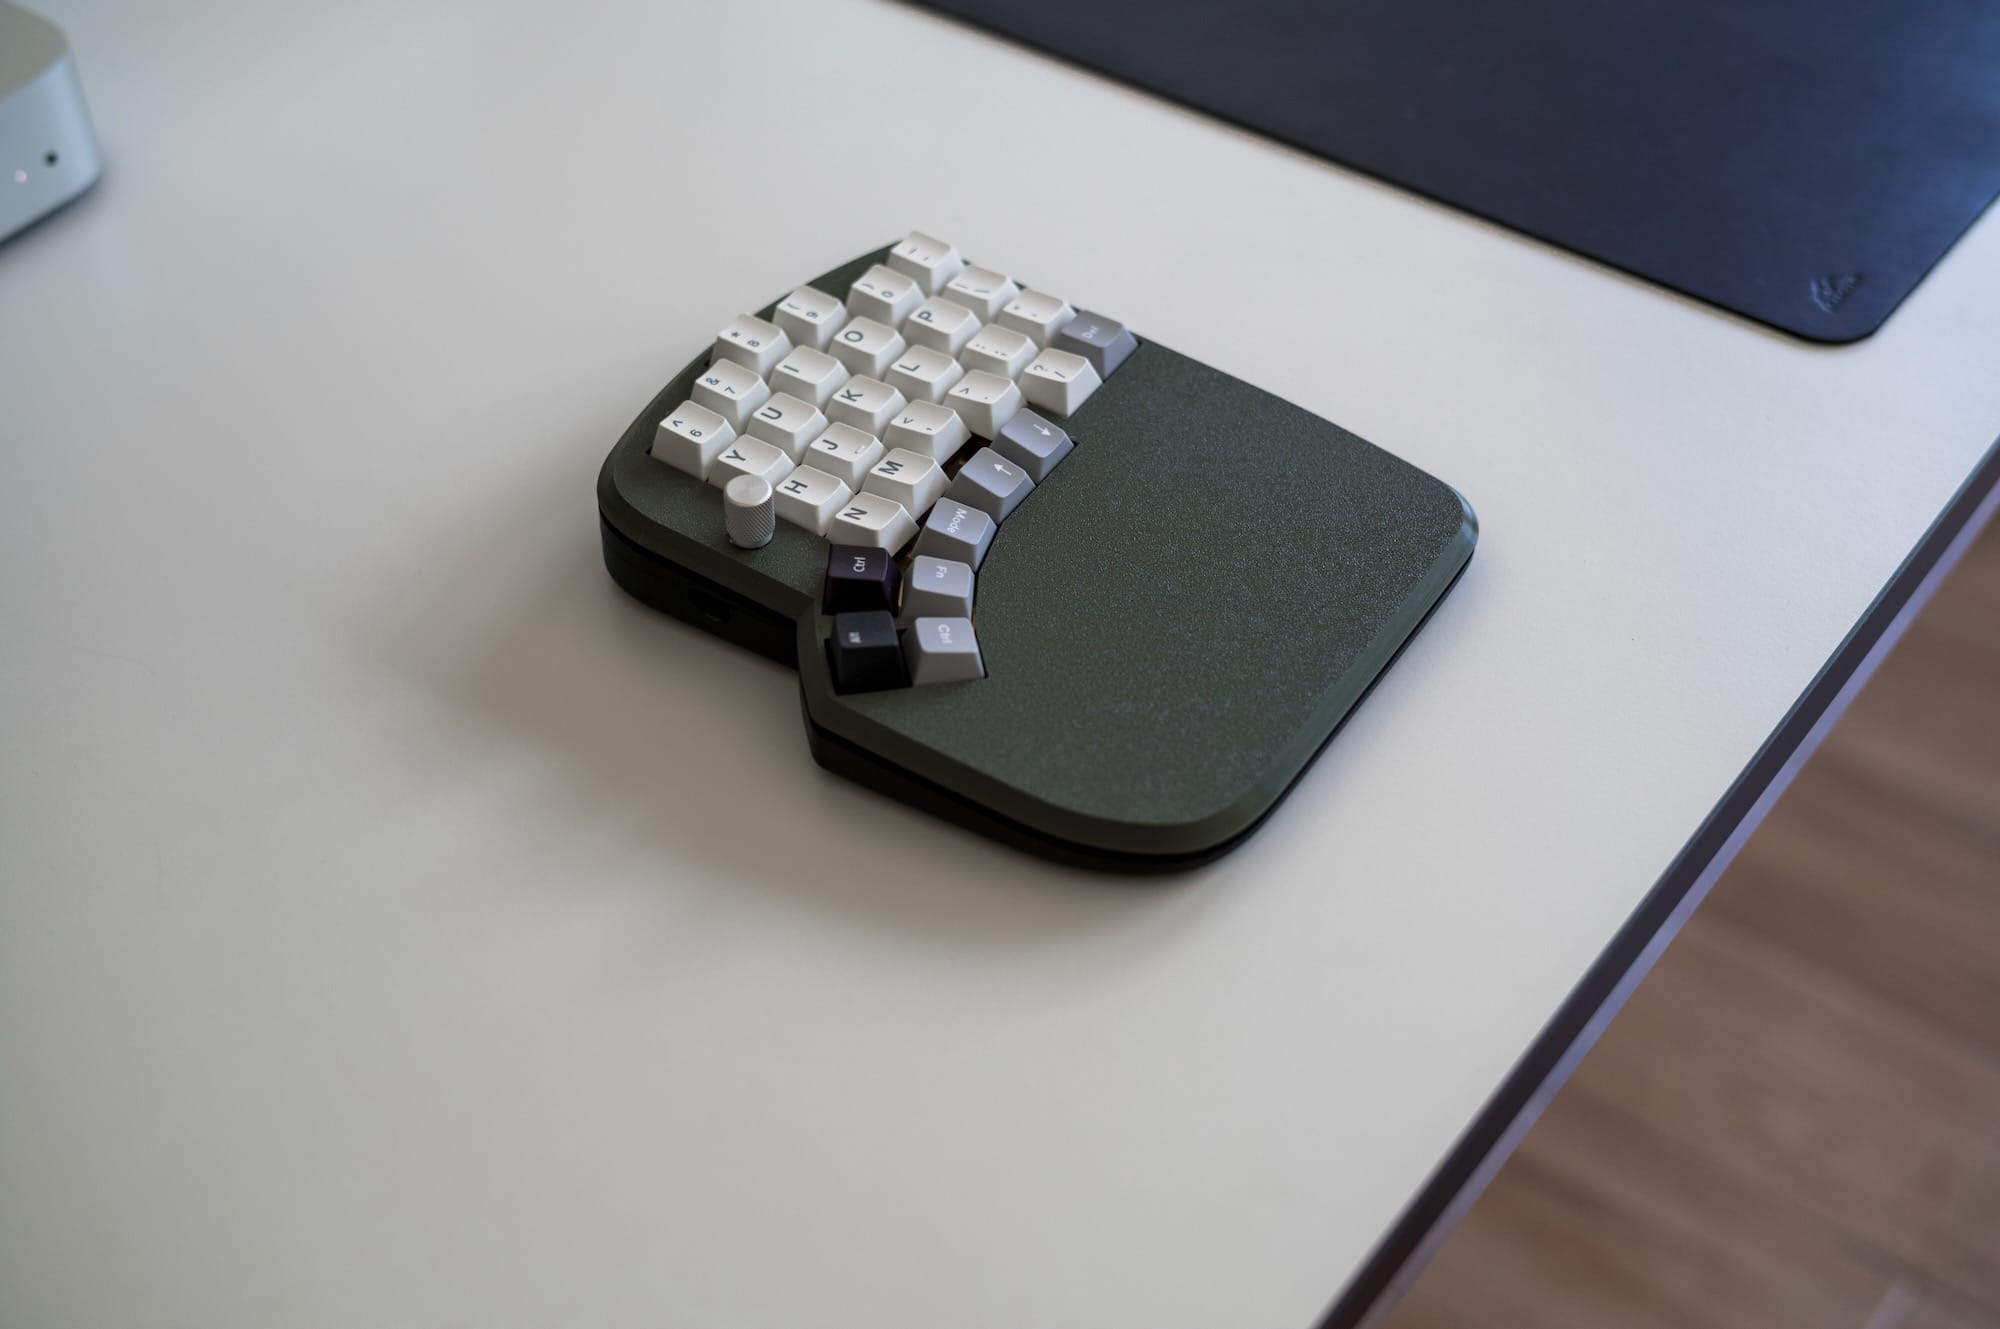
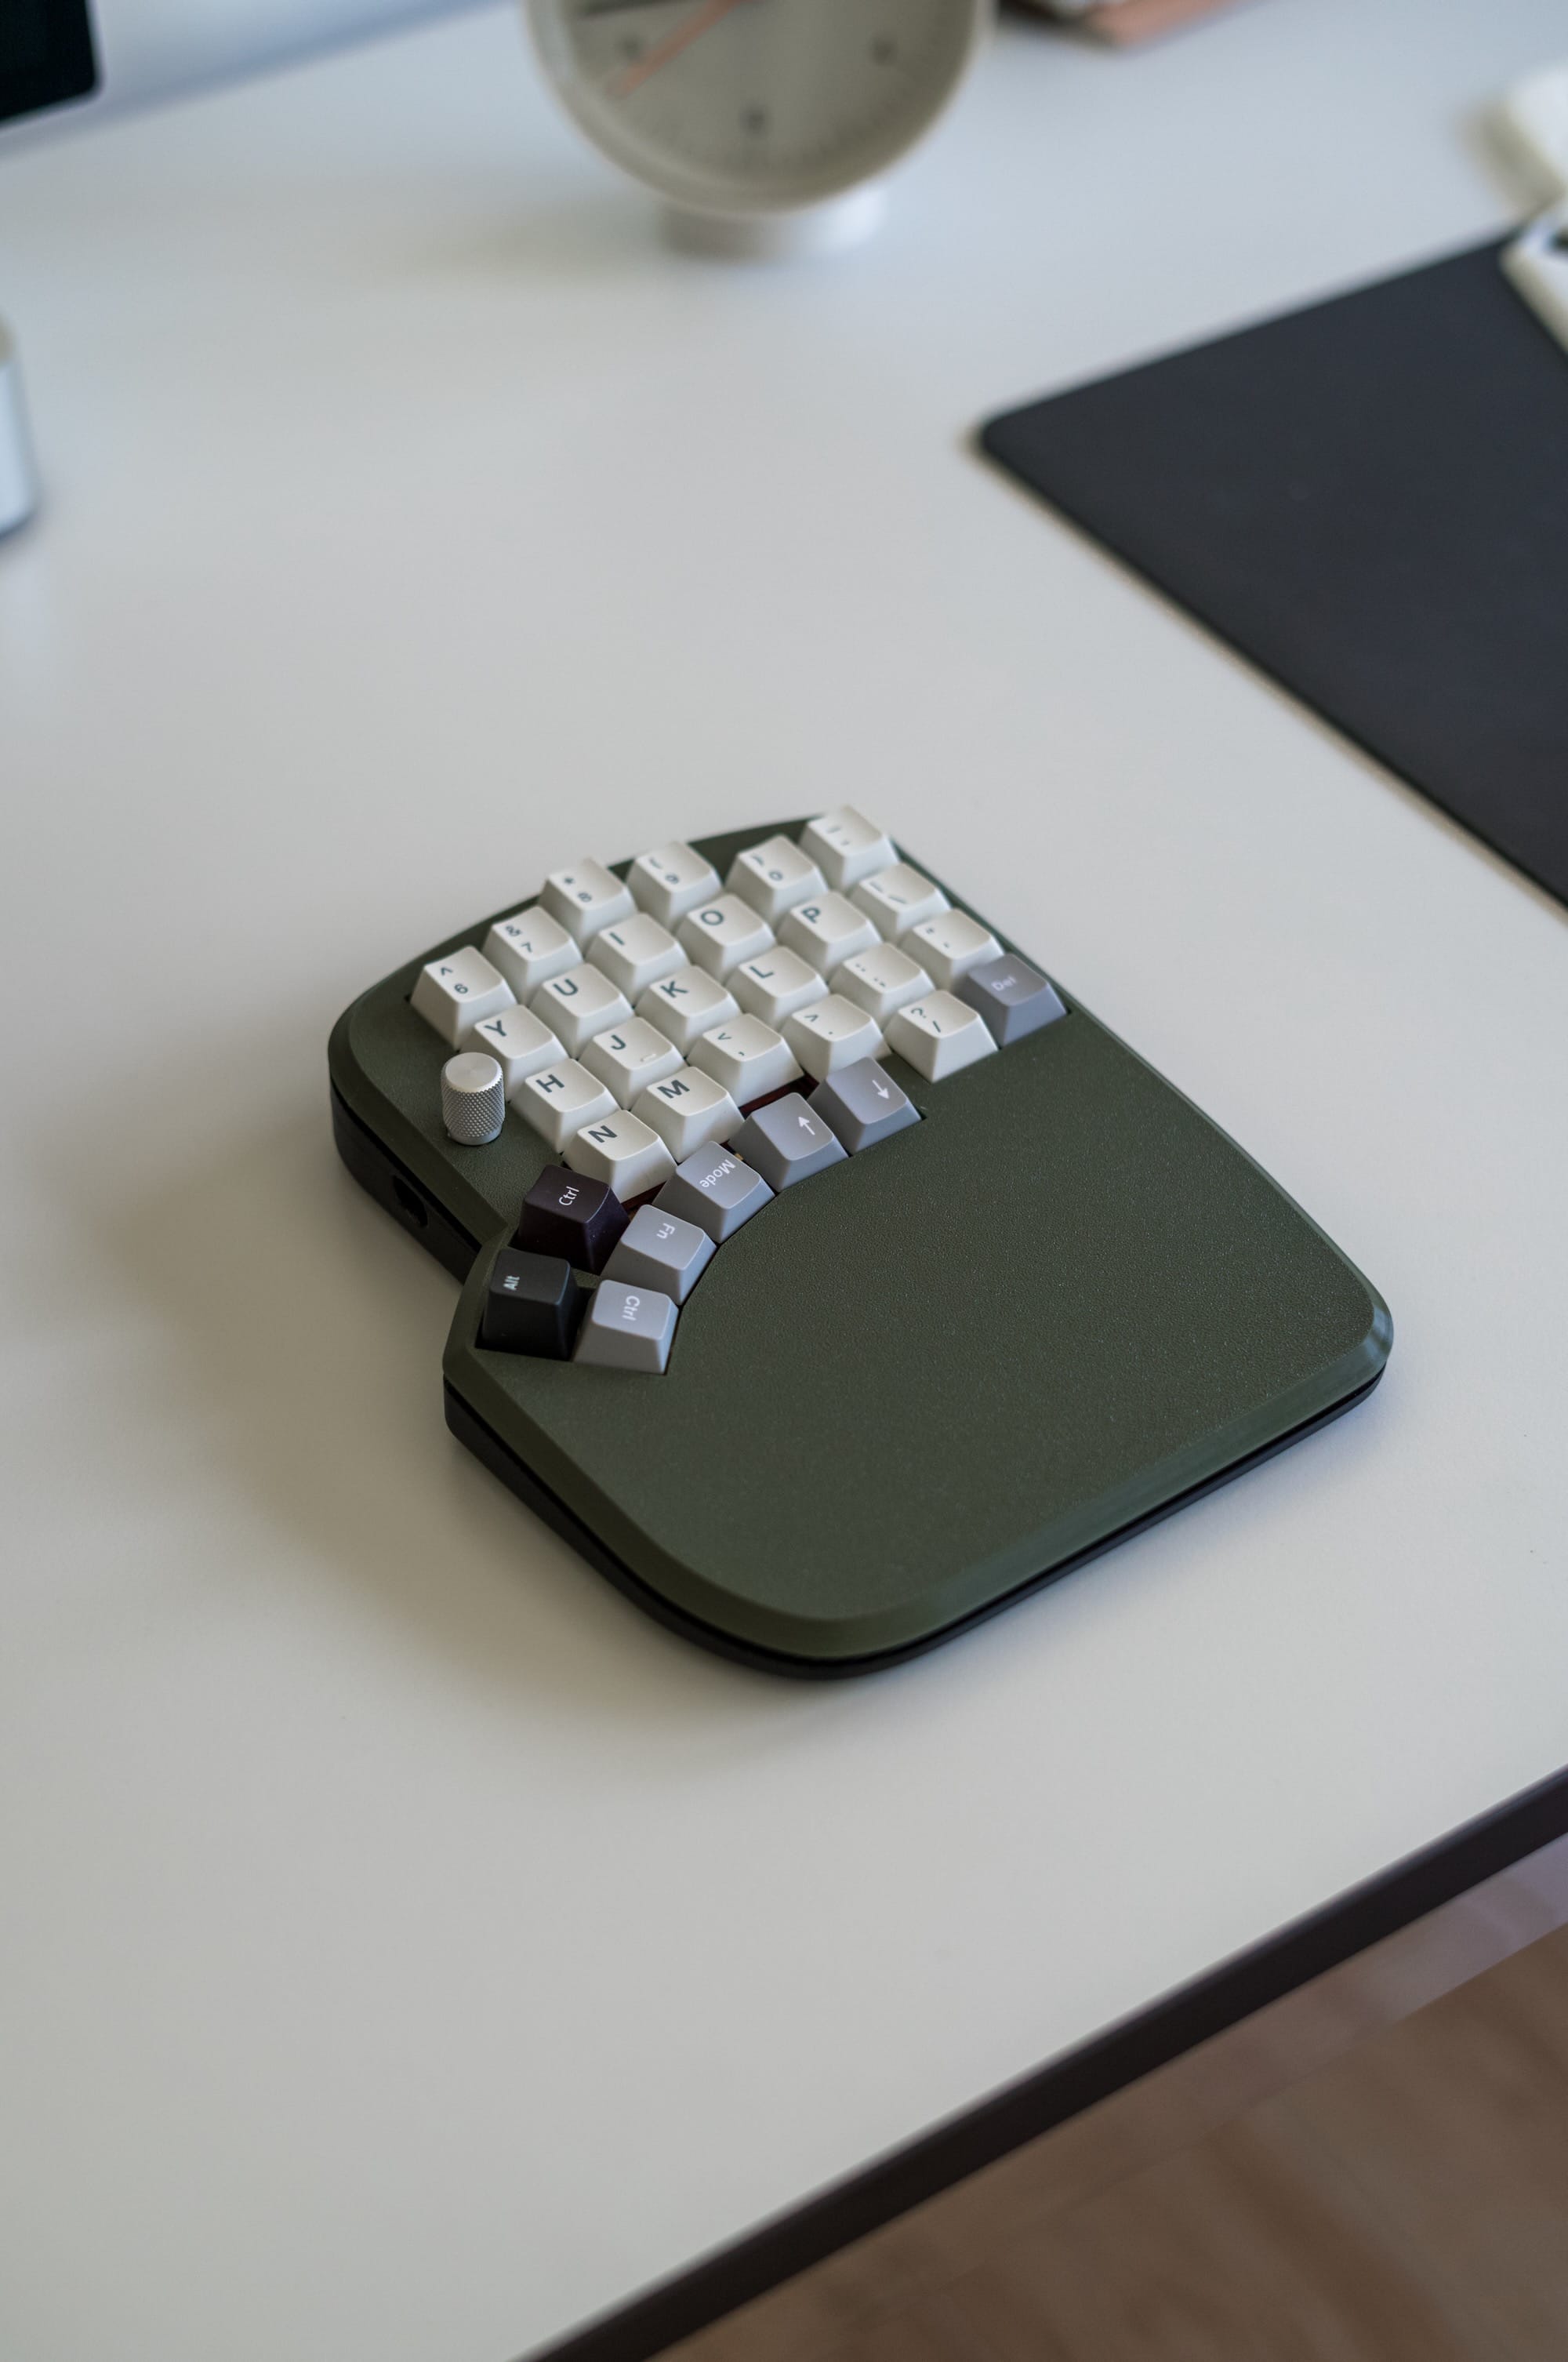
I really liked the layout of the Elora, but I never could get used to the fact that it has no case. The plastic wrist pad's I got also felt very cheap. Having some experience in designing various objects in the past, I thought I could create something that would resemble my Kinesis Advantage 360 Pro.
I started by sketching an initial design on a scratch paper and then opened Fusion 360 to create the 3D model. After several weeks of iterations, I finally achieved the design I was satisfied with.
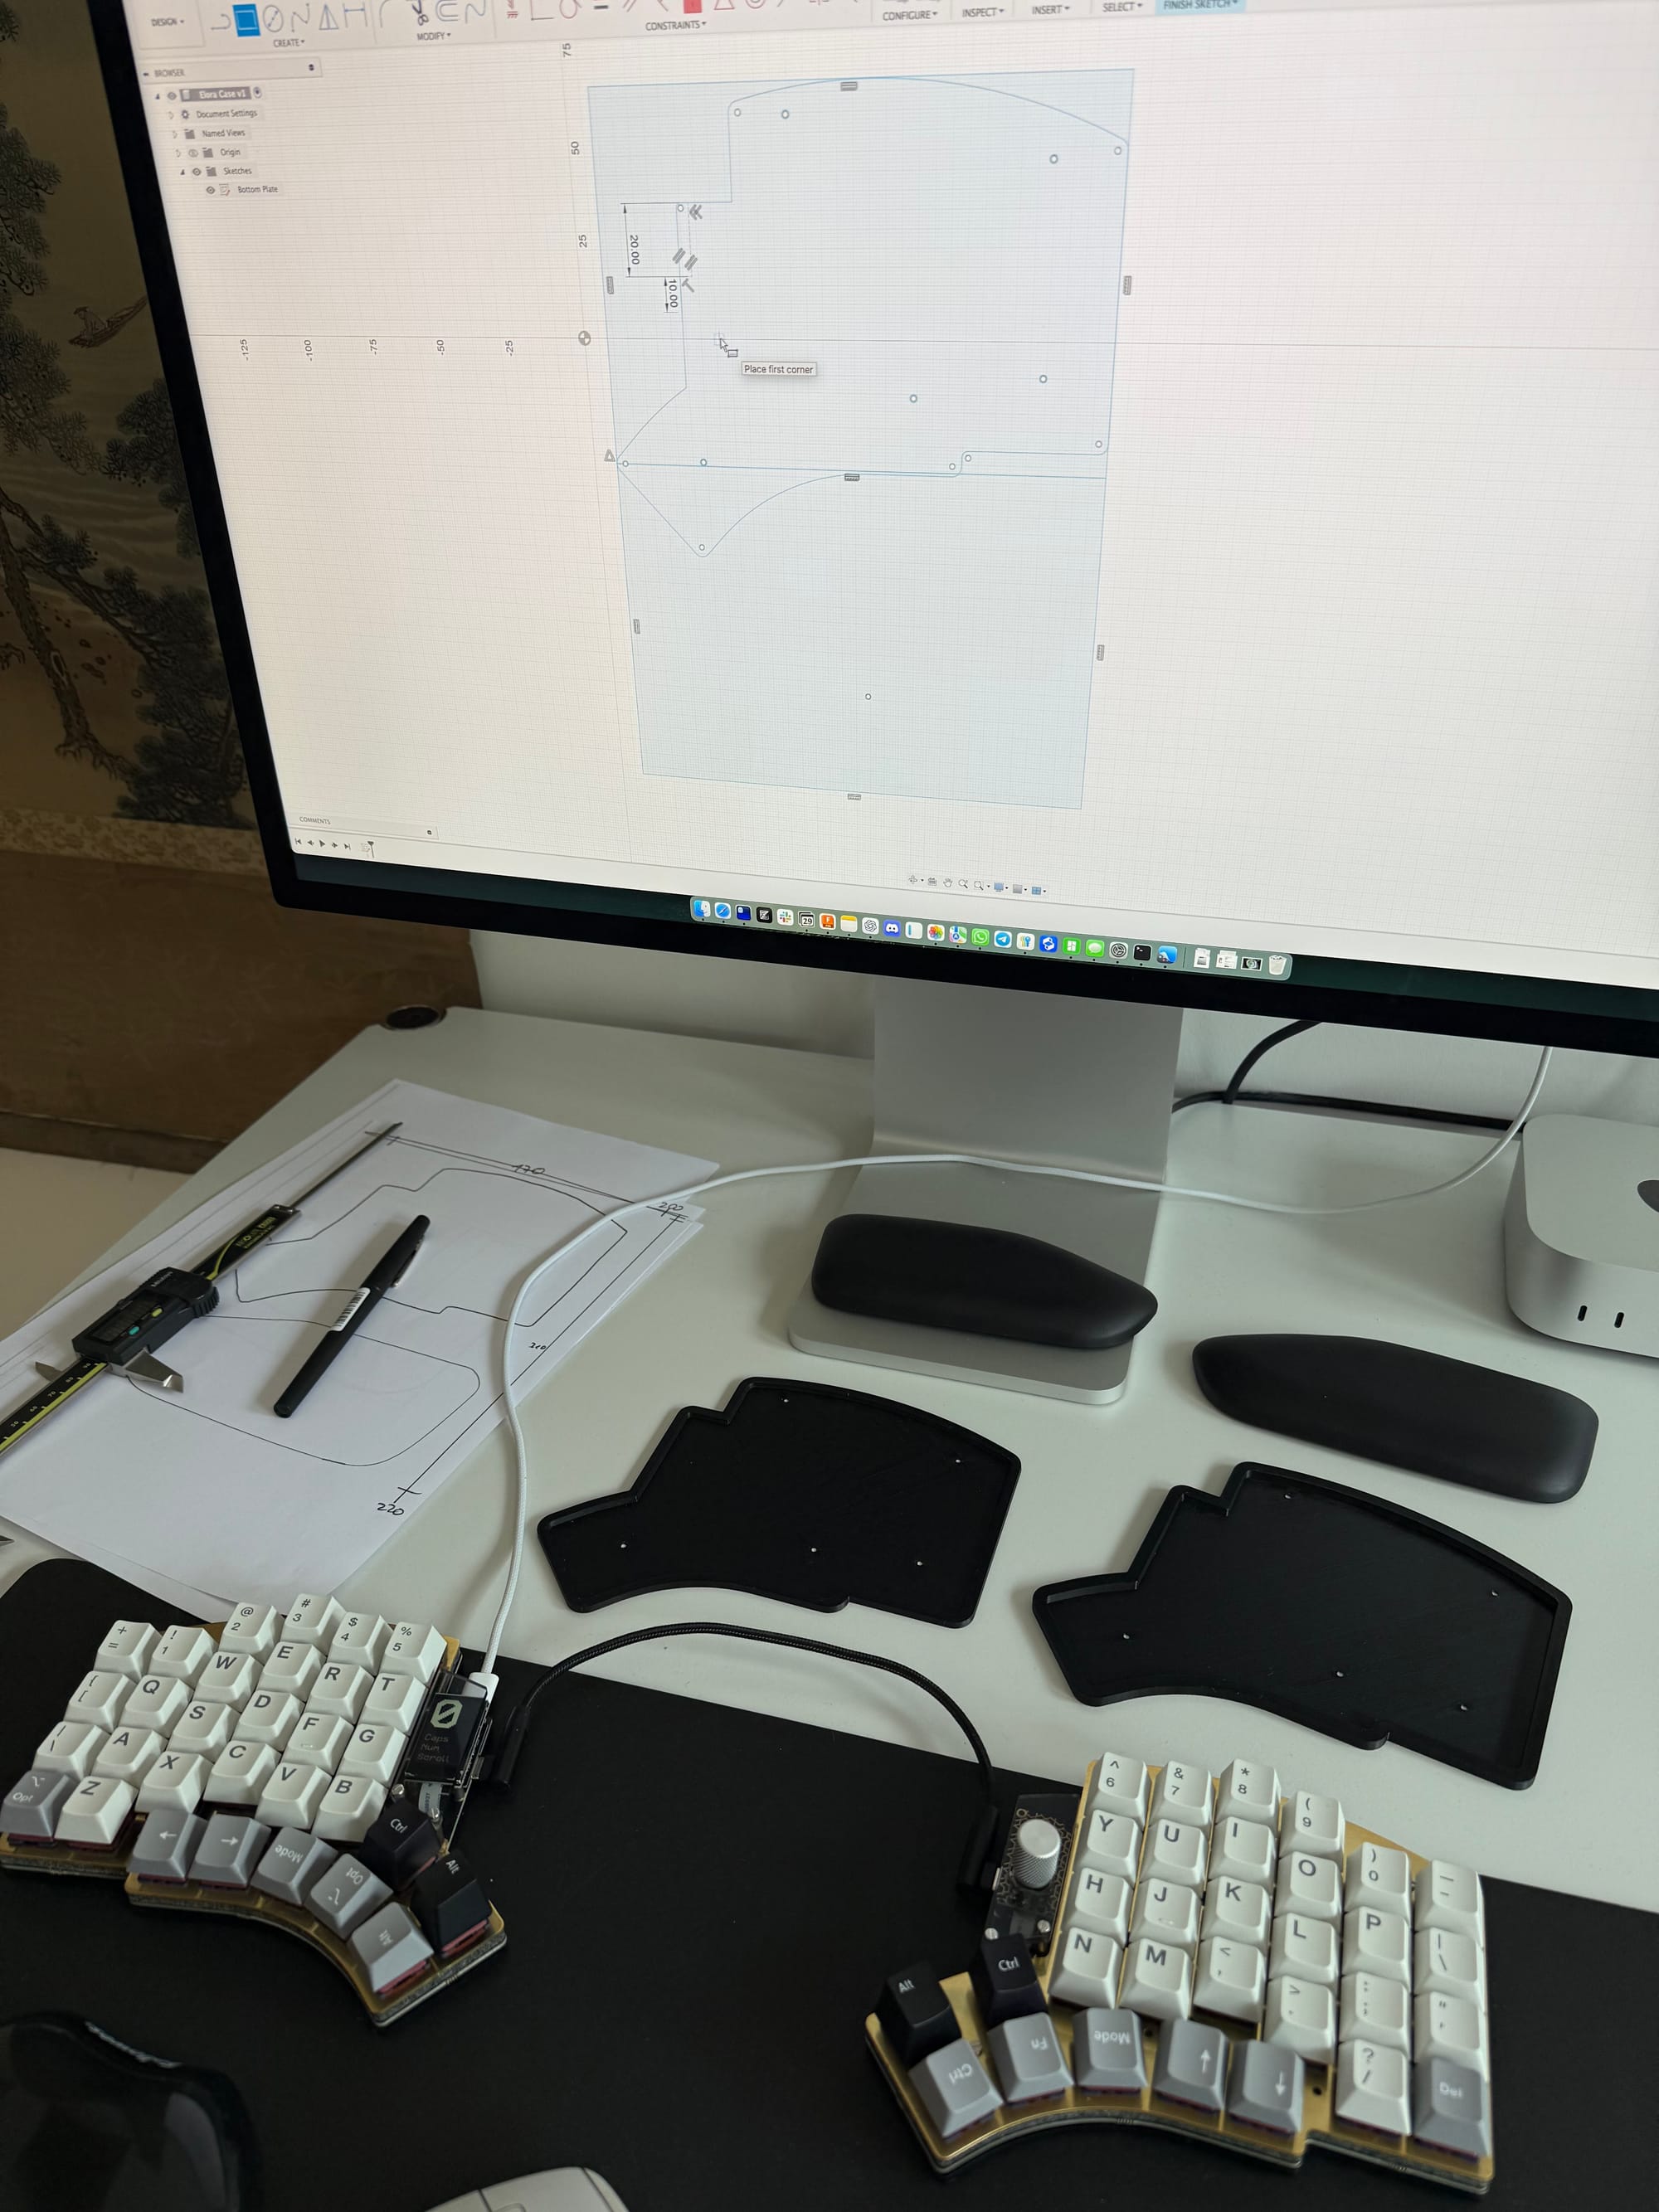
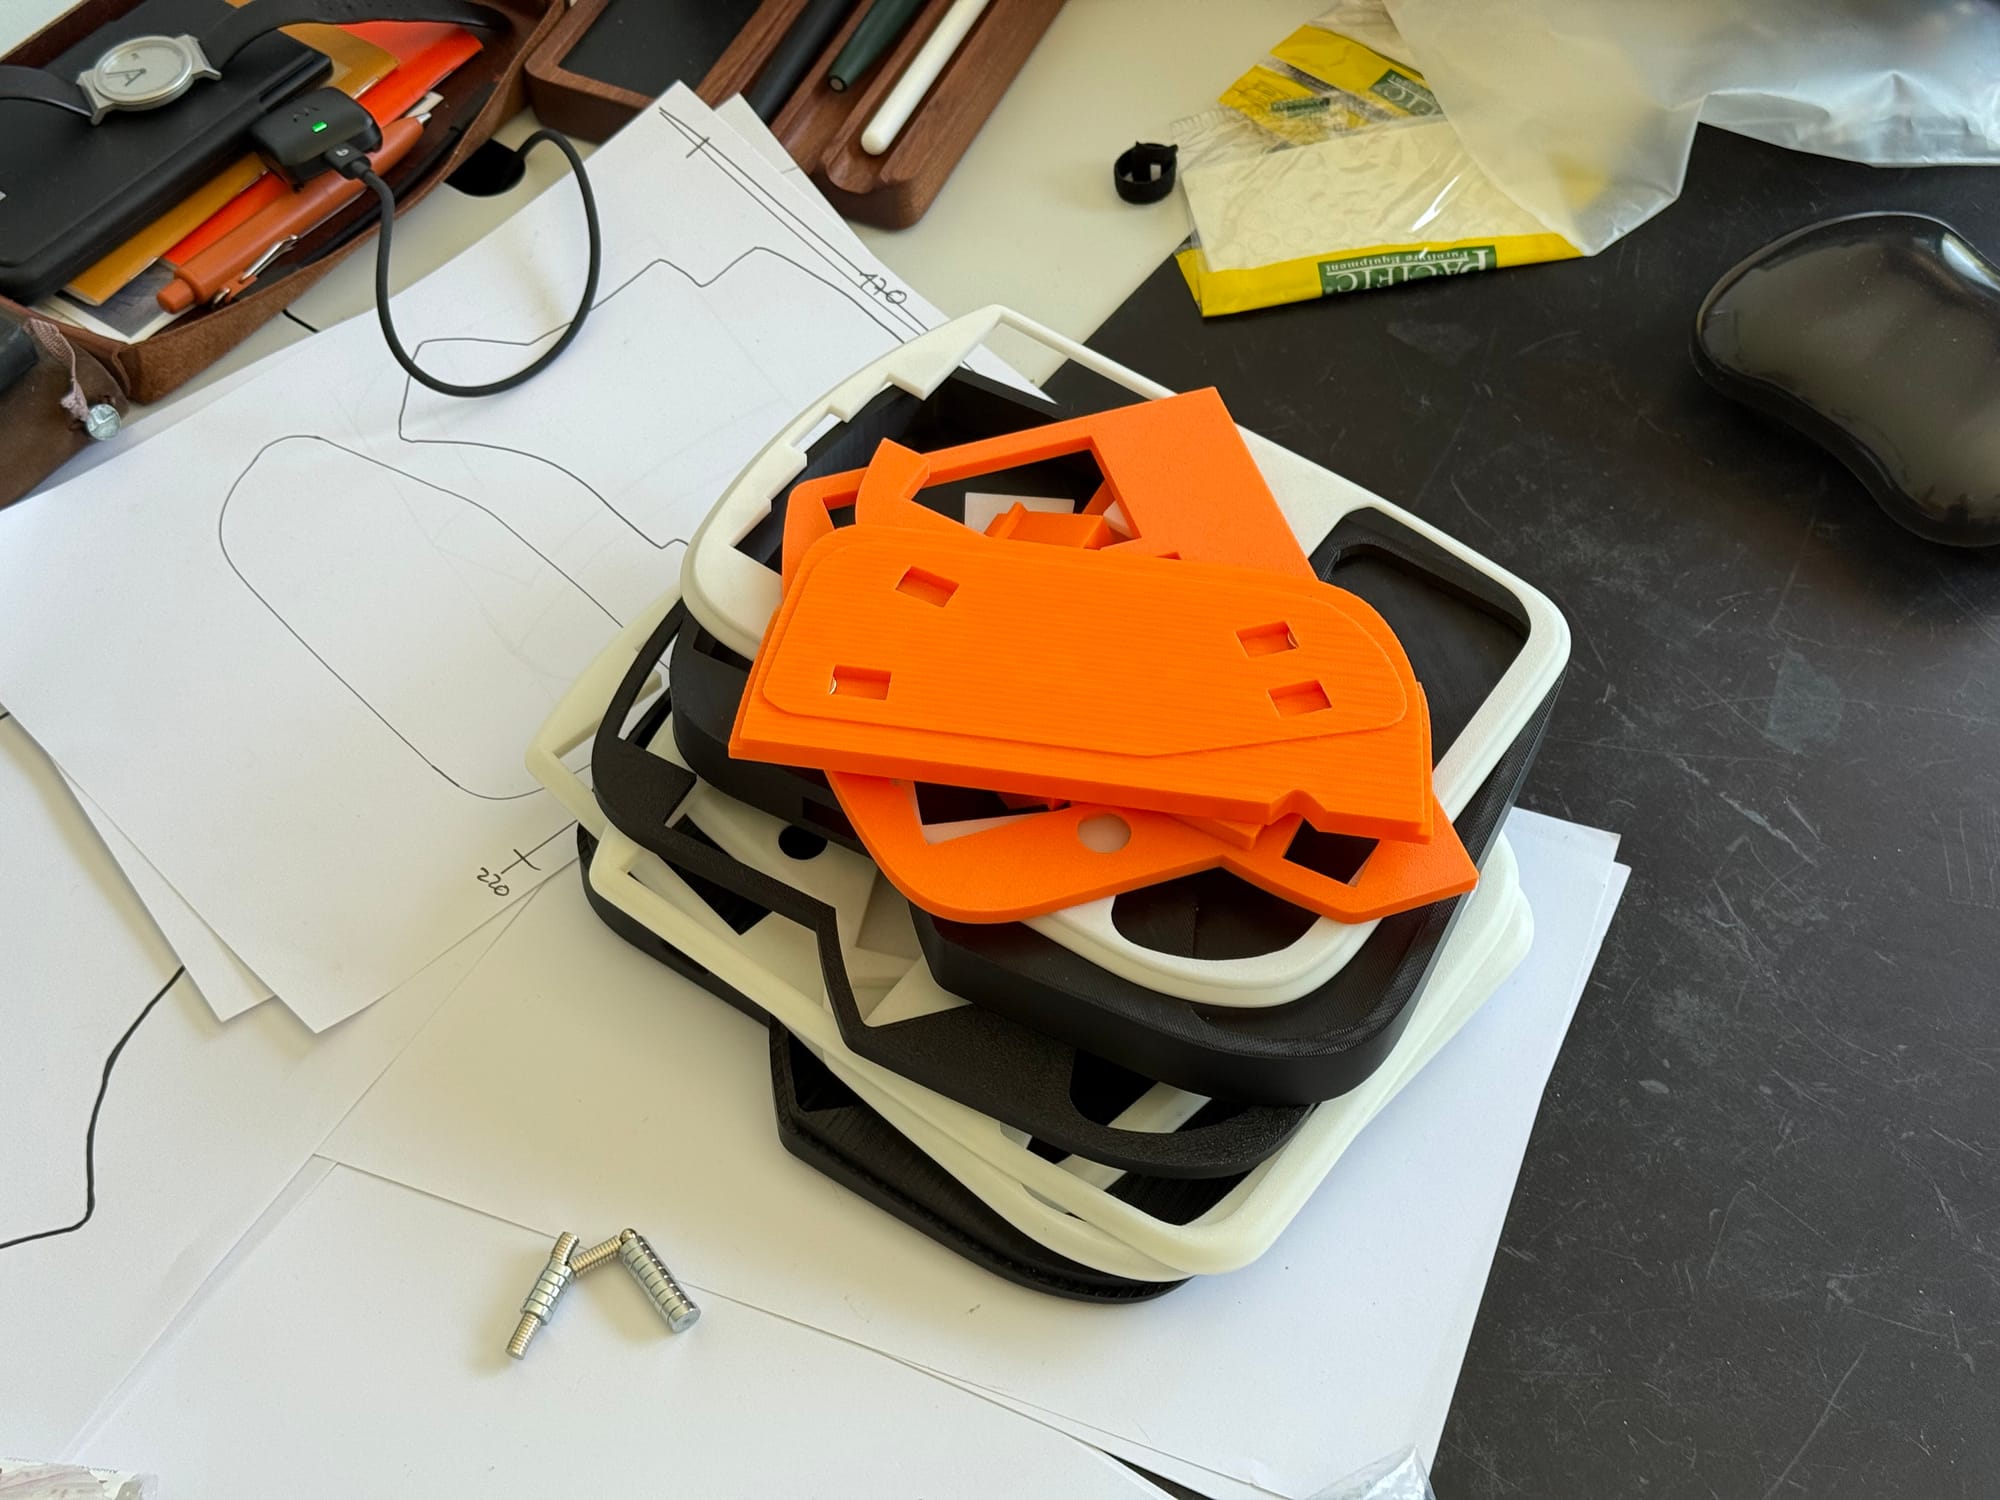

Prototyping means creating lots of small parts, using it for a while, seeing what's wrong and iterating until it's done.
Some of the challenges were:
- The Halcyon Elora has a modular part that allows you to attach a Display, Encoder, Touchpad, or leave it as is. These parts come in various sizes and measurements.
- The wrist pad I used is the official Kinesis leather pad. It had magnets. Designing the magnet holes and making sure I could retrofit it after the print took some time.
- Coming up with the top plate design was great, because once I nailed the bottoms, iterating significantly increased as I only had to print the top case.
- The USB-C cables needed to be attached, but the holes for them were all over the place.
Once I finished the design I was happy. It's two parts, the bottom base and the top plate.
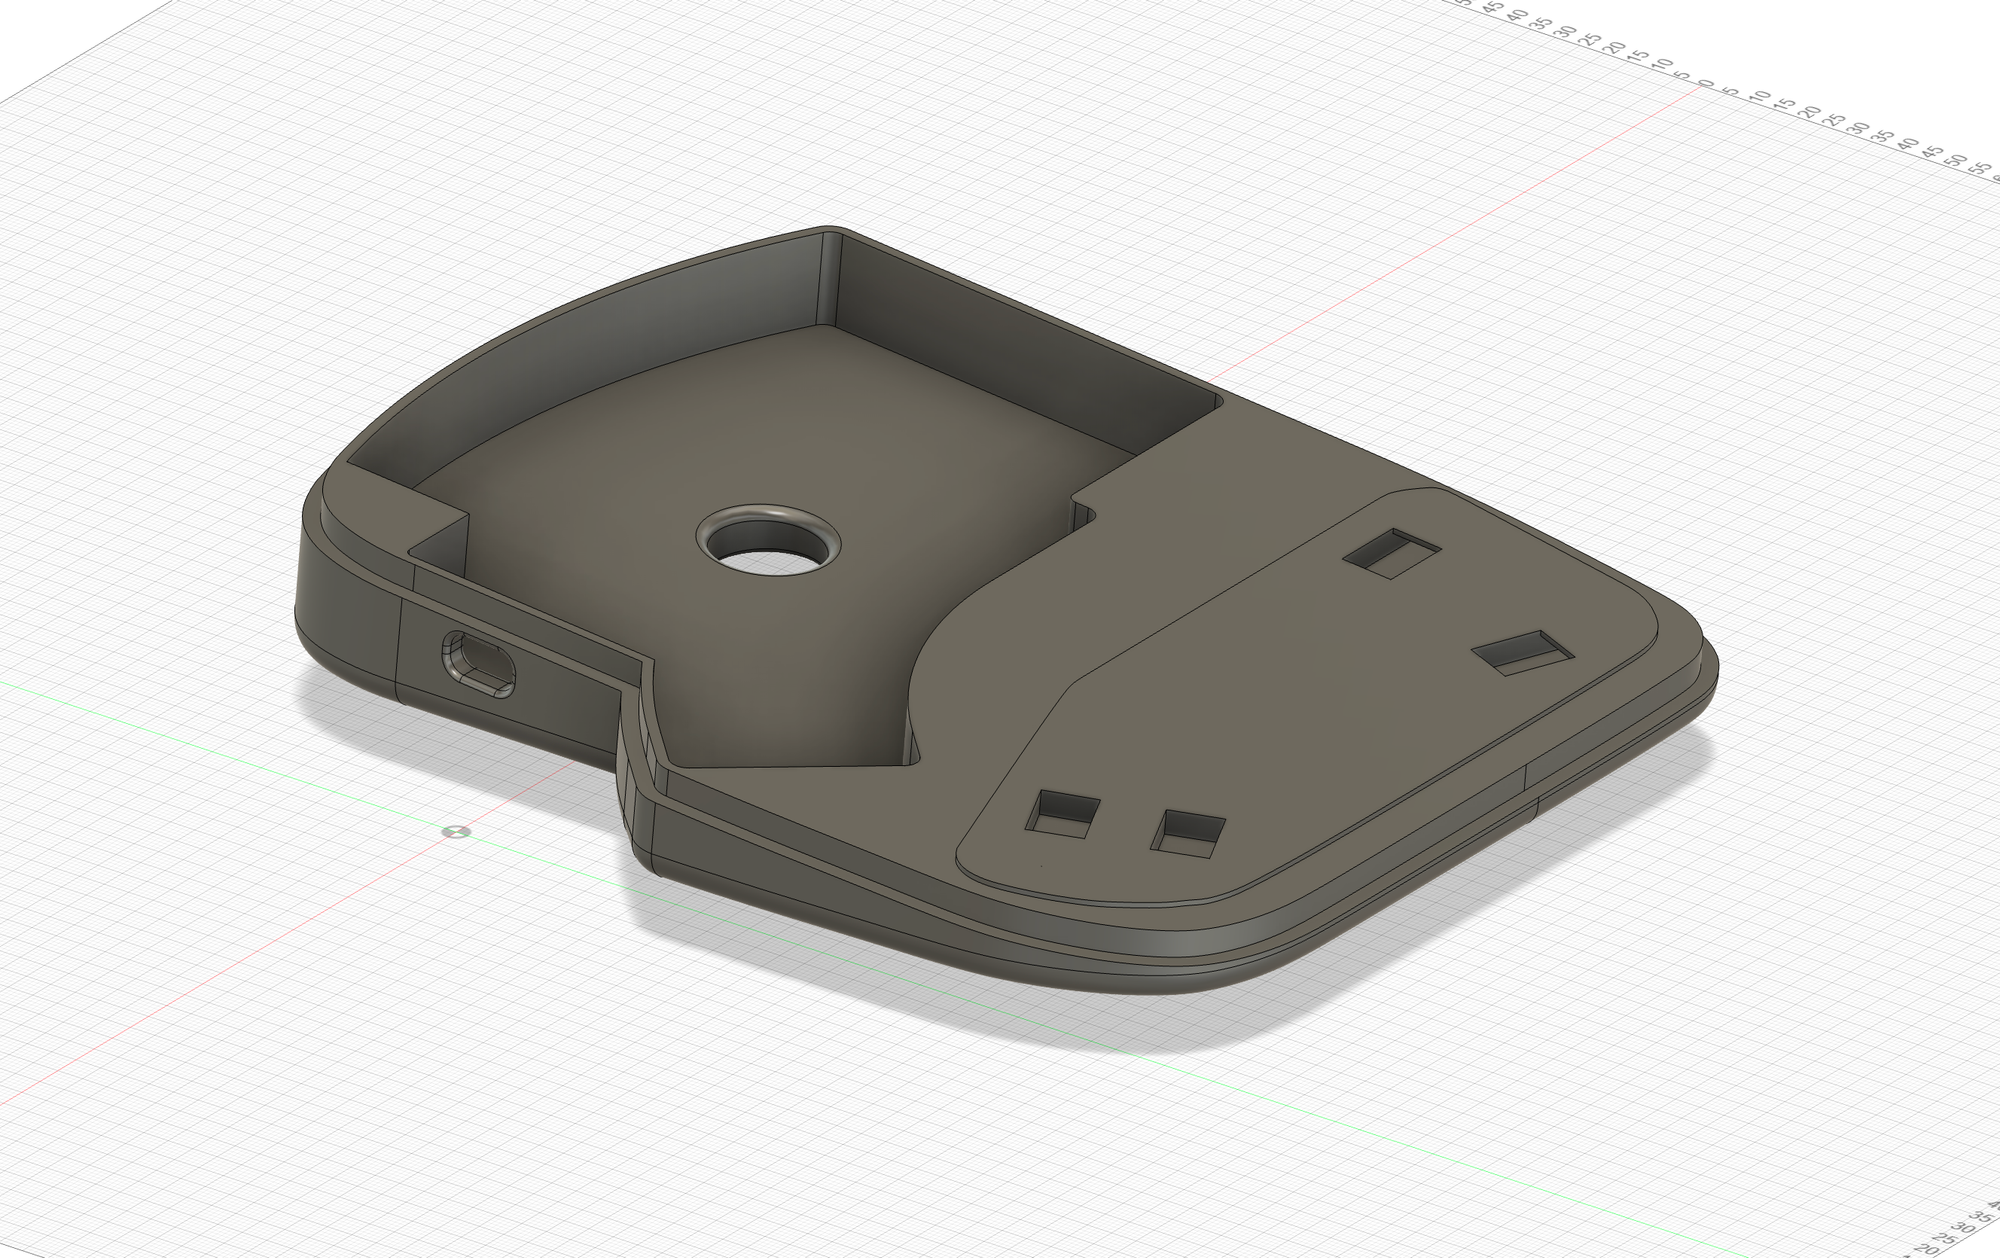
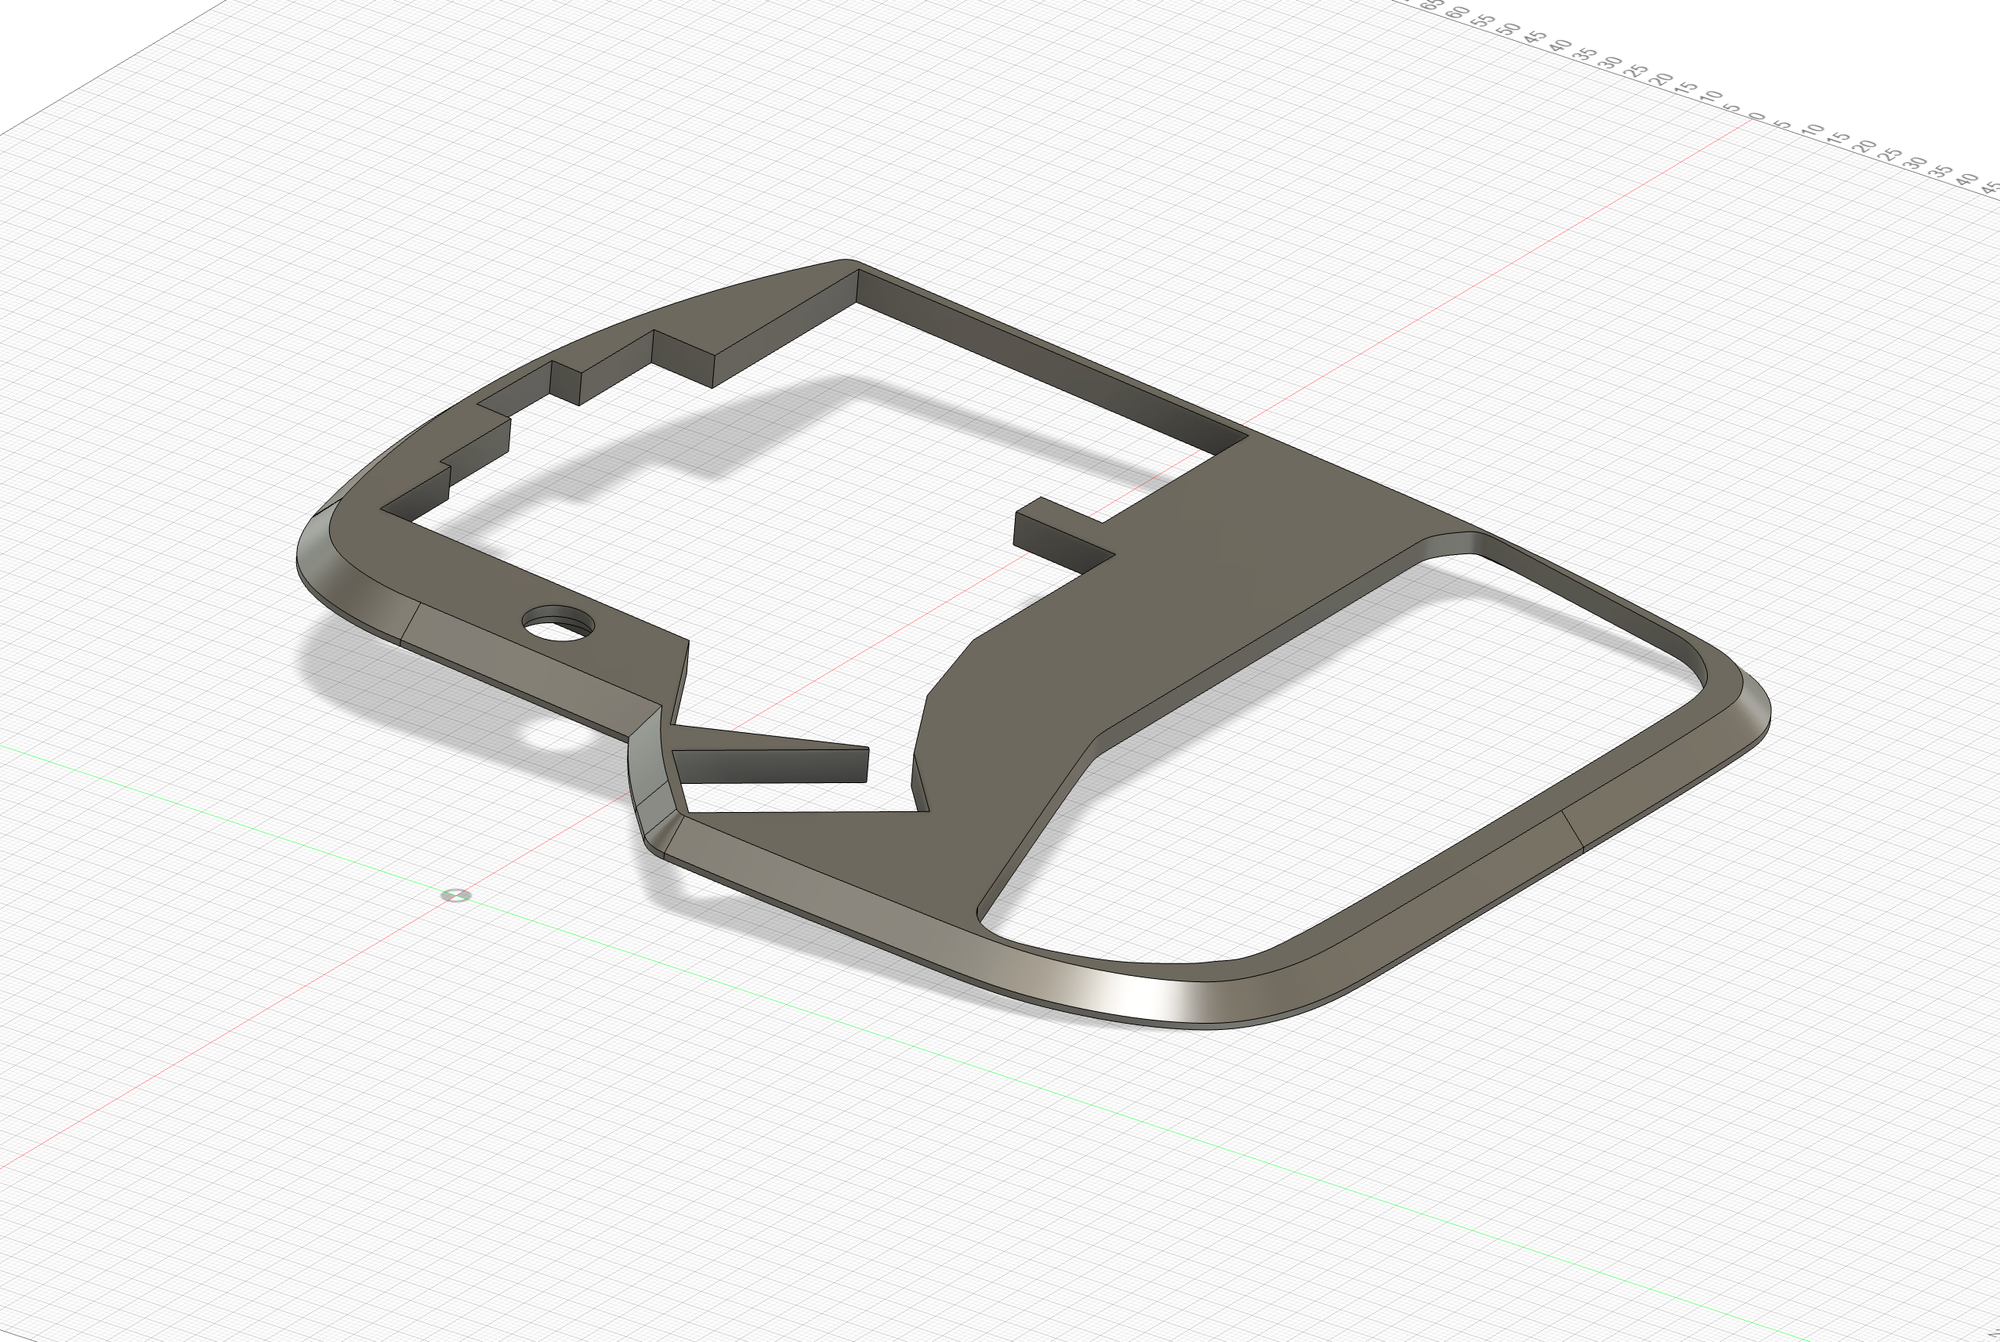
The bottom base and the top plate for the right part of the keyboard
Top plates
Once you’ve printed the bottom bases, you’ll need to pick up one left and one right top plate. From here, you have several options. I wanted to ensure that the wrist pad was optional, so for every two plates, I had to create a “no wrist” option. Additionally, depending on whether you use a Display, Encoder, or nothing extension, the top plate also changes. Multiply this by two because there’s a left and right part, resulting in this list:
- Left Top
- Left Top Encoder
- Left Top Display
- Left Top No Wrist
- Left Top Encoder No Wrist
- Left Top Display No Wrist
- Right Top
- Right Top Encoder
- Right Top Display
- Right Top No Wrist
- Right Top Encoder No Wrist
- Right Top Display No Wrist
Final design
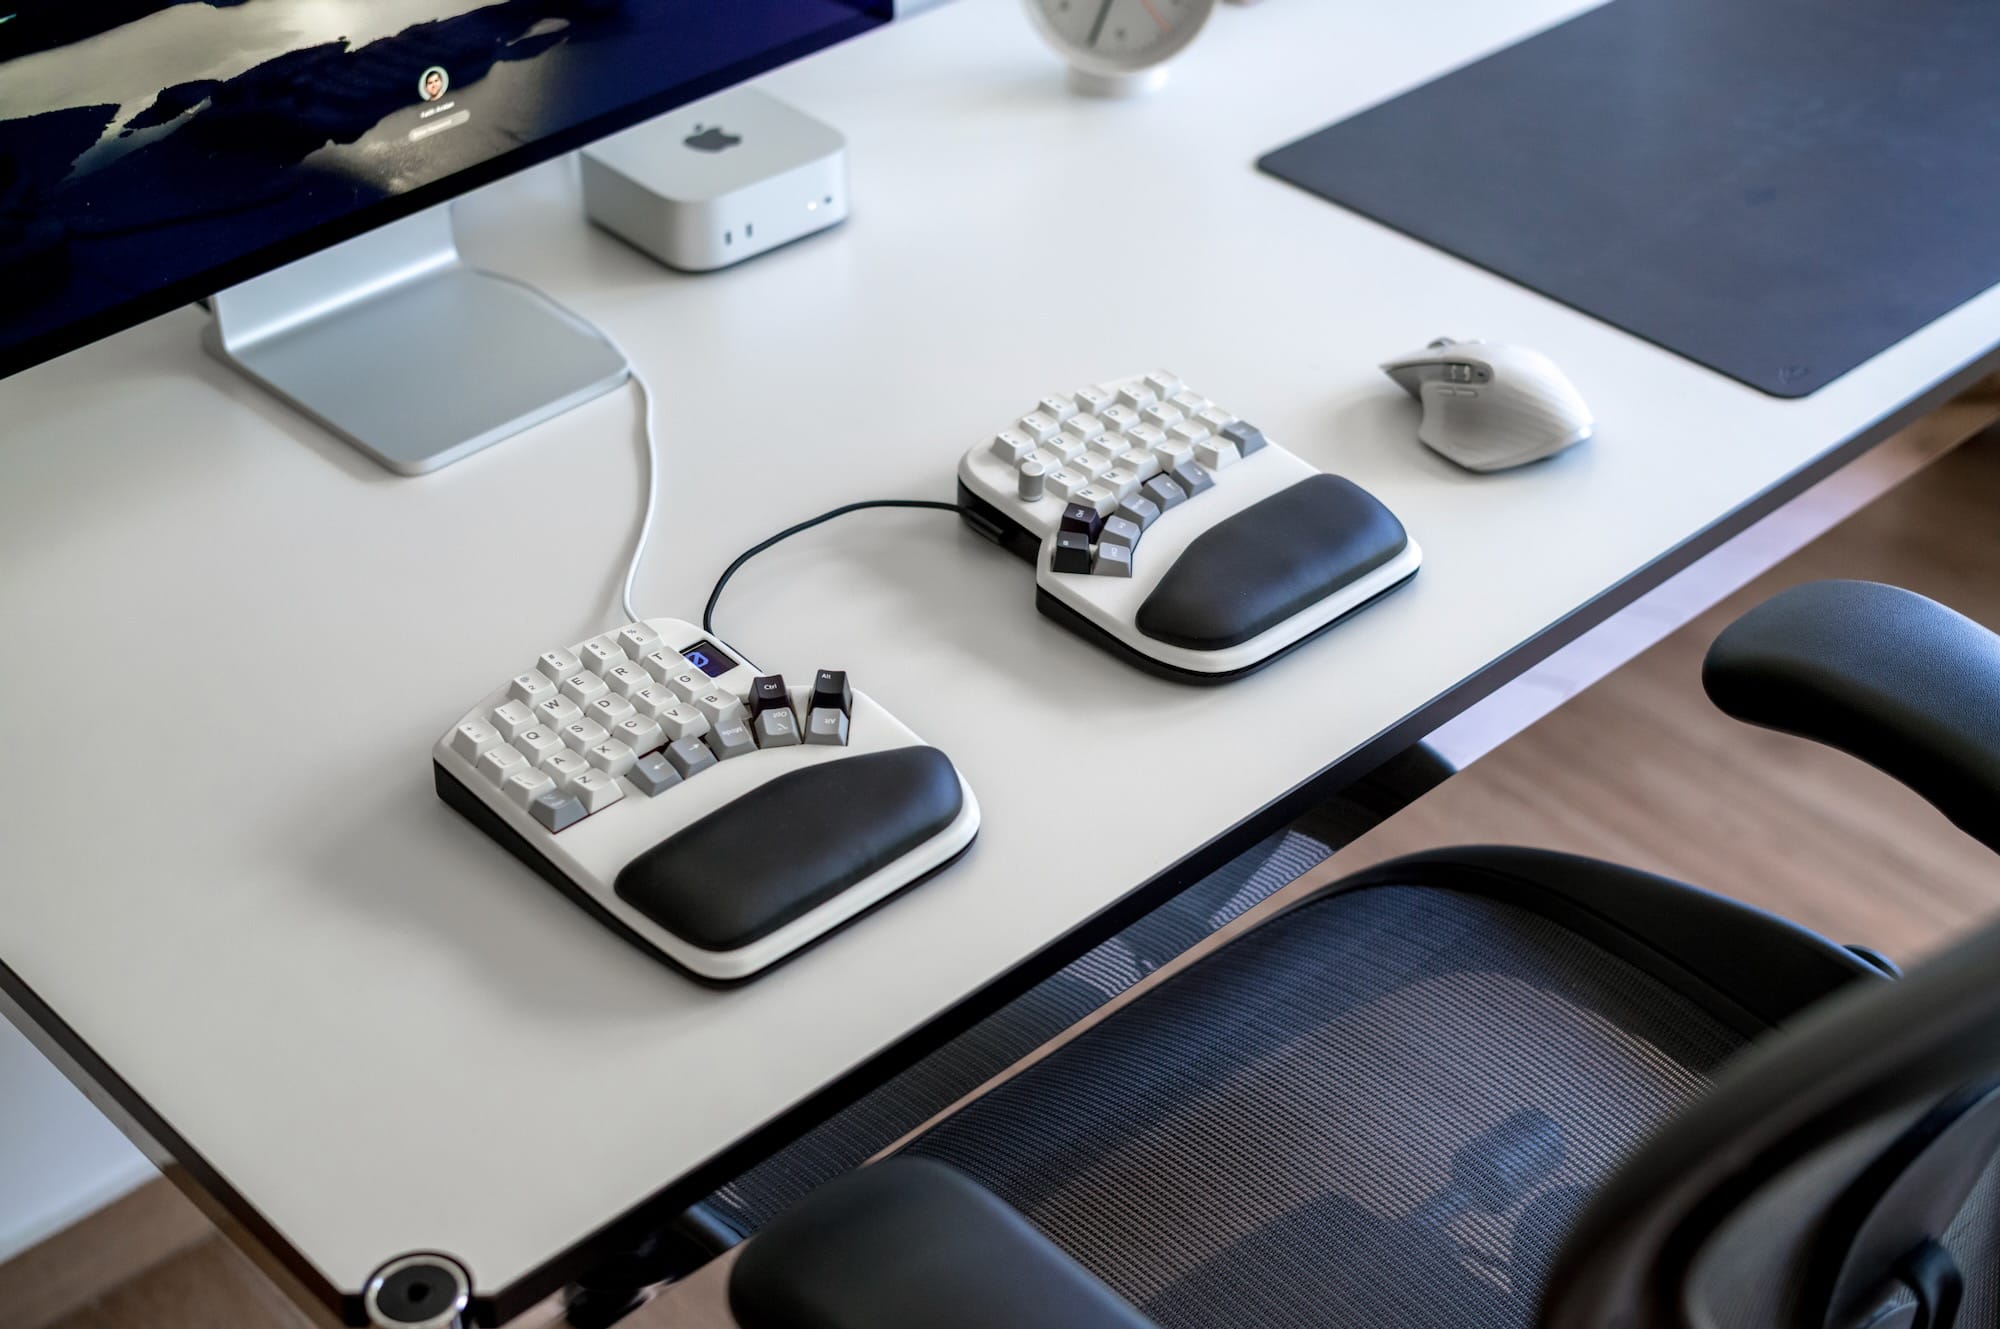
Here is the final design of the Hyper Case:
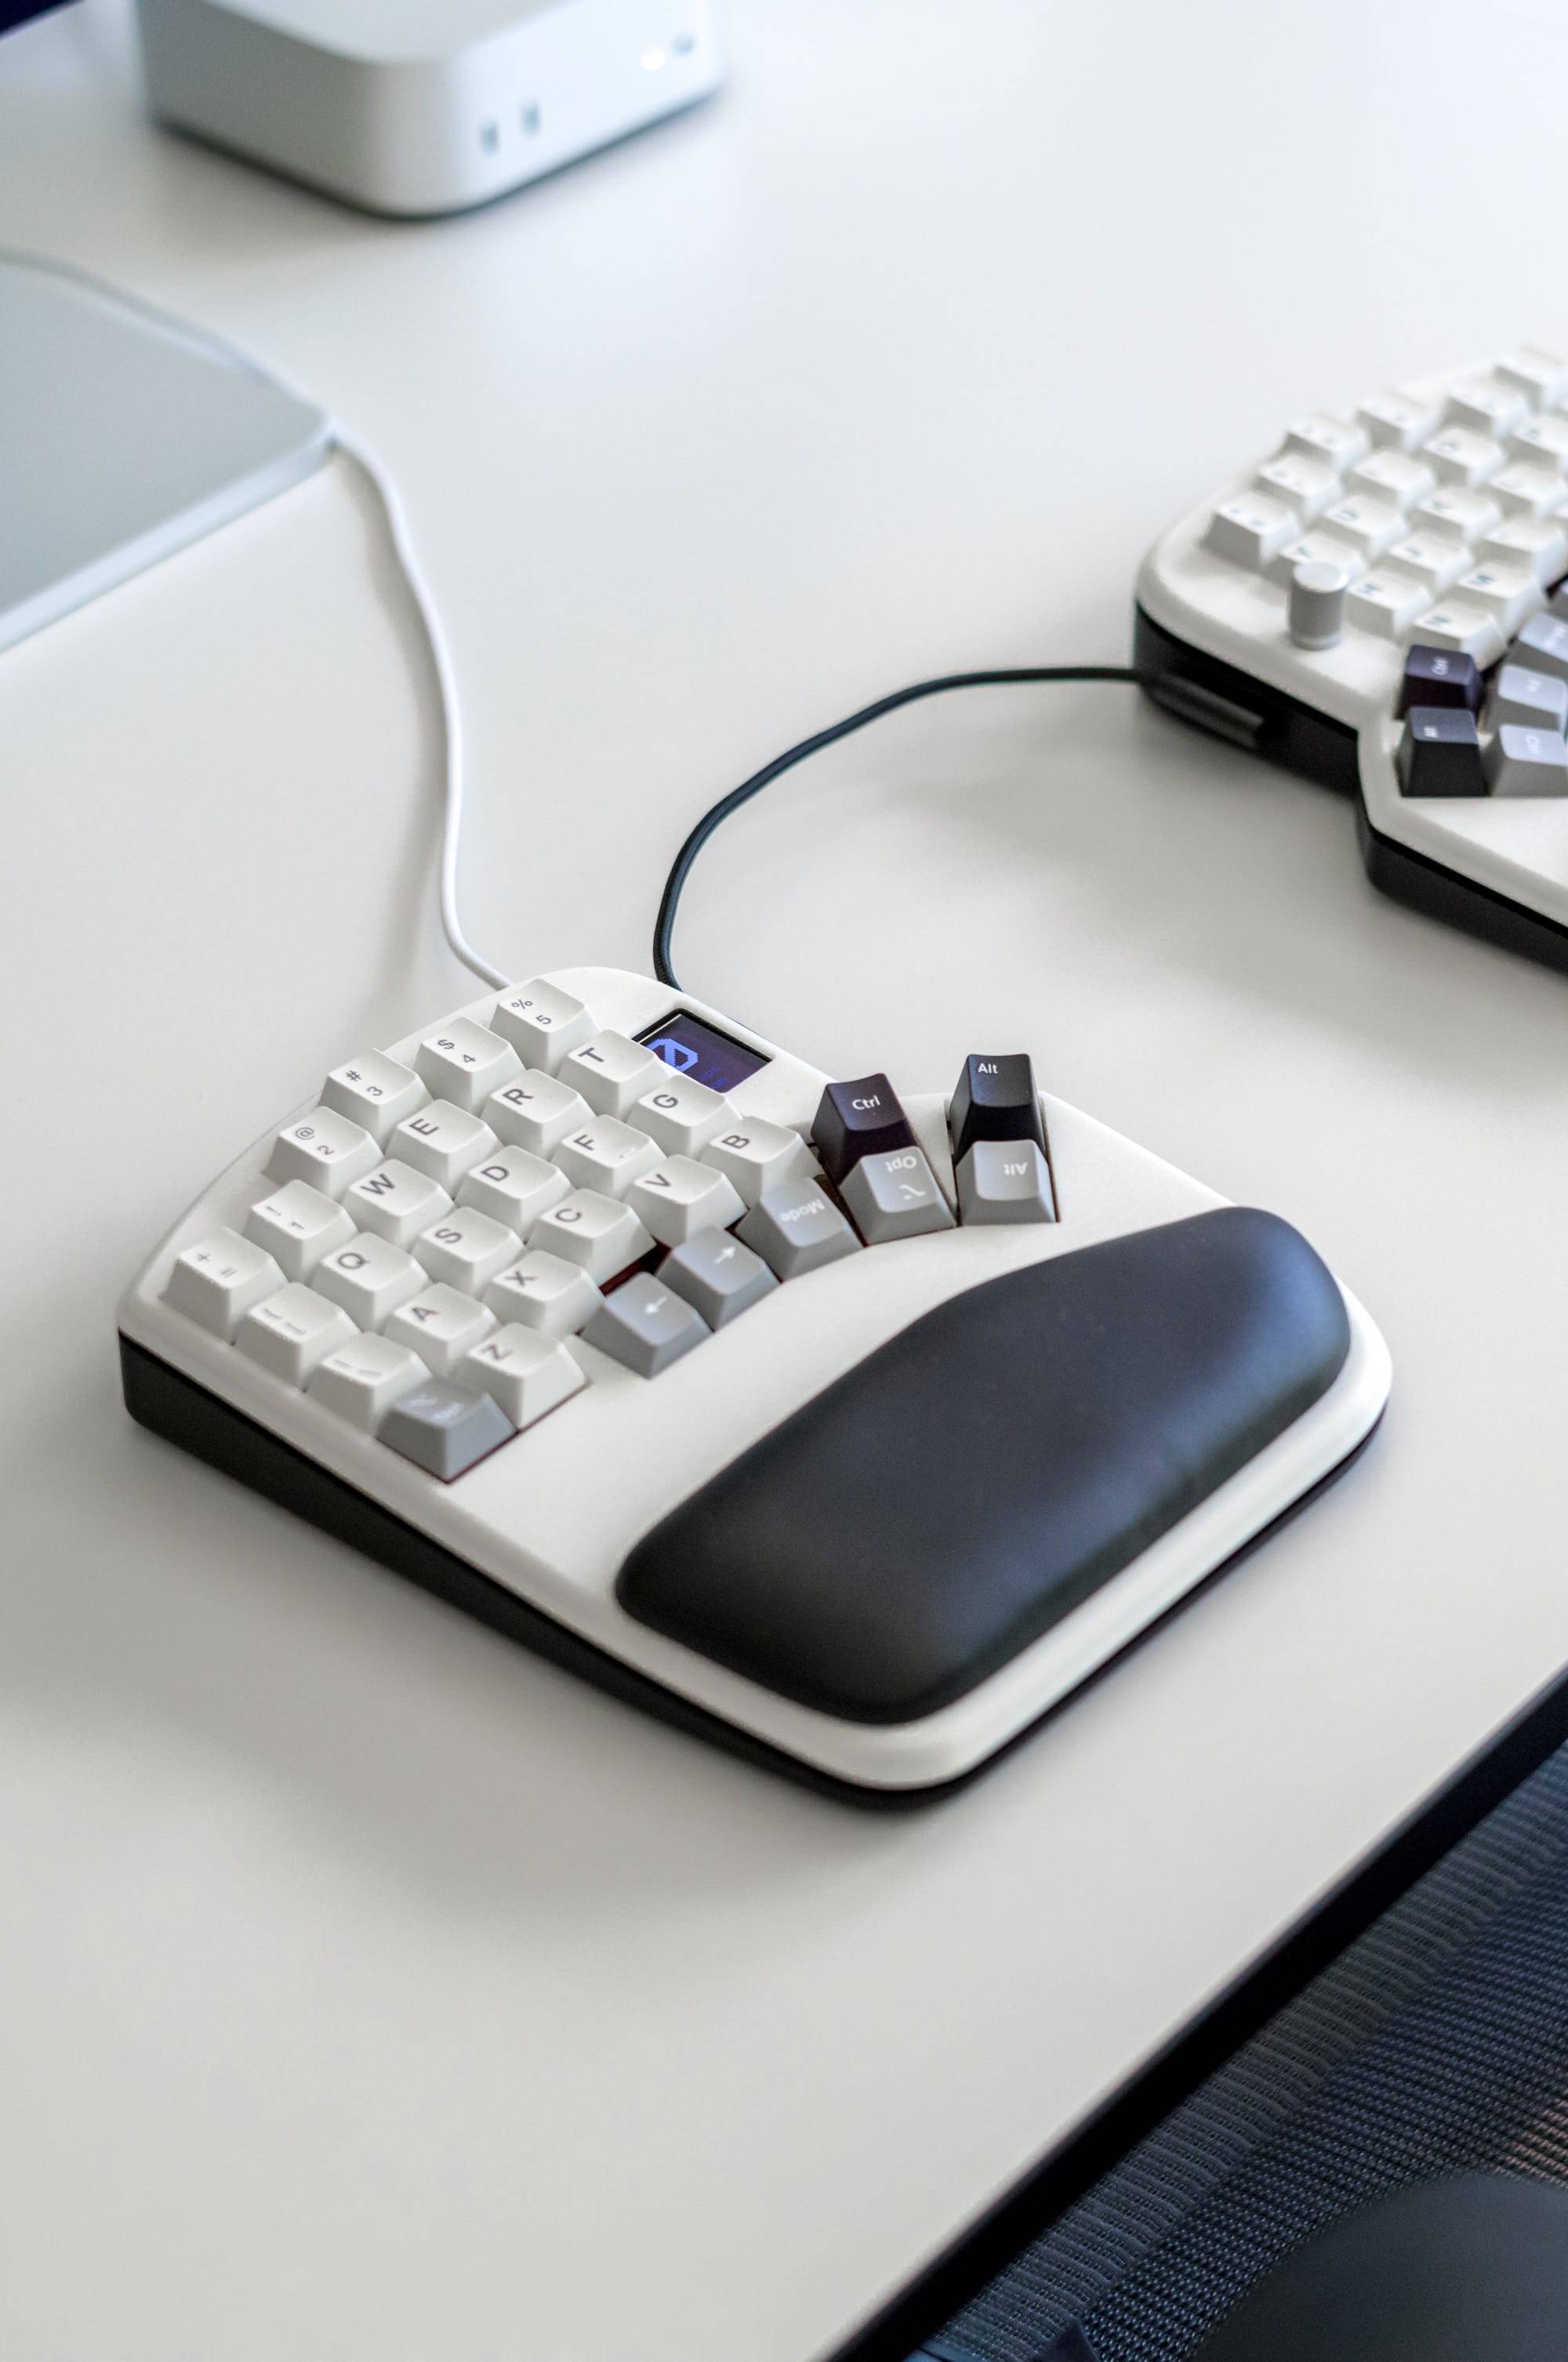

The Left part has two USB-C ports

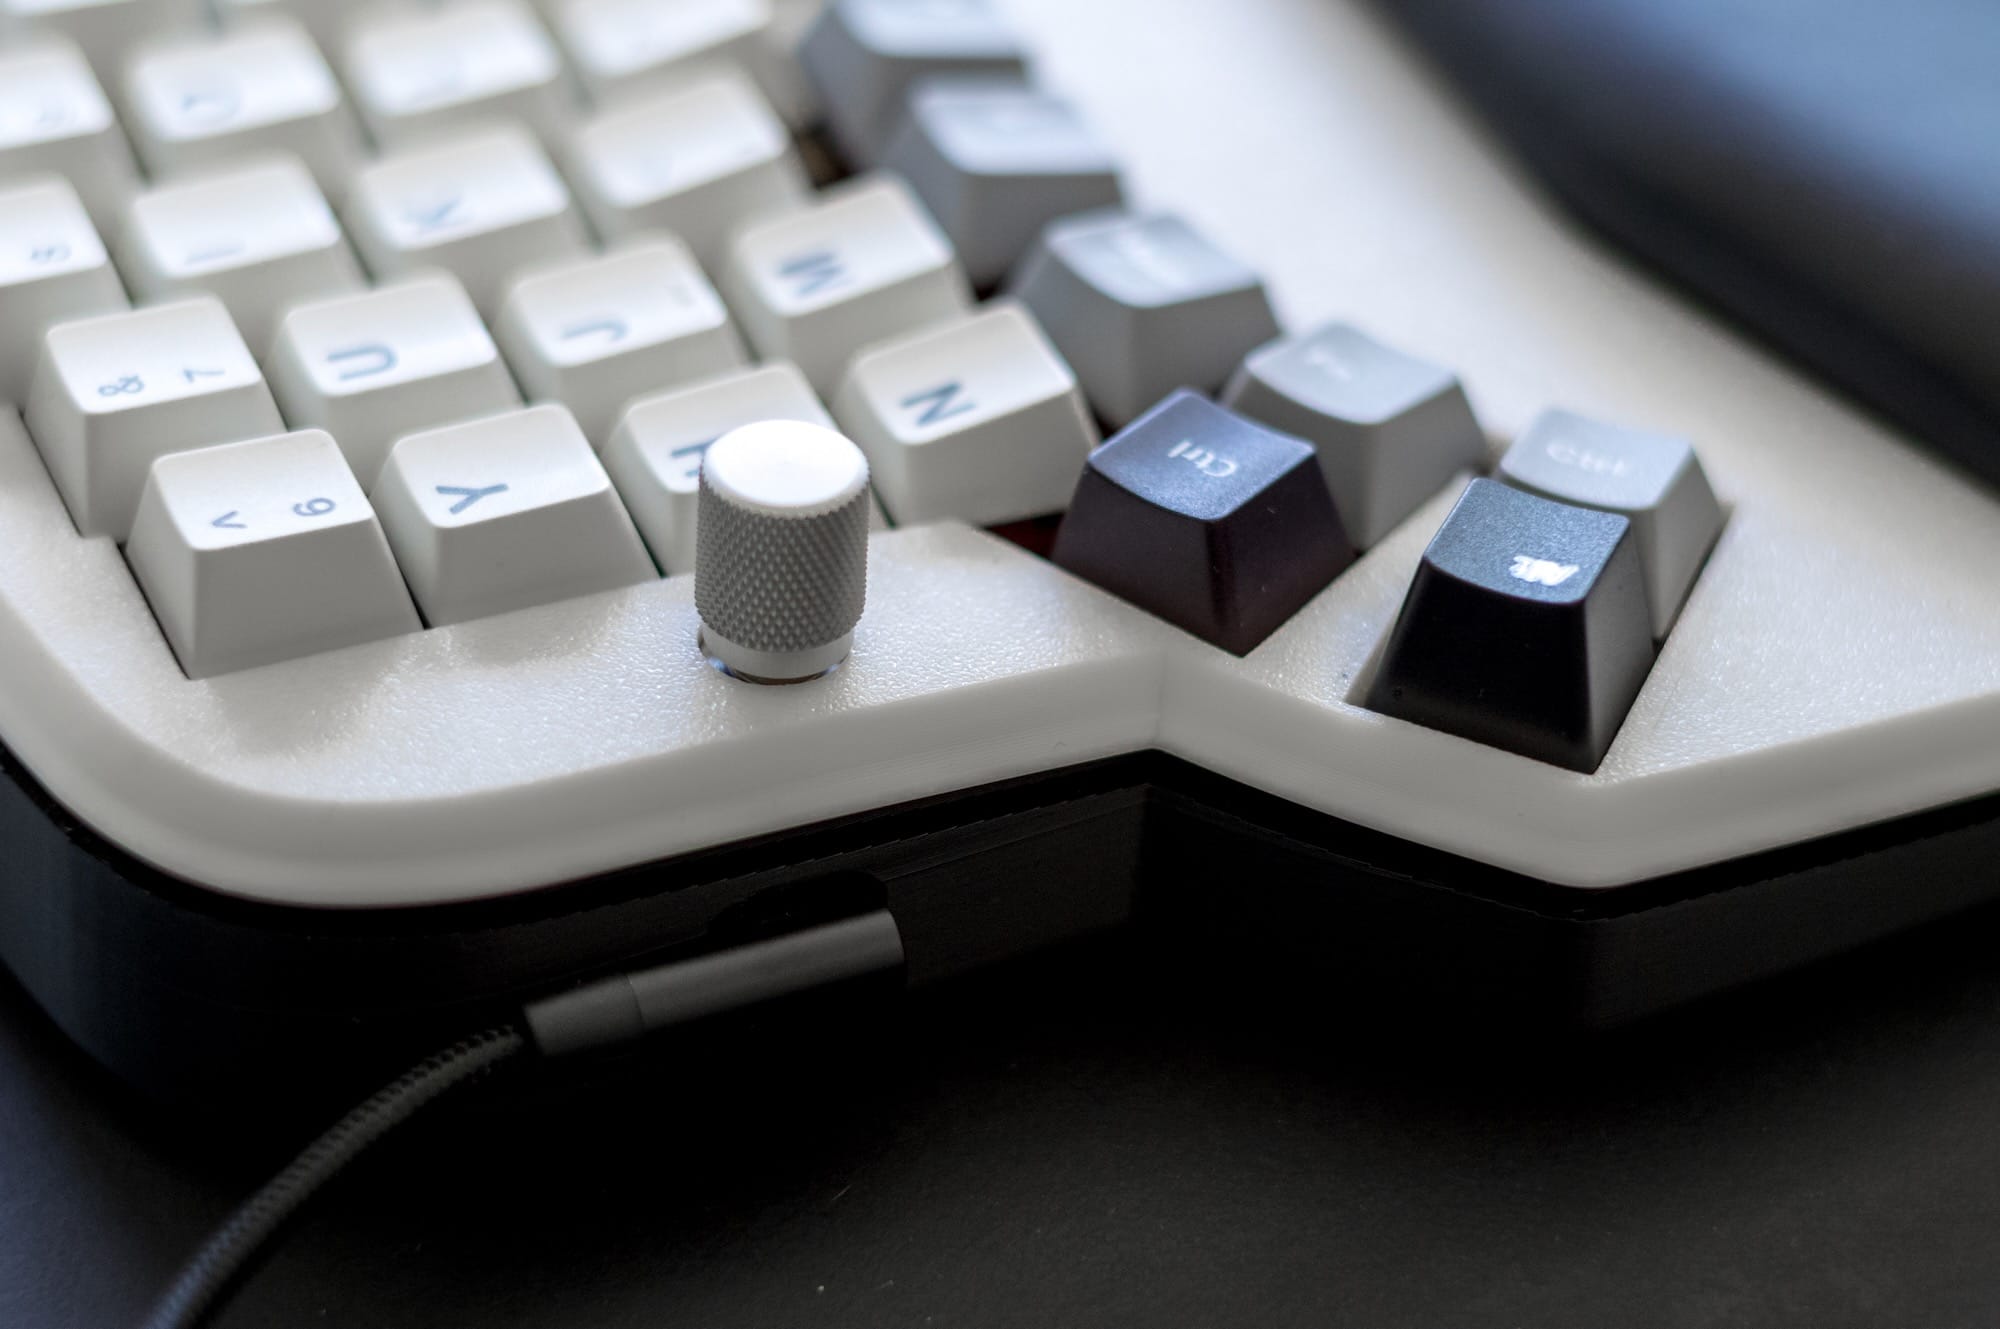
The right side only has one USB-C port. As you can see here, the top plate is different as I use an encoder.
Here is a top plate with no wrist pad support. You can still use it to rest your wrist of course


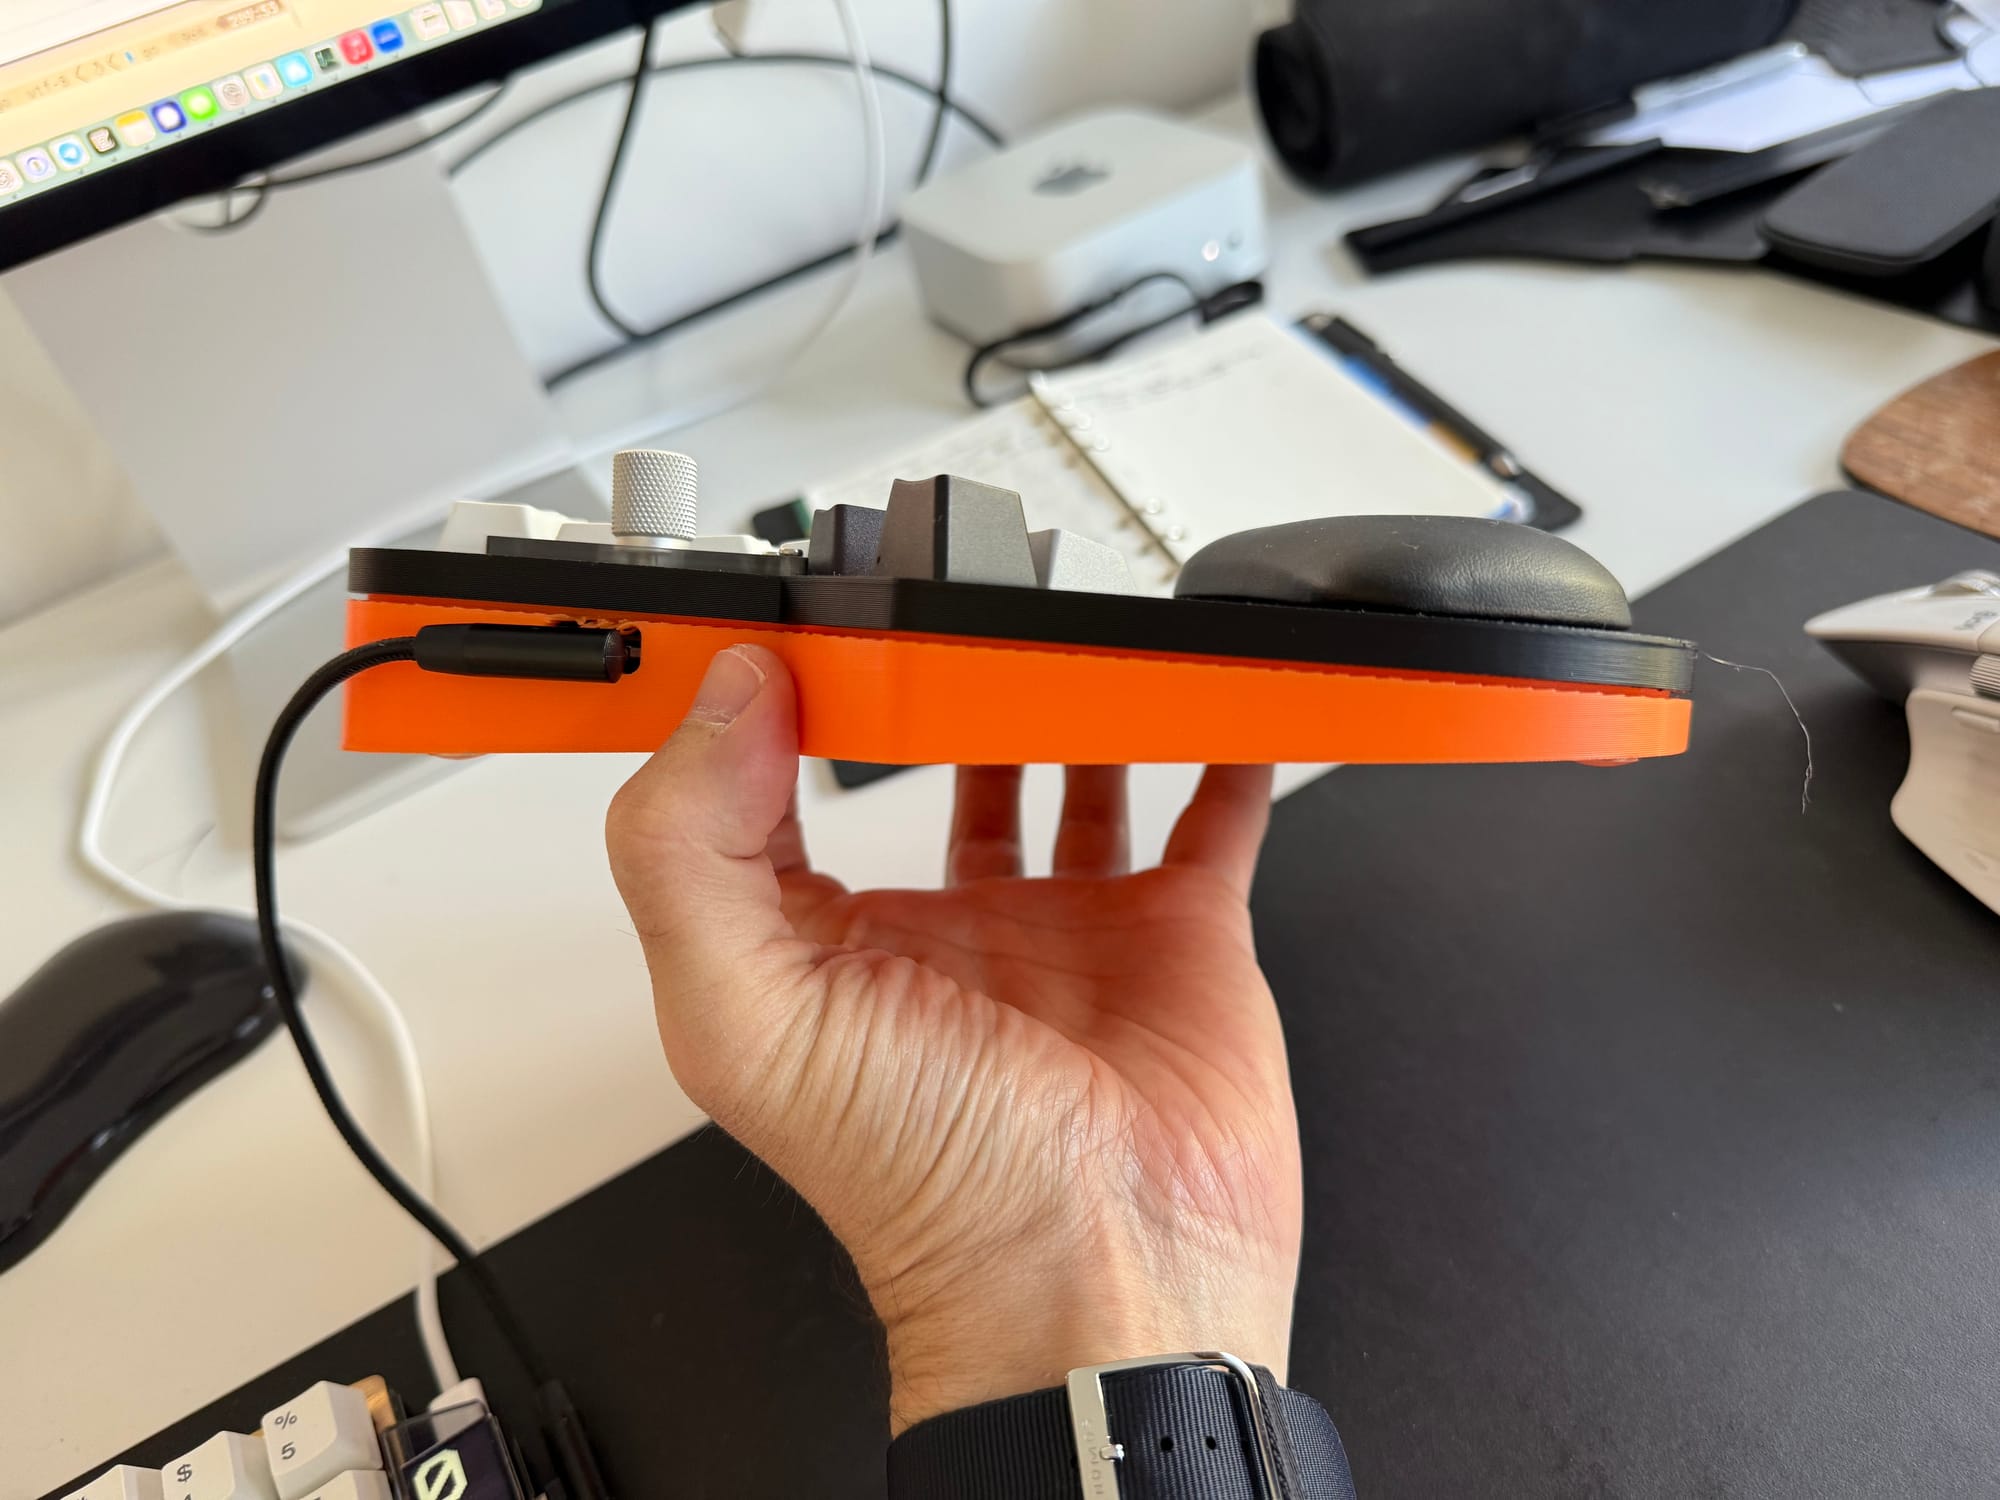
I use a 5 degree horizontal positive tilt. I found this the perfect small addition I'm happy with it, without making the keyboard bulky.
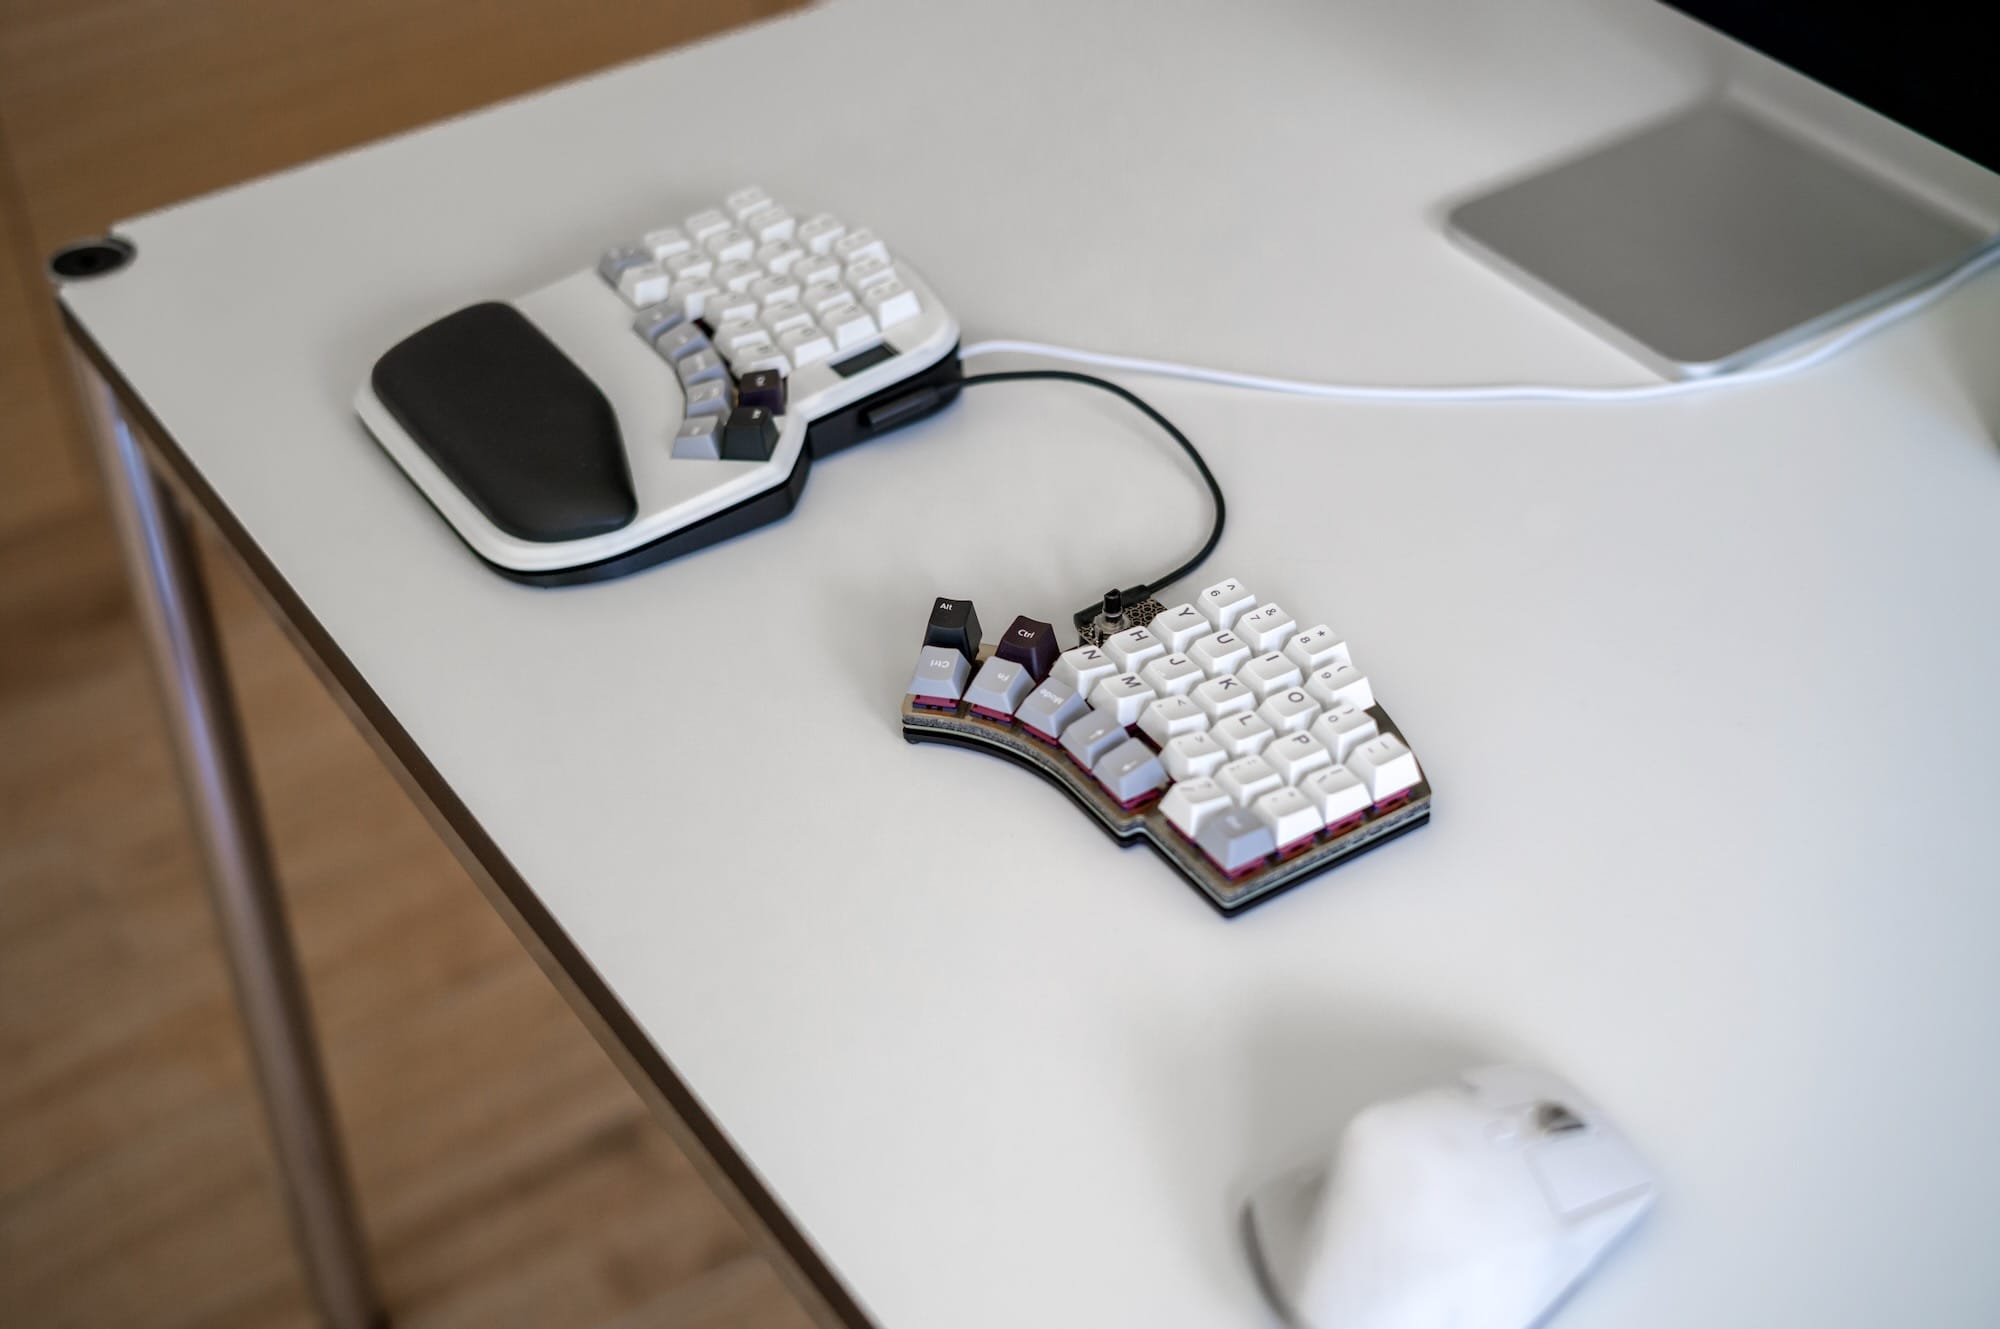
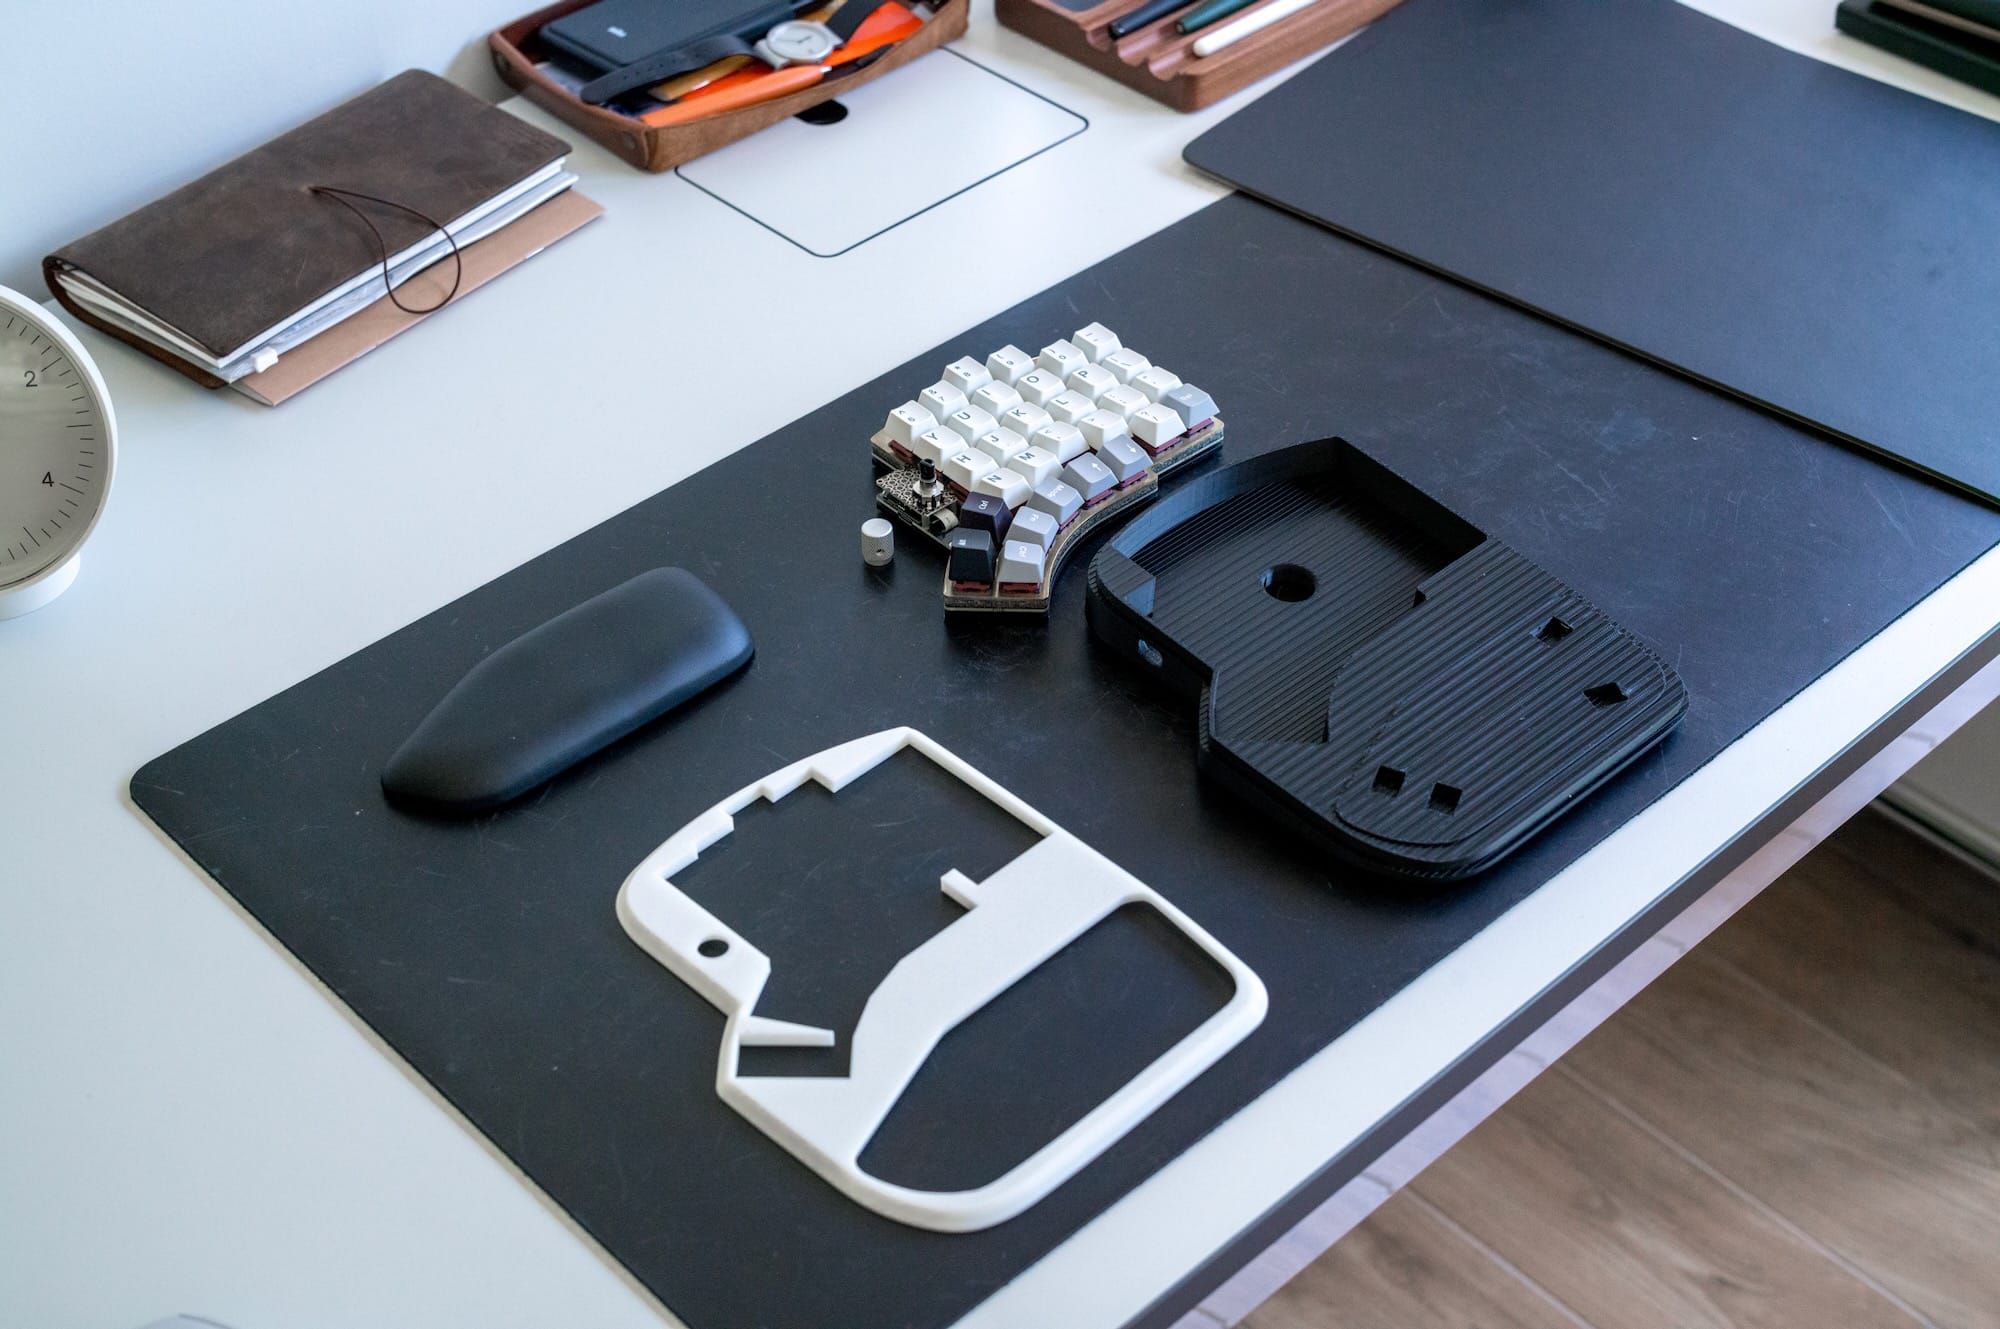
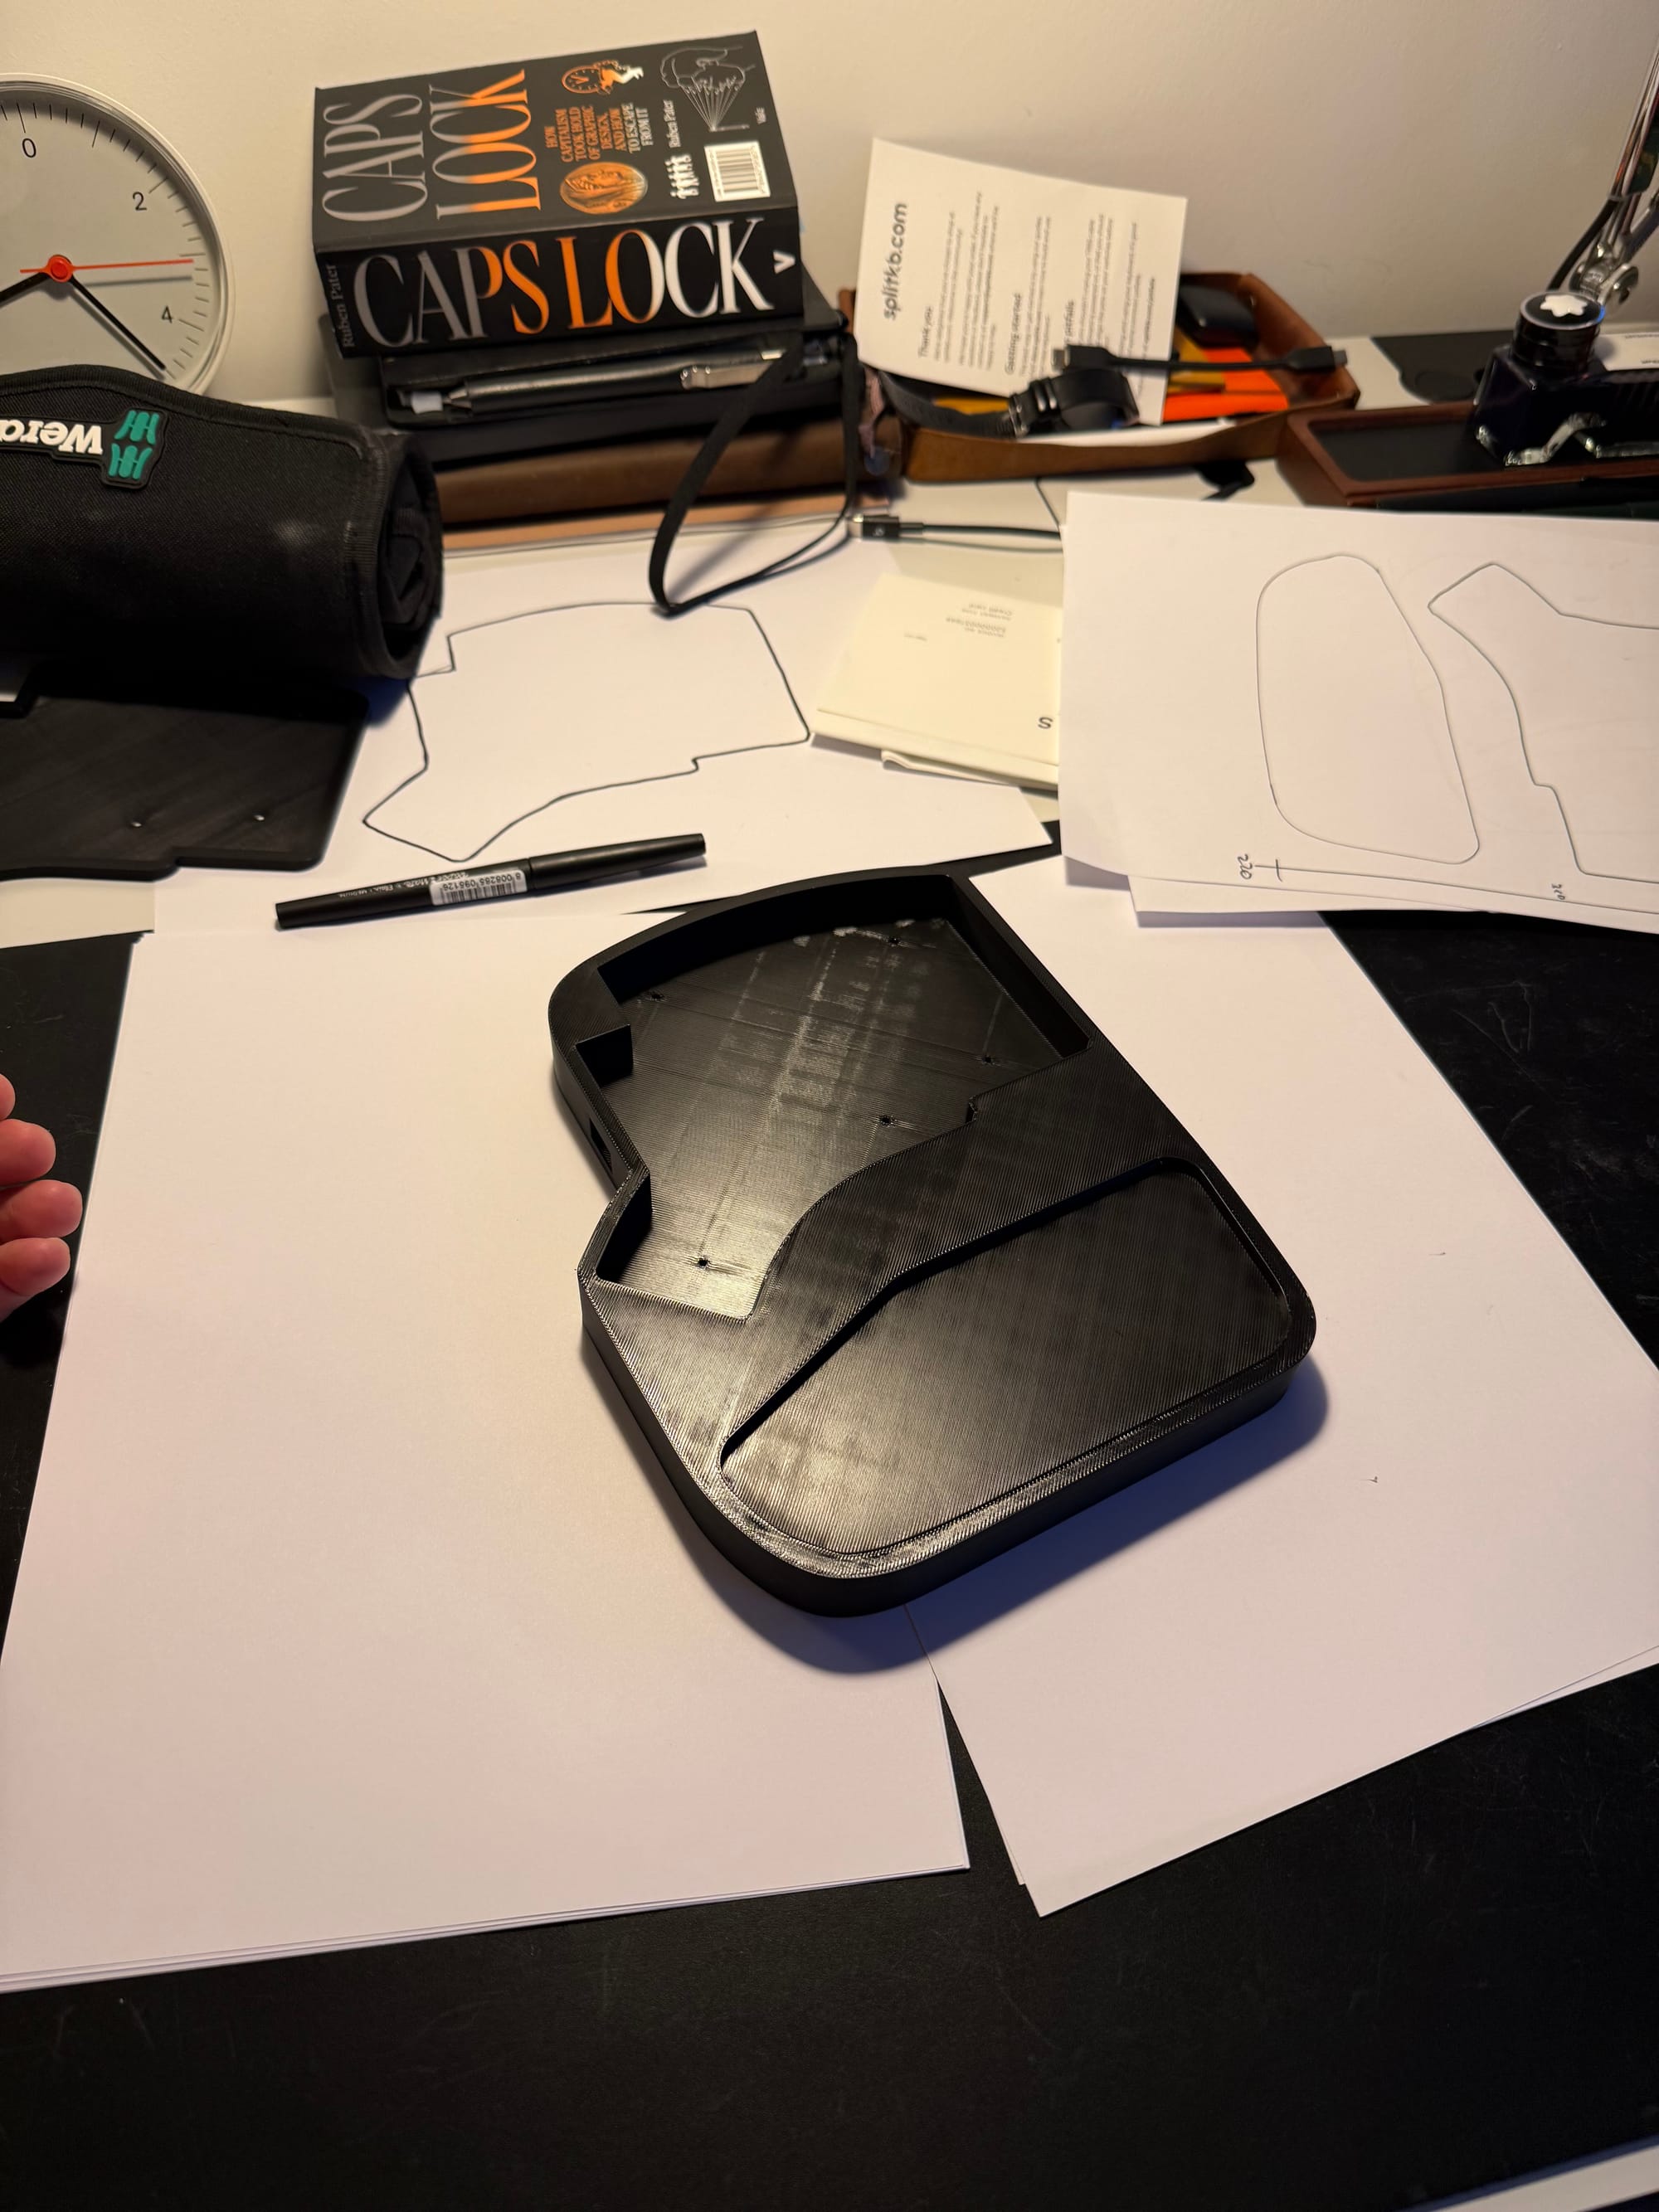
Here is another comparison of the bare Halcyon Elora vs /w Hyper Case. Right you can see the top and bottom pieces separated. The bottom base has also four holes for four 10mm x 3mm magnets for the optional wrist pad support.
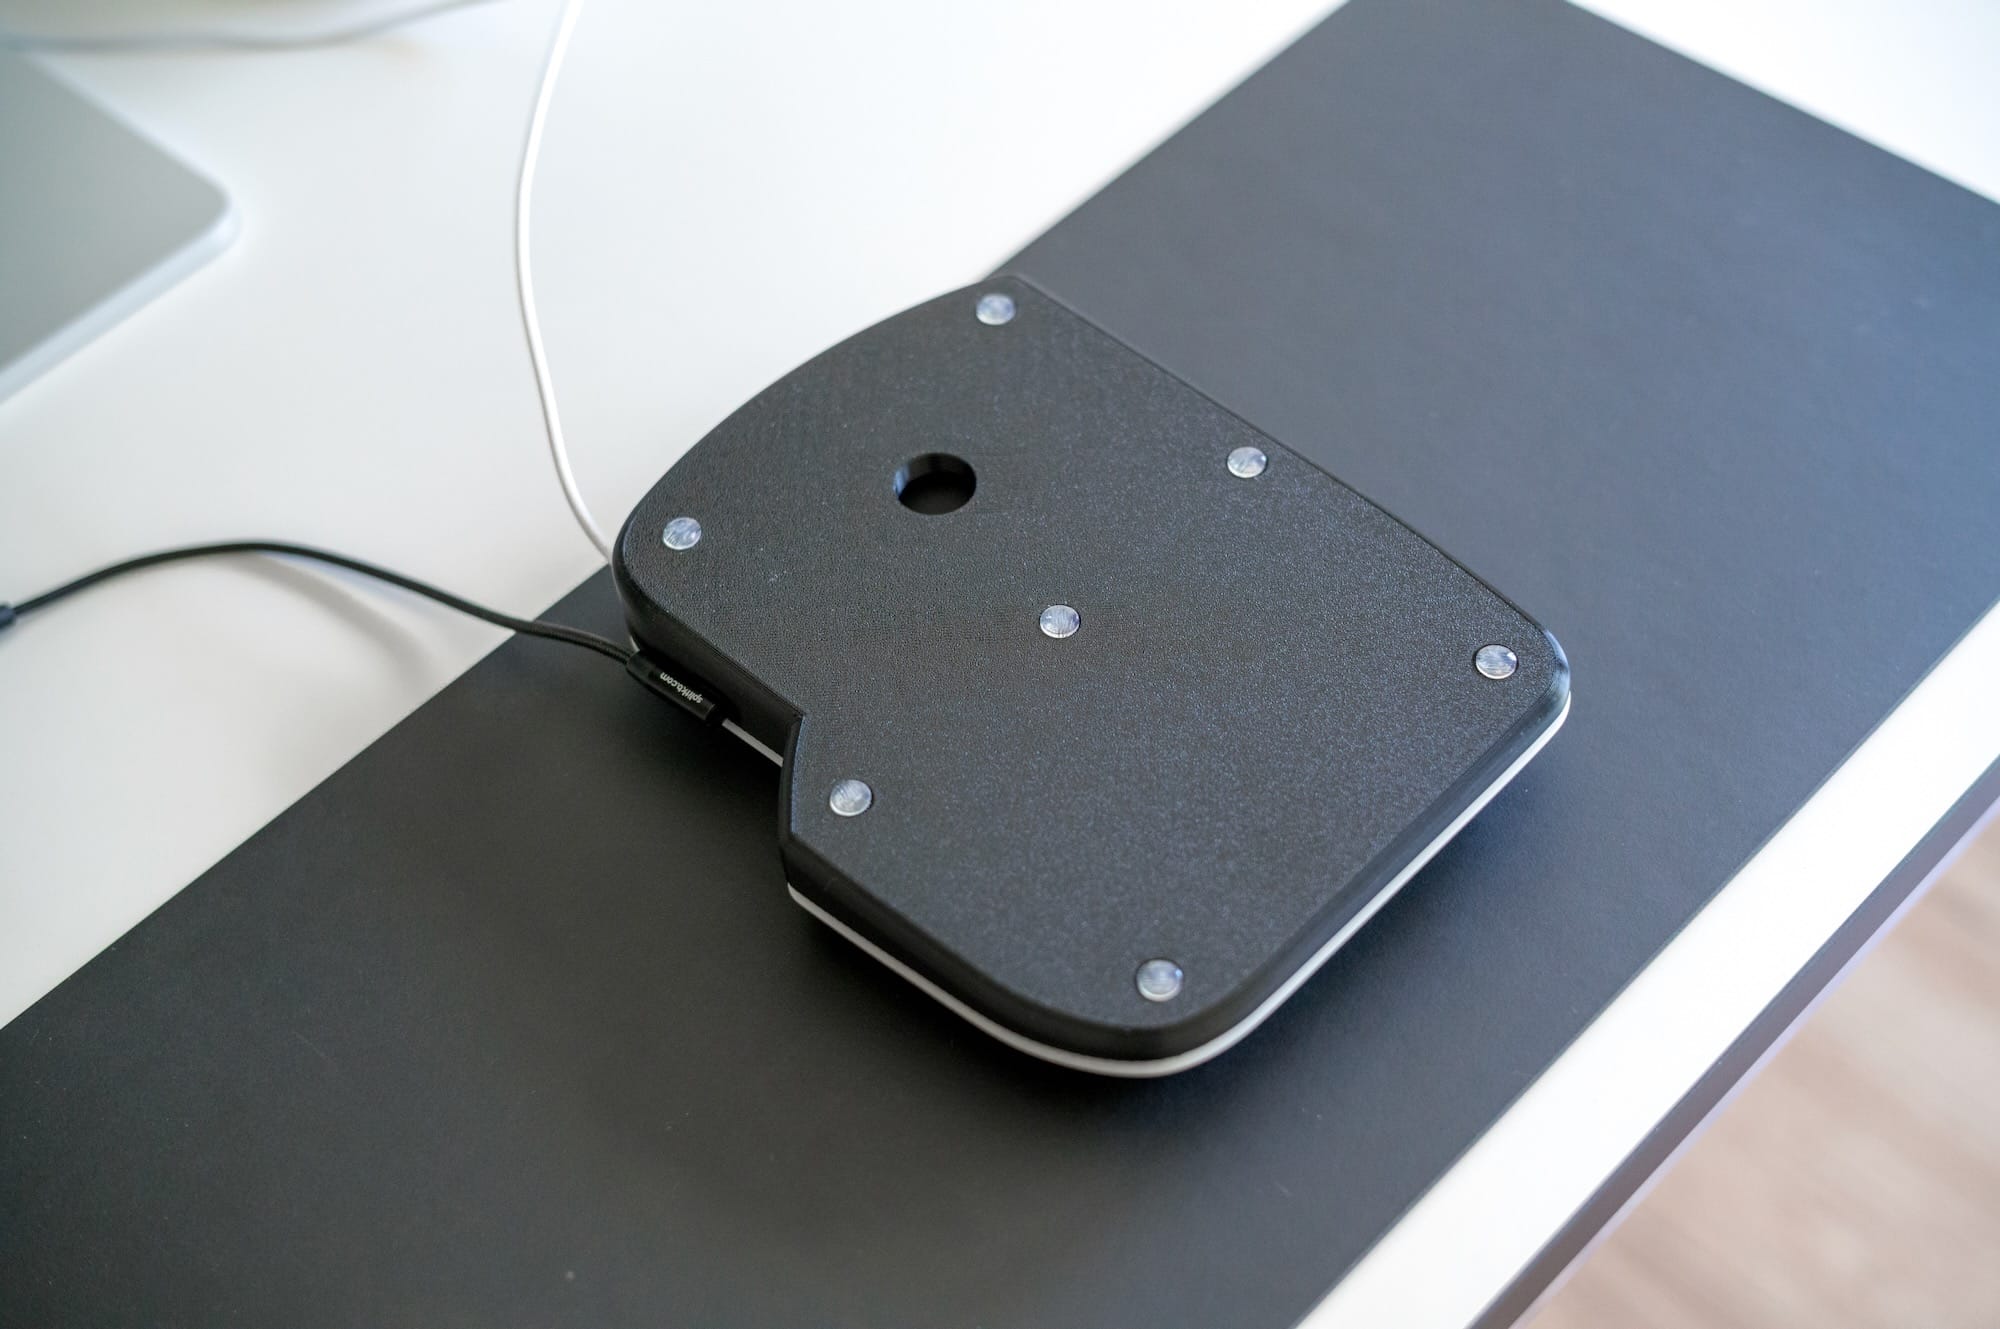
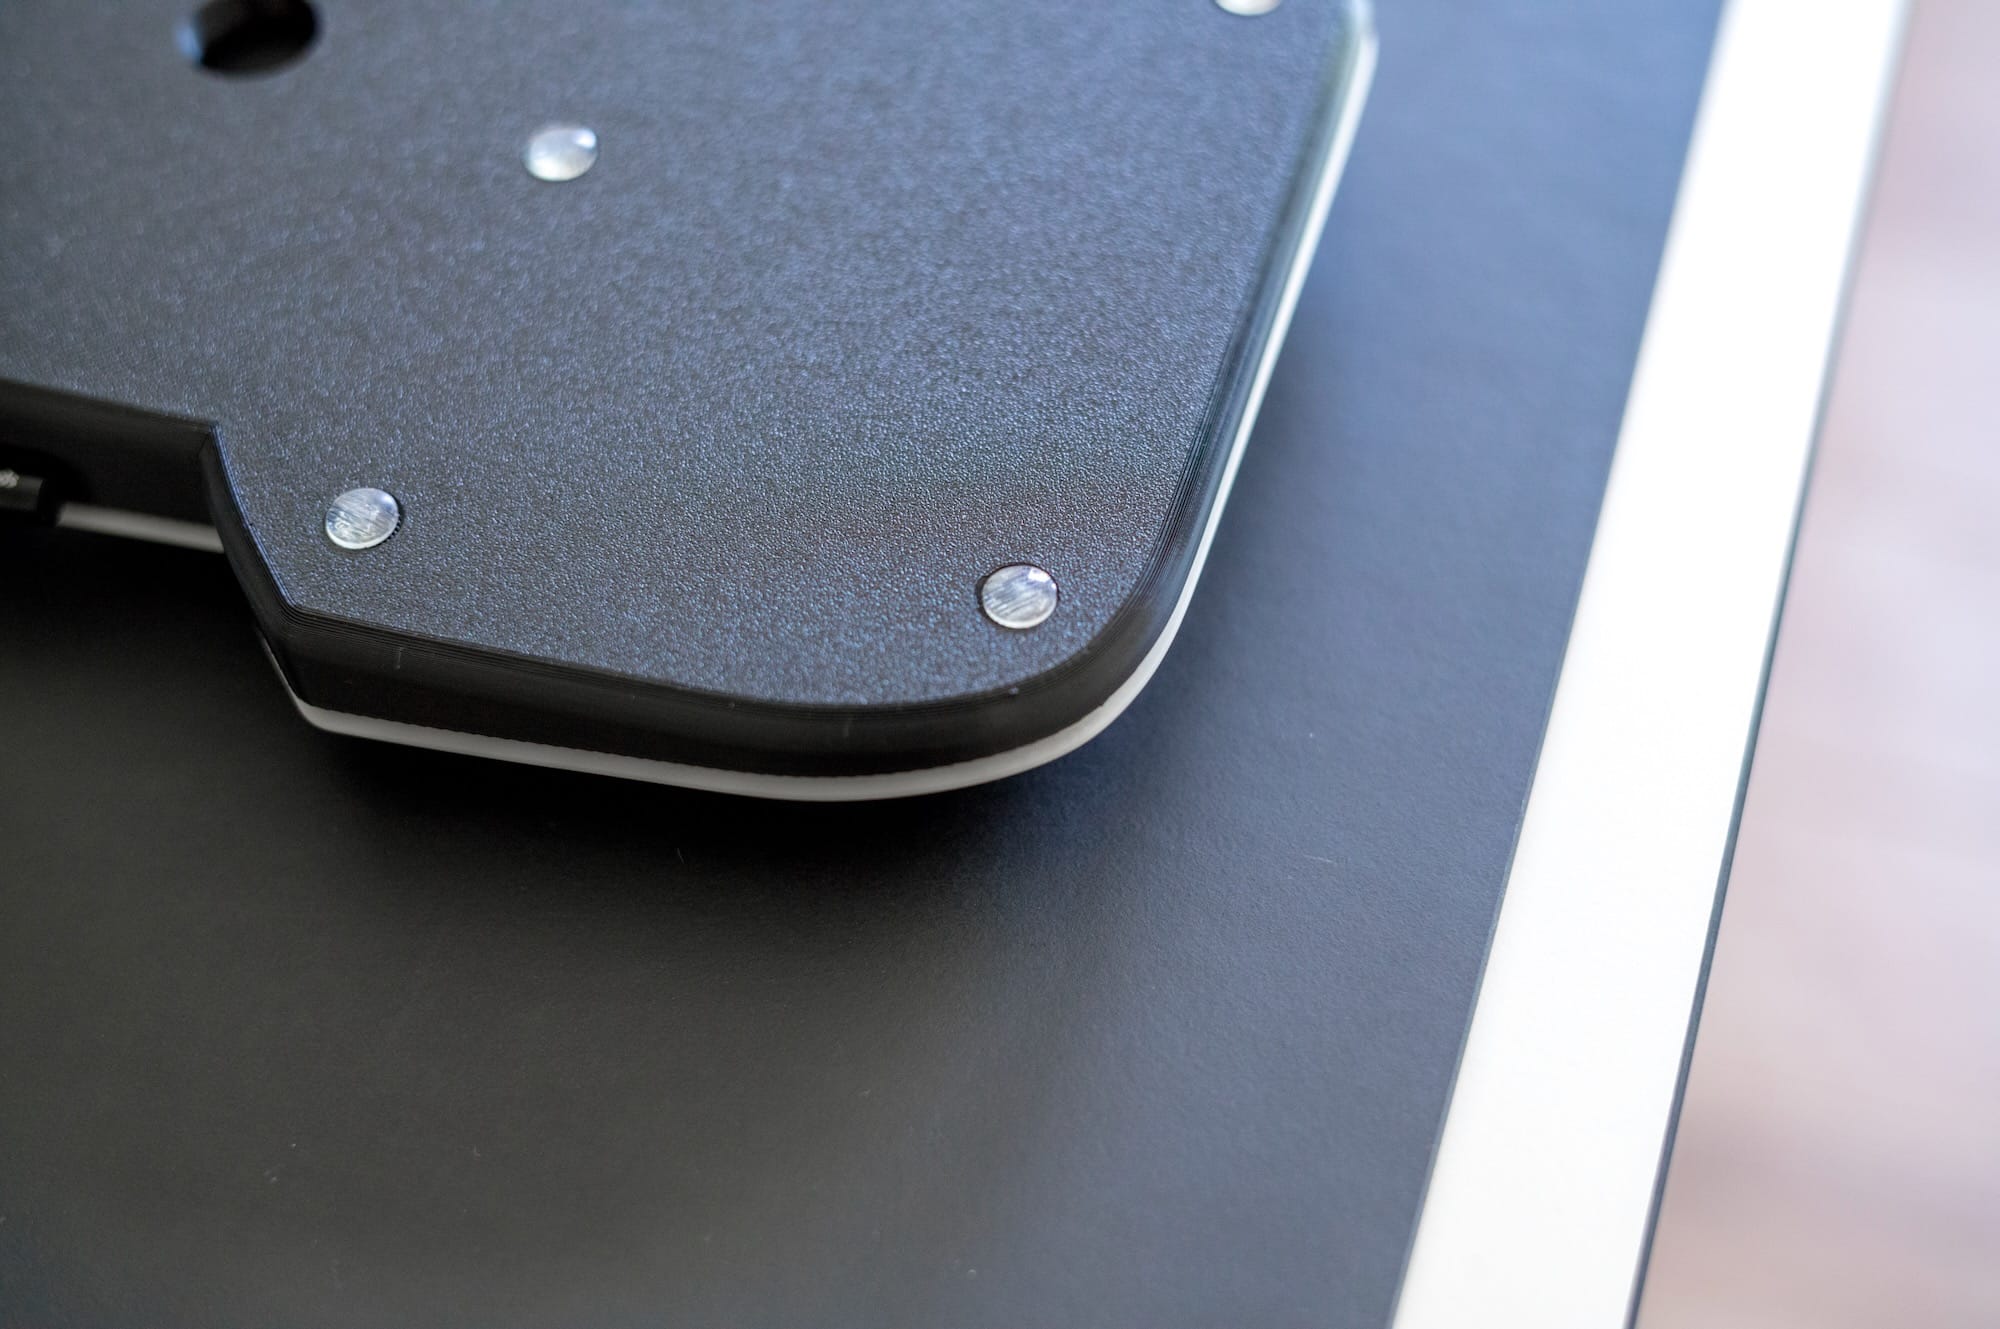
The hole at the bottom is to take out the keyboard in case you need to modify or repair it. It also has several points to attach a 9mm x 2mm rubber stoppers to prevent it from sliding.
I made the Hyper Case available for download: https://arslan.io/halcyon-elora-hyper-case/ The Makerworld page also has all 12 top plates so you can easily download and print your top plates.
Let me know if you have any questions. If you're reading this from your email, you can reply and It'll drop to my email box.